System Administration
Reminder
Operations in this section require logging in to the system with a system administrator account.
System Initialization Configuration
Description
The operations in this section are mainly basic configuration operations after the system has just been deployed, such as: organization user creation/import, initial site creation, etc.
Change Password
Description
It is recommended to change the system administrator password when logging in for the first time.
Click Personal Center > Personal Settings > Change Password
Enter the old password and new password, then click Save
After the change is completed, the system will automatically return to the login page. You can log in with the new password
Change avatar (optional): Click Personal Center > Personal Settings > Basic Information, click Change Avatar, and upload a local image as the new avatar
Create/Import Organization Users
Description
Organization: The biggest benefit of planning organizations in AiTop is that permissions can be assigned to organizations. When personnel in the organization change, permissions will also automatically change.
Organizations in AiTop have unlimited levels. Parent organizations can contain multiple levels of sub-organizations.
From a business perspective, organizations can be divided into: administrative organizations and role organizations.
- Administrative organization: Generally refers to the company's administrative organizational structure, facilitating permission allocation by department and group. Generally, the company is divided into top-level organizations, and parts are divided into secondary organizations, and so on.
- Role organization: Organizations with a role concept, facilitating permission allocation by role. For example: system administrator group, document control specialist, etc.
There are multiple ways to create/import organization users. Please choose the appropriate method from below.
Manually Create Organization
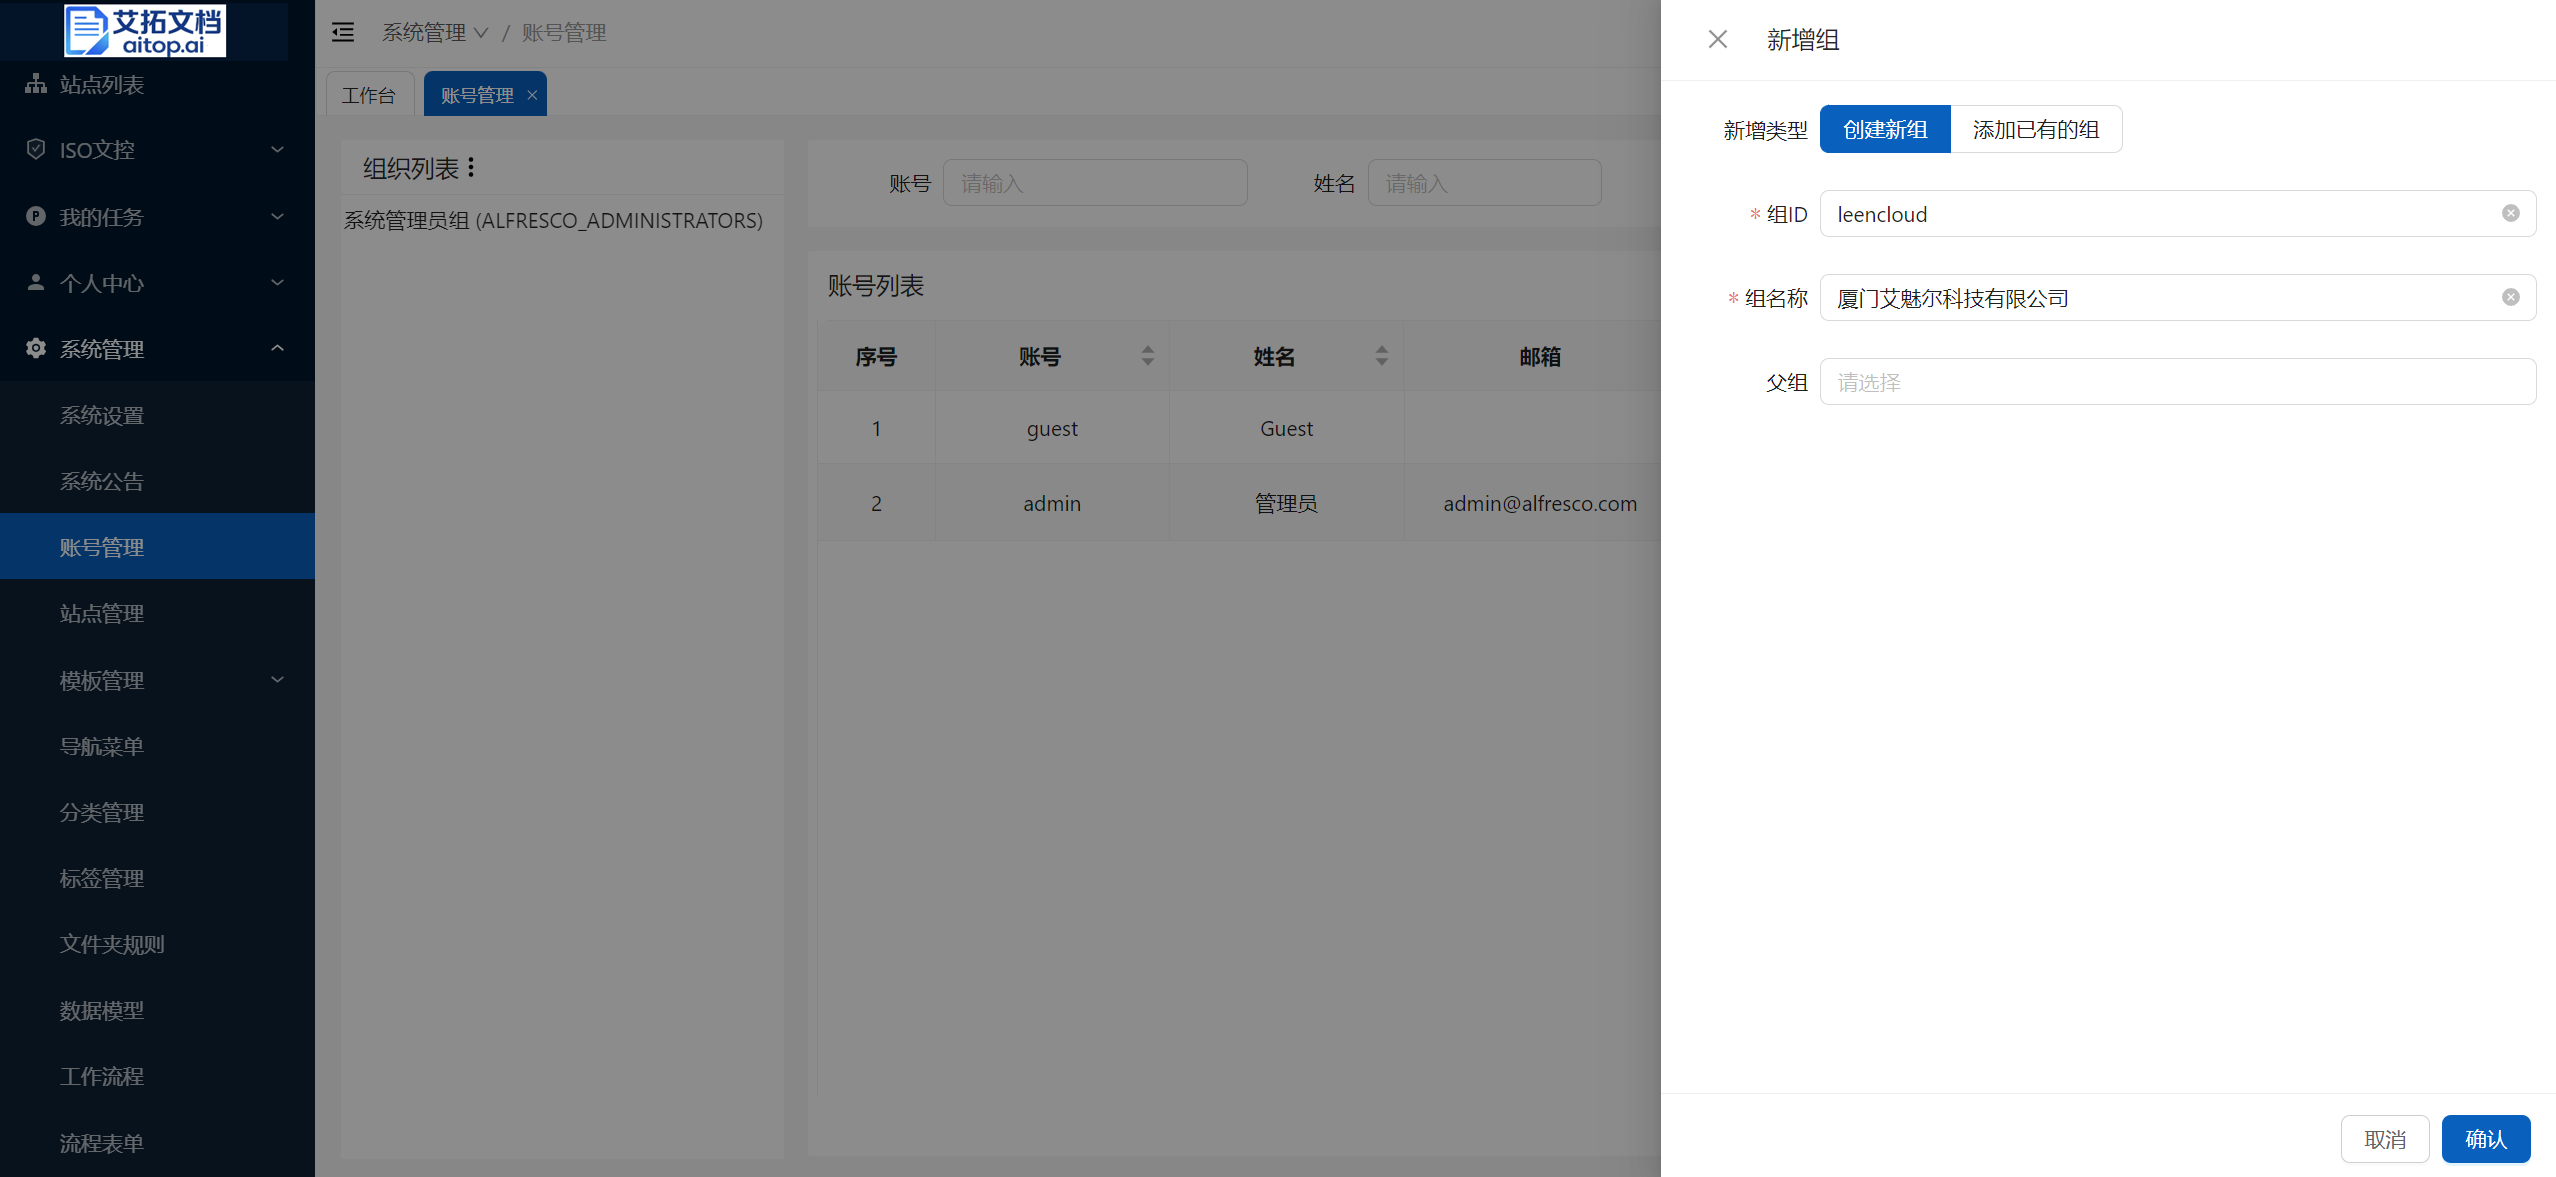
Click System Administration > Account Management
Click the + in the left organization list
Fill in the attribute information of the new group and click Confirm:
- New type: Create new group
- Group ID: Generally the abbreviation of the first letter of the group name. The group ID must be unique in the system
- Group name: The name of the group
- Parent group: Select the parent group to which it belongs. If creating a top-level organization, leave it blank
Manually Create User
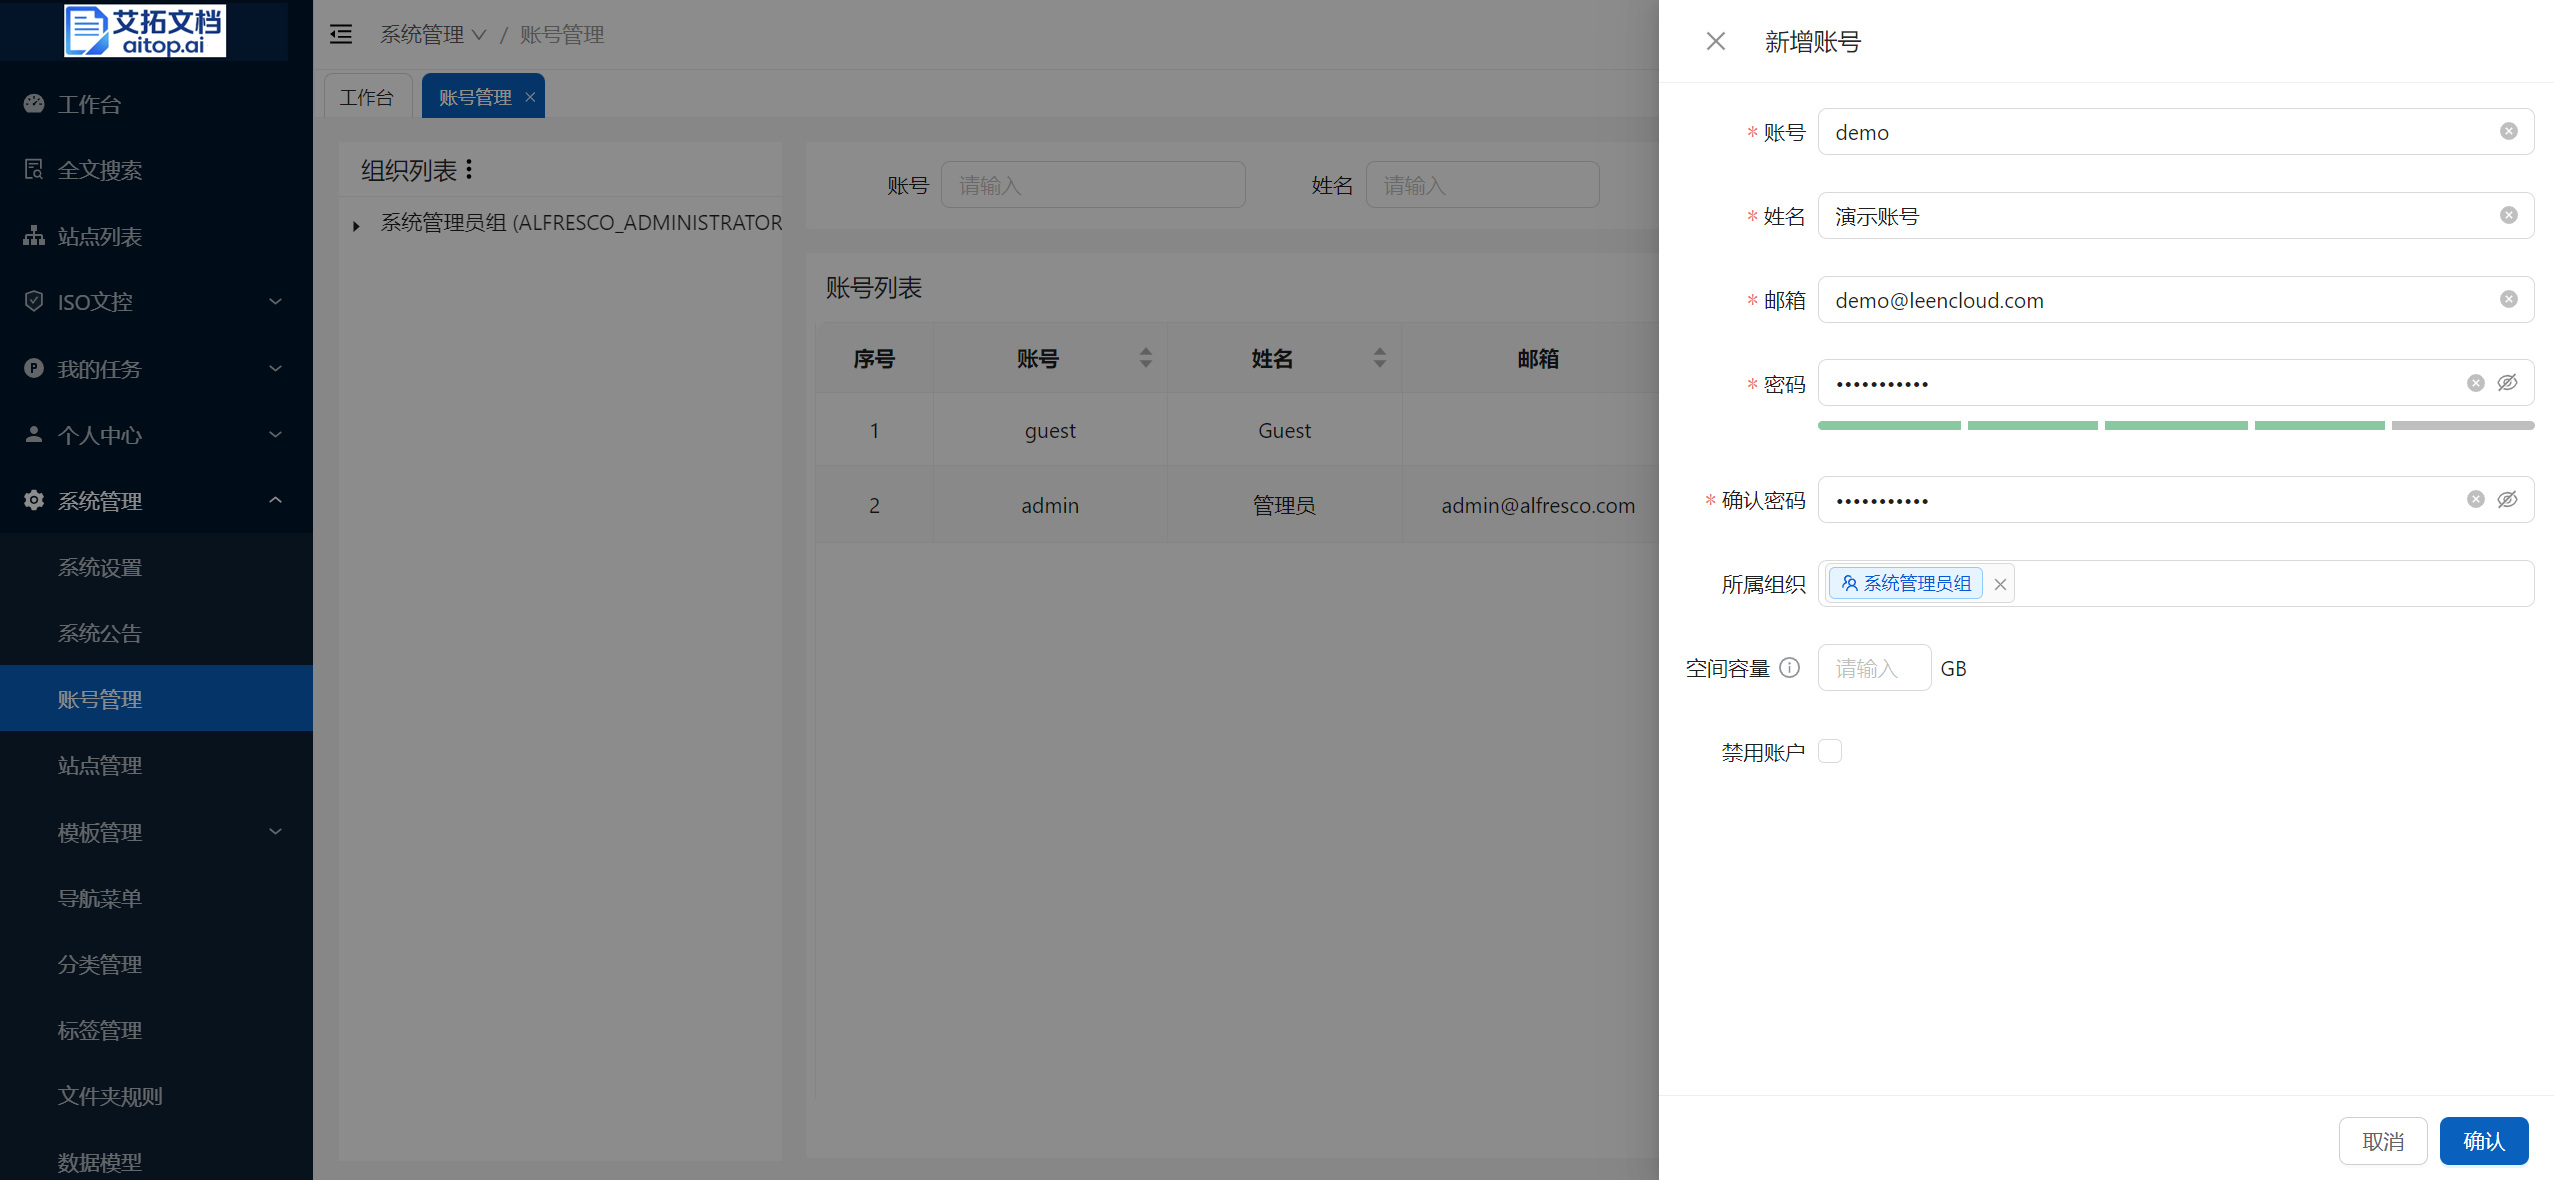
Click System Administration > Account Management
Click Add Account on the toolbar
Fill in the attribute information of the new account and click Confirm:
- Account: Generally composed of English or numbers. You can use employee numbers or abbreviated names for easy user memory. The account must be unique in the system
- Name: User's name
- Email: User's email address. If the user has no email address, you can fill in any string that conforms to the email format
- Password/Confirm Password: The login password for the account. It is recommended to use a password composed of more than 6 digits, uppercase and lowercase English letters, and special characters
- Belonging organization: The organization to which the user belongs. Multiple selections are allowed
- Space capacity: The total size of files the user can upload. Leave blank to not limit. It is not recommended to limit unless there are special circumstances
- Disable account: After checking, the account will not be able to log in
Import Organization & Users from WeChat/DingTalk
The system supports batch import of corporate address books from Enterprise WeChat or DingTalk, including organizational structure and users. Before importing, interface settings need to be made first. This article uses Enterprise WeChat as an example. DingTalk can refer to this operation.
Description
Before setting up, if the AiTop application has not yet been created in Enterprise WeChat, you need to create it first. For details, please refer to: [TODO]
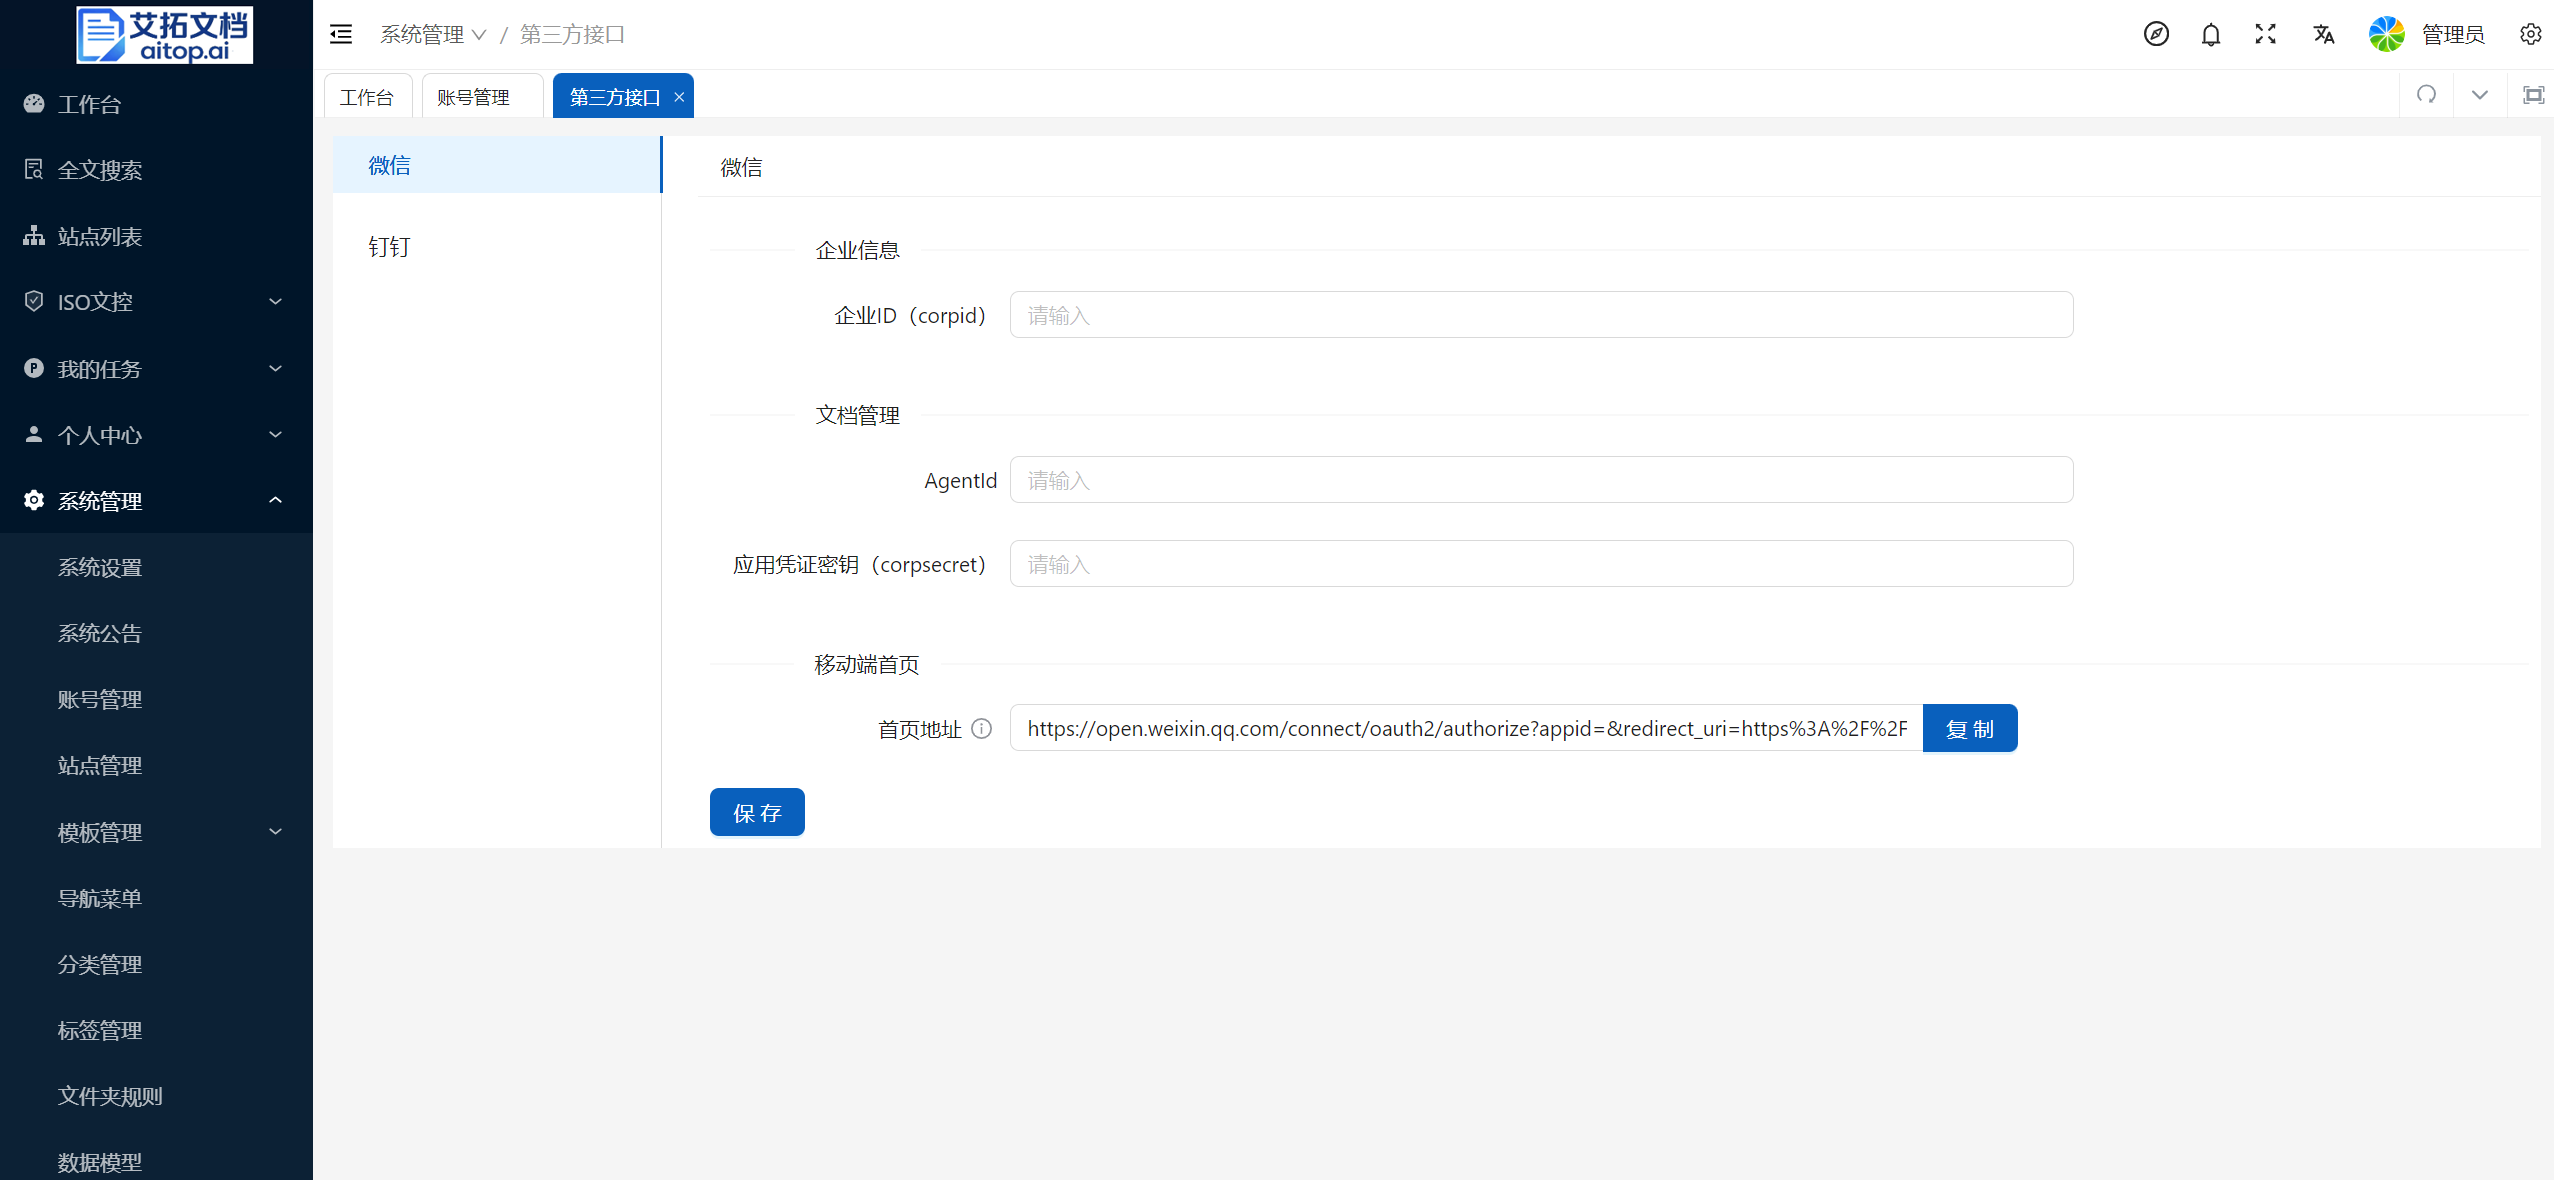
Click System Administration > Account Management
Click Import > Interface Settings on the toolbar
Use the company's Enterprise WeChat administrator account to log in to Enterprise WeChat, copy the following information and fill it in the AiTop interface settings page, then click Save:
- Enterprise ID (corpid)
- Document Management
- AgentId
- Application credential key (corpsecret)
Return to System Administration > Account Management page
Click Import > Import from WeChat on the toolbar
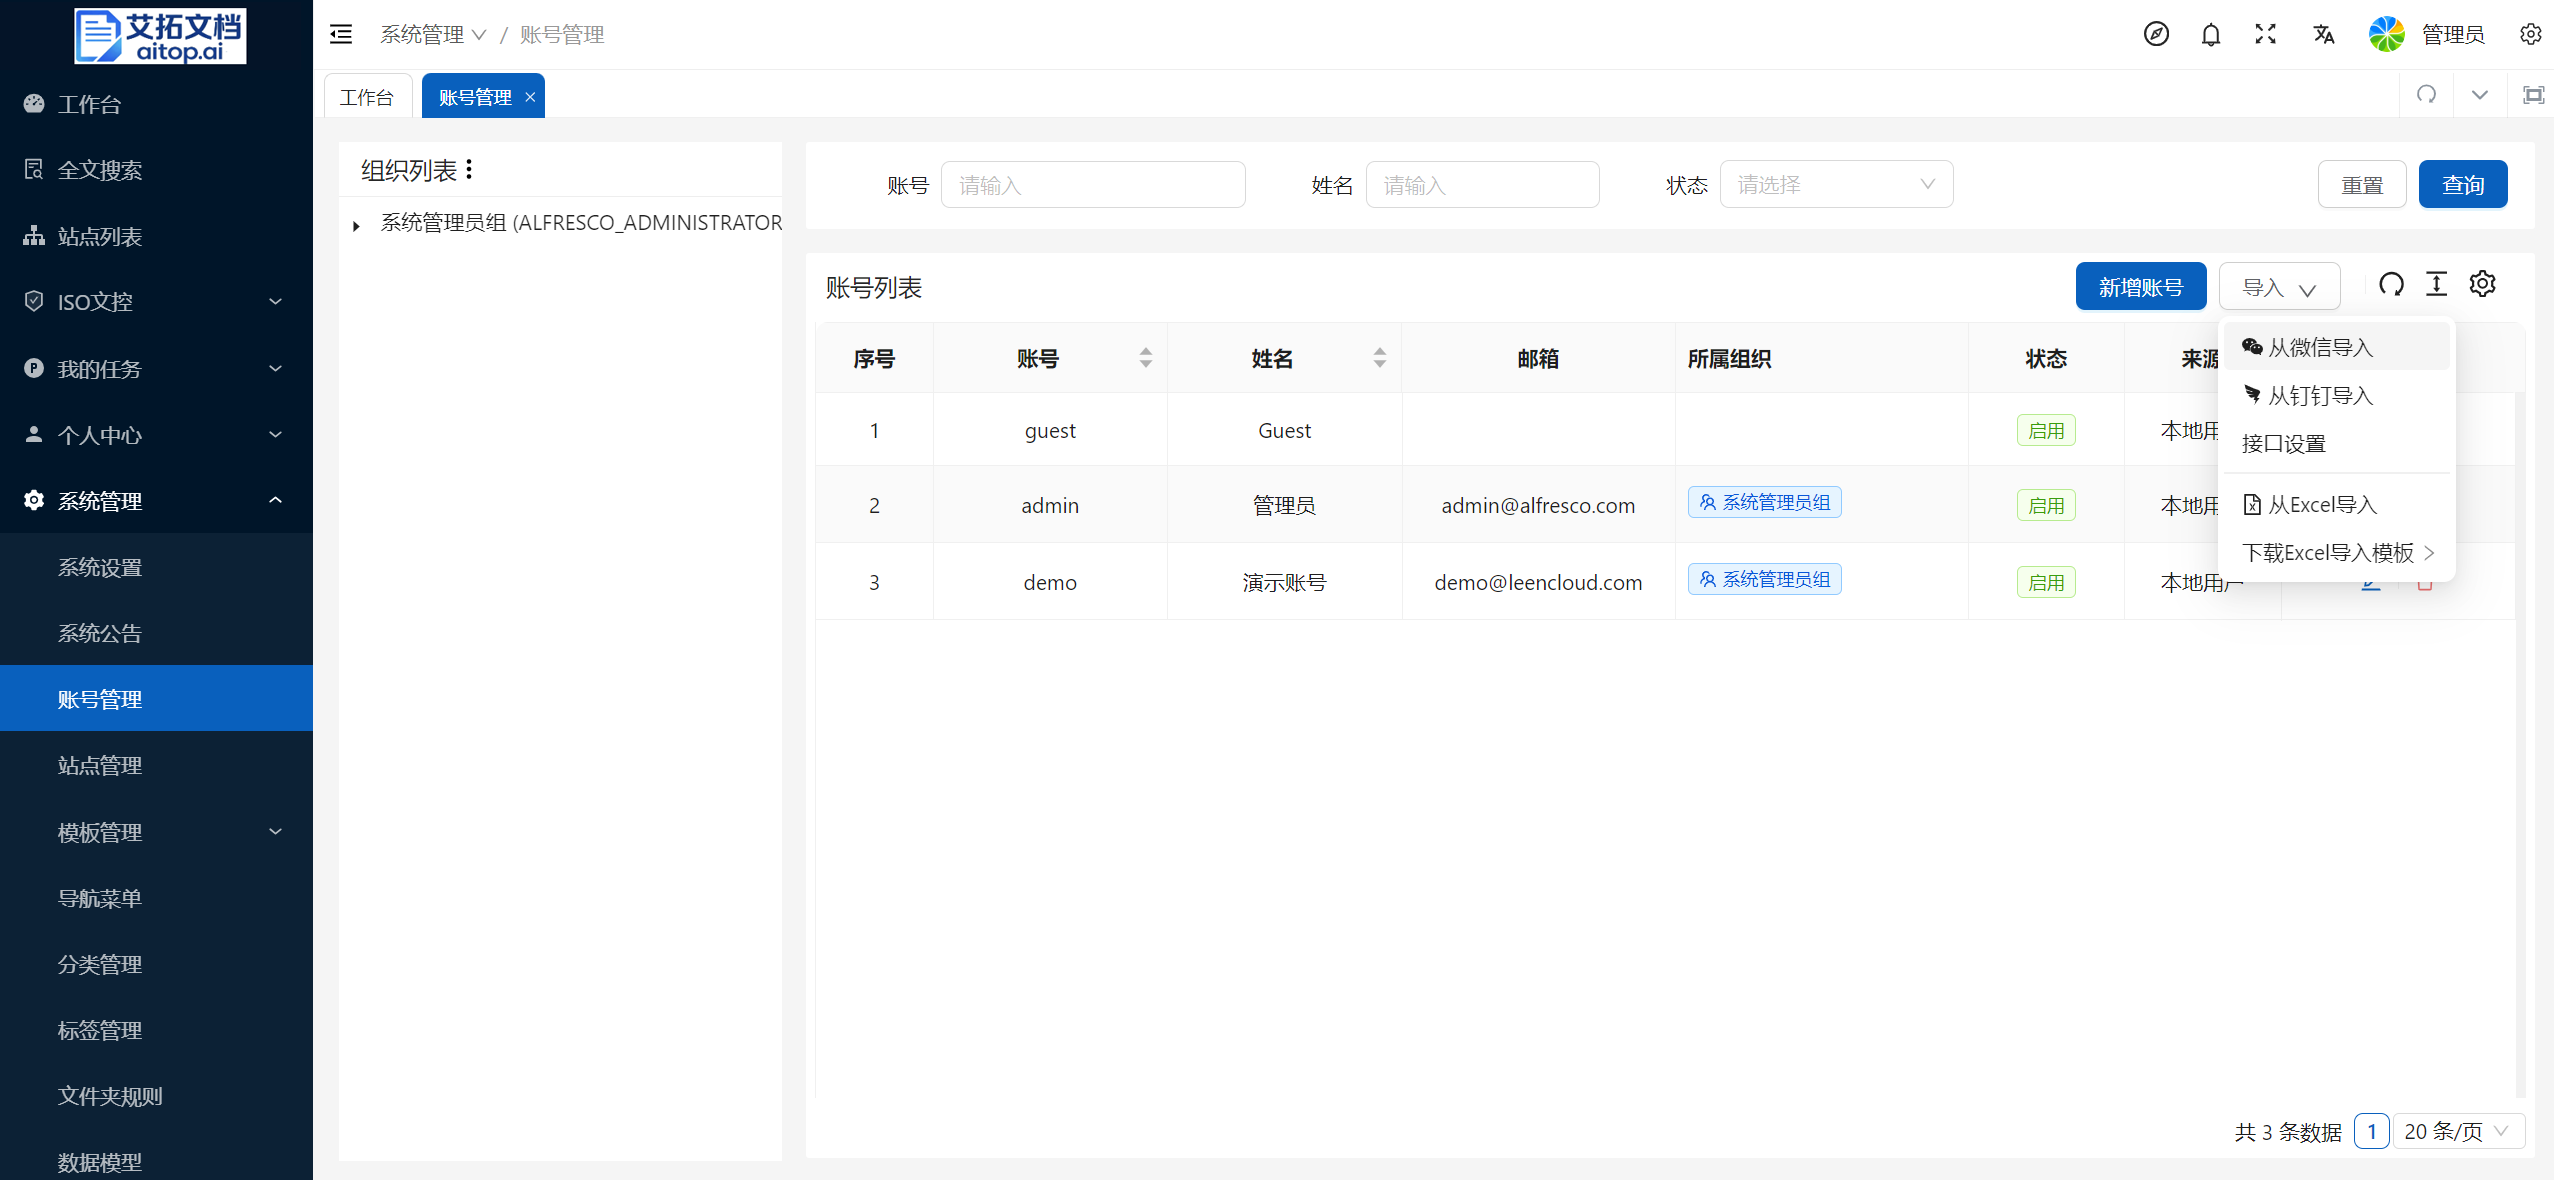
Import from Excel
Click System Administration > Account Management
Click Import > Download Excel Import Template on the toolbar
Fill in the downloaded Excel template
- User name, First name, Last name, Email address, Password are required information
- User name: The account used by the user to log in to the system
- First name: User's name (including first and last name)
- Last name: Space (must enter a space)
- Email address: Required. If the user has no email address, you can fill in any string that conforms to the email format
- Password: User's initial password
- Click the Import > Import from Excel button on the toolbar, select the filled Excel template, and click Start Upload to batch import users.
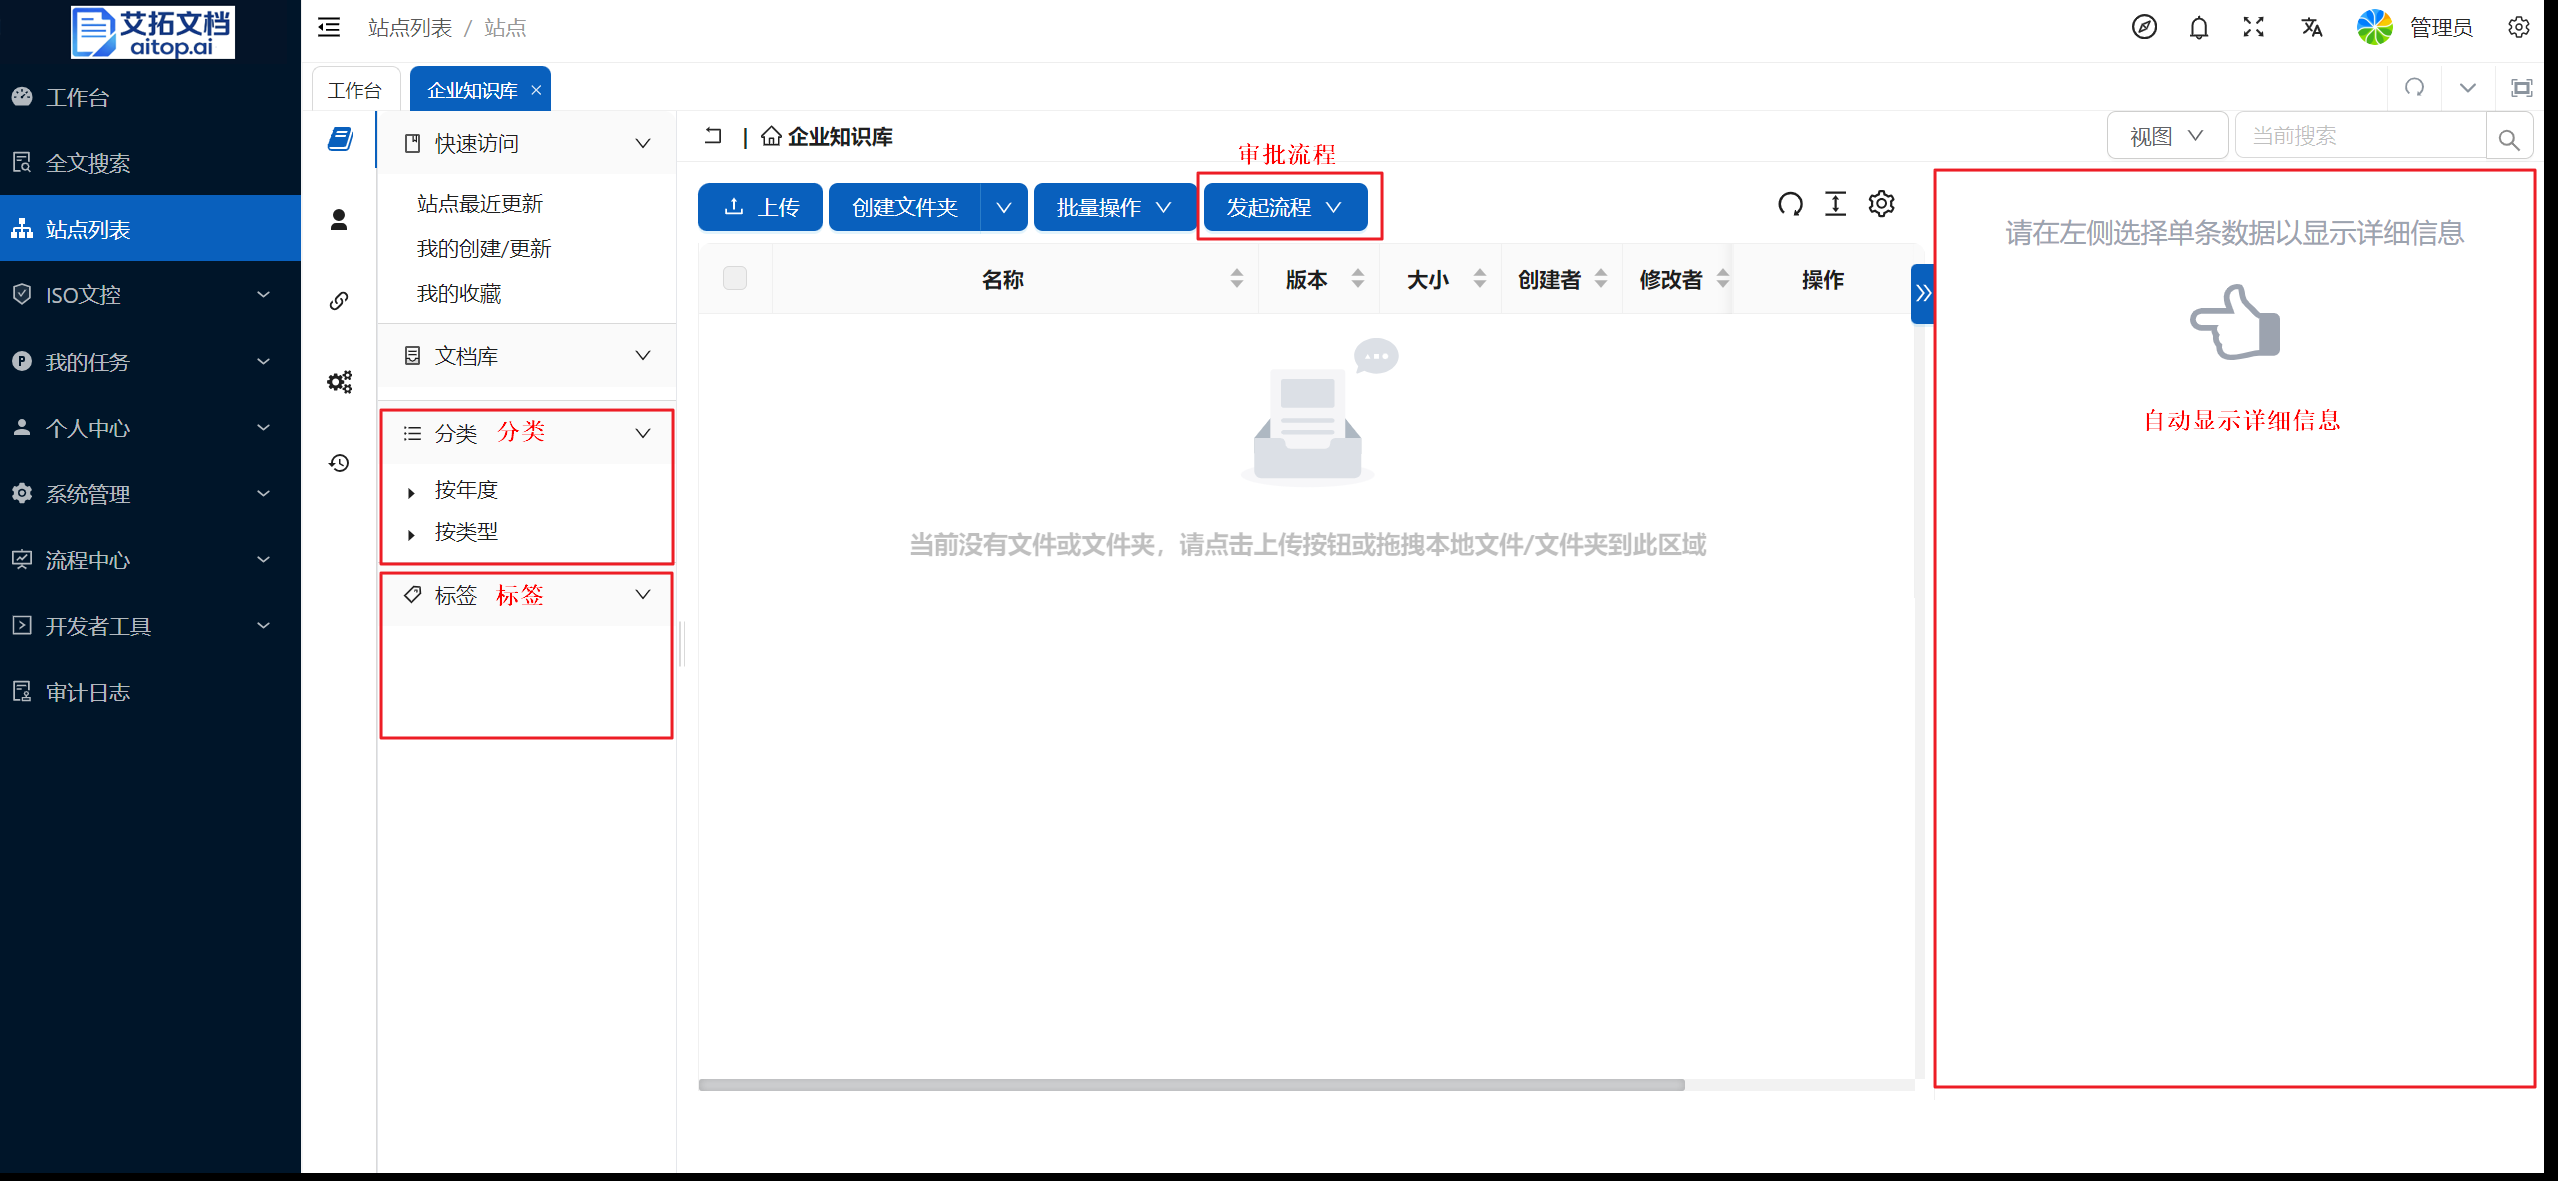
Create Site
Description
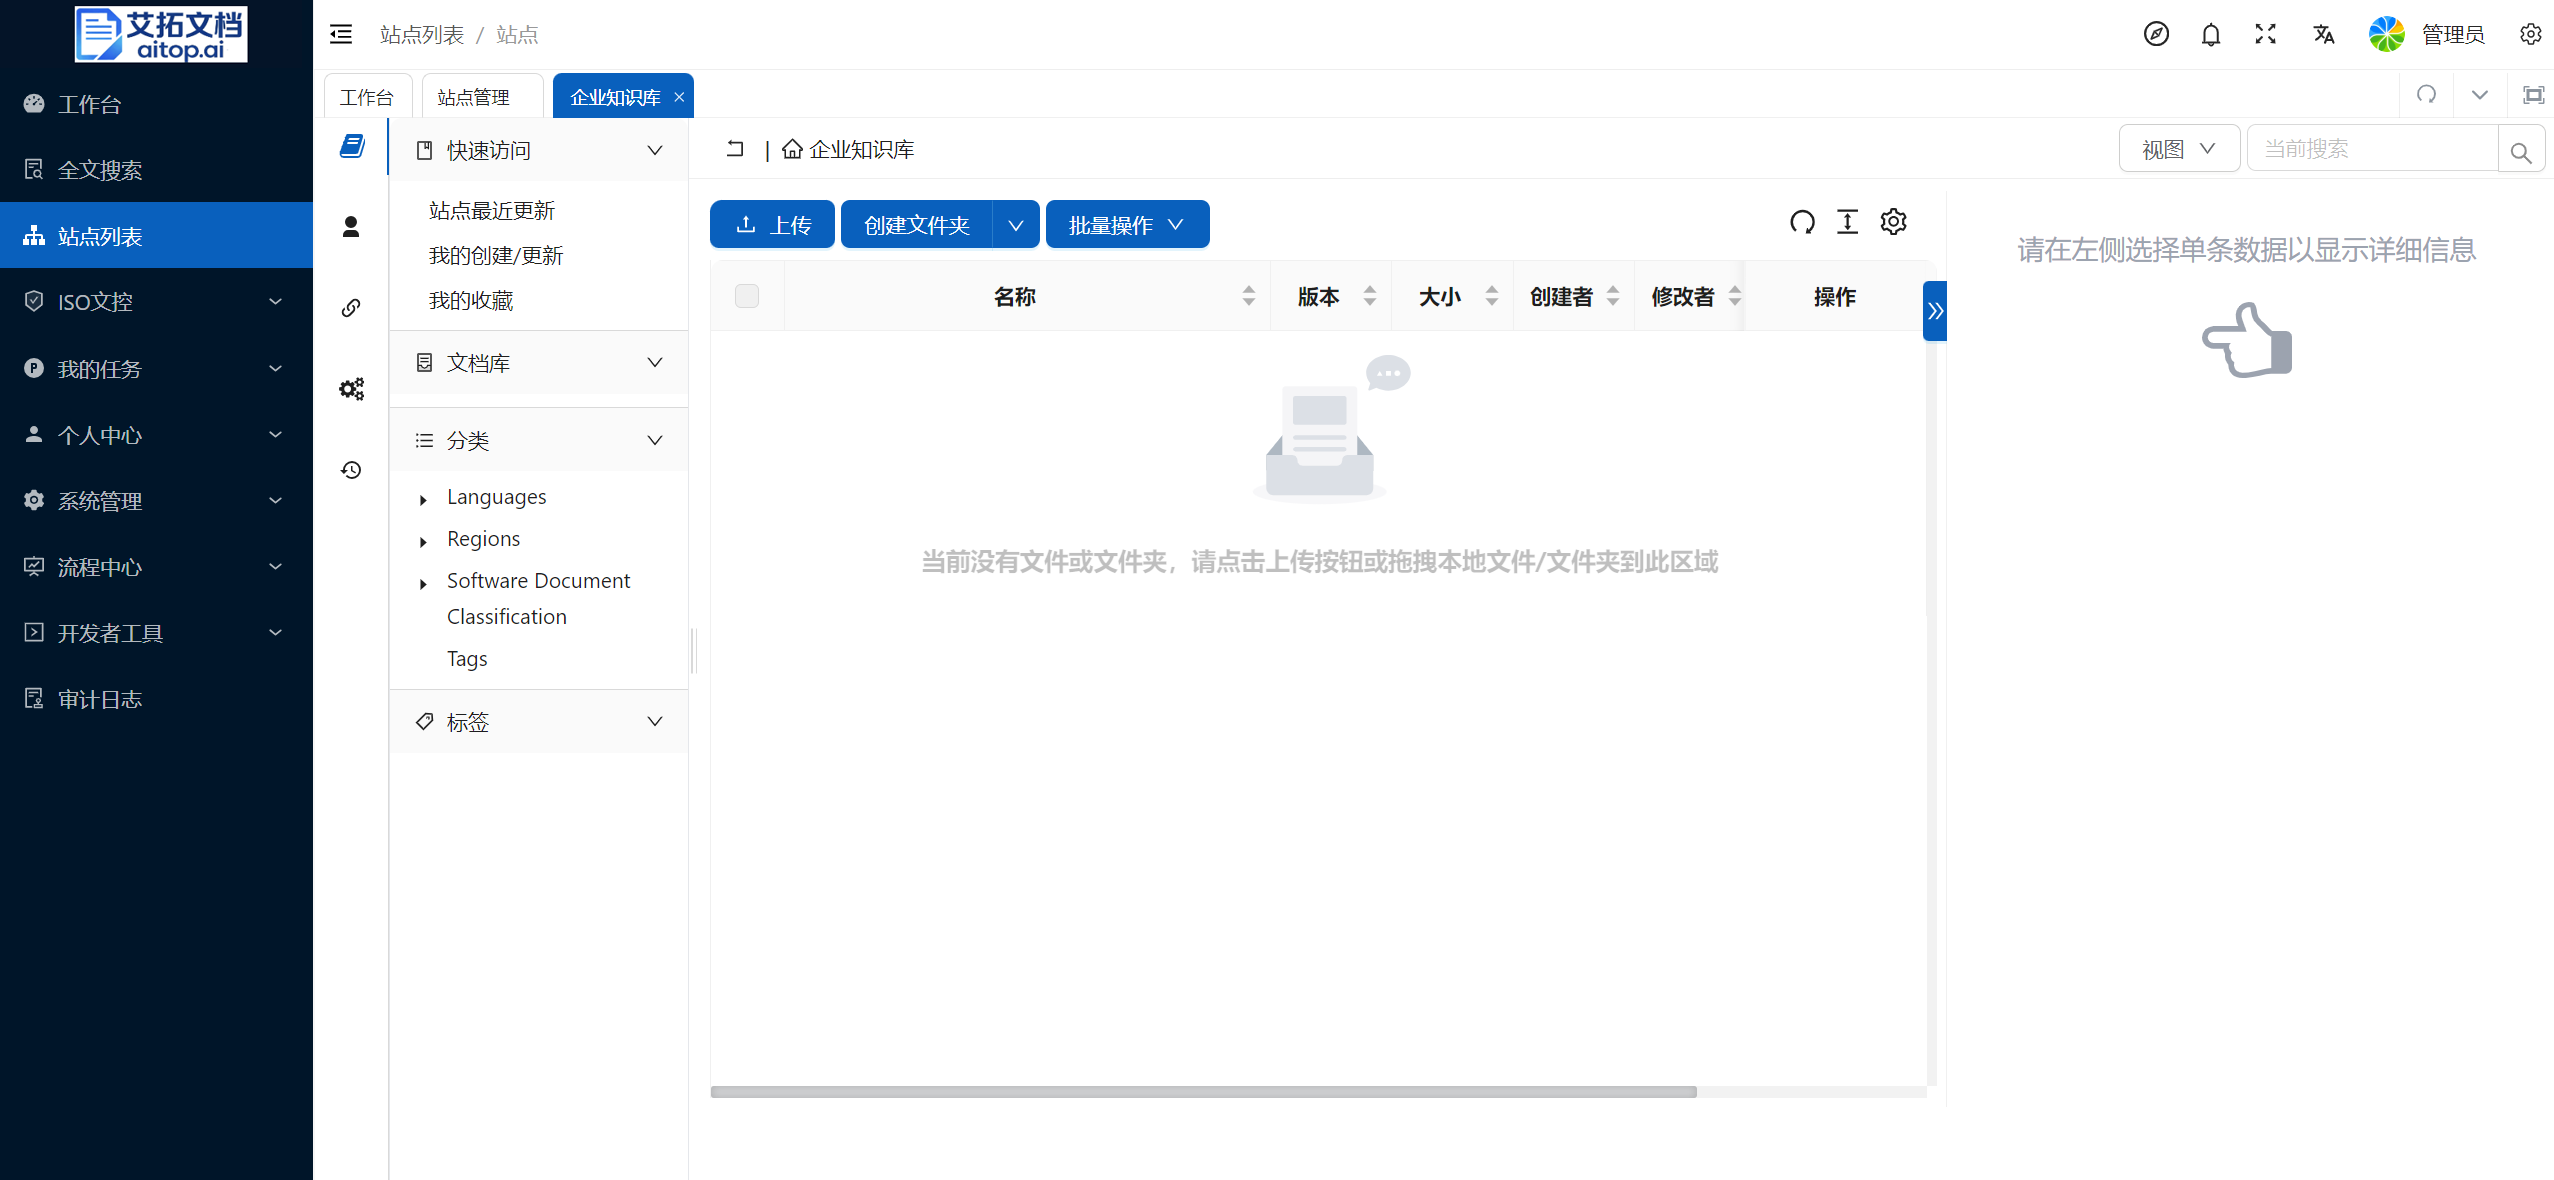
Concept of site: A site is the largest unit for managing documents in AiTop. Data and permissions between different sites are relatively independent. Sites can be divided according to actual business needs.
For example, you can allocate sites for each department, allocate sites for each project, or allocate sites for the company's common business, such as: enterprise knowledge base, etc. There is no limit to the number of sites in the system.
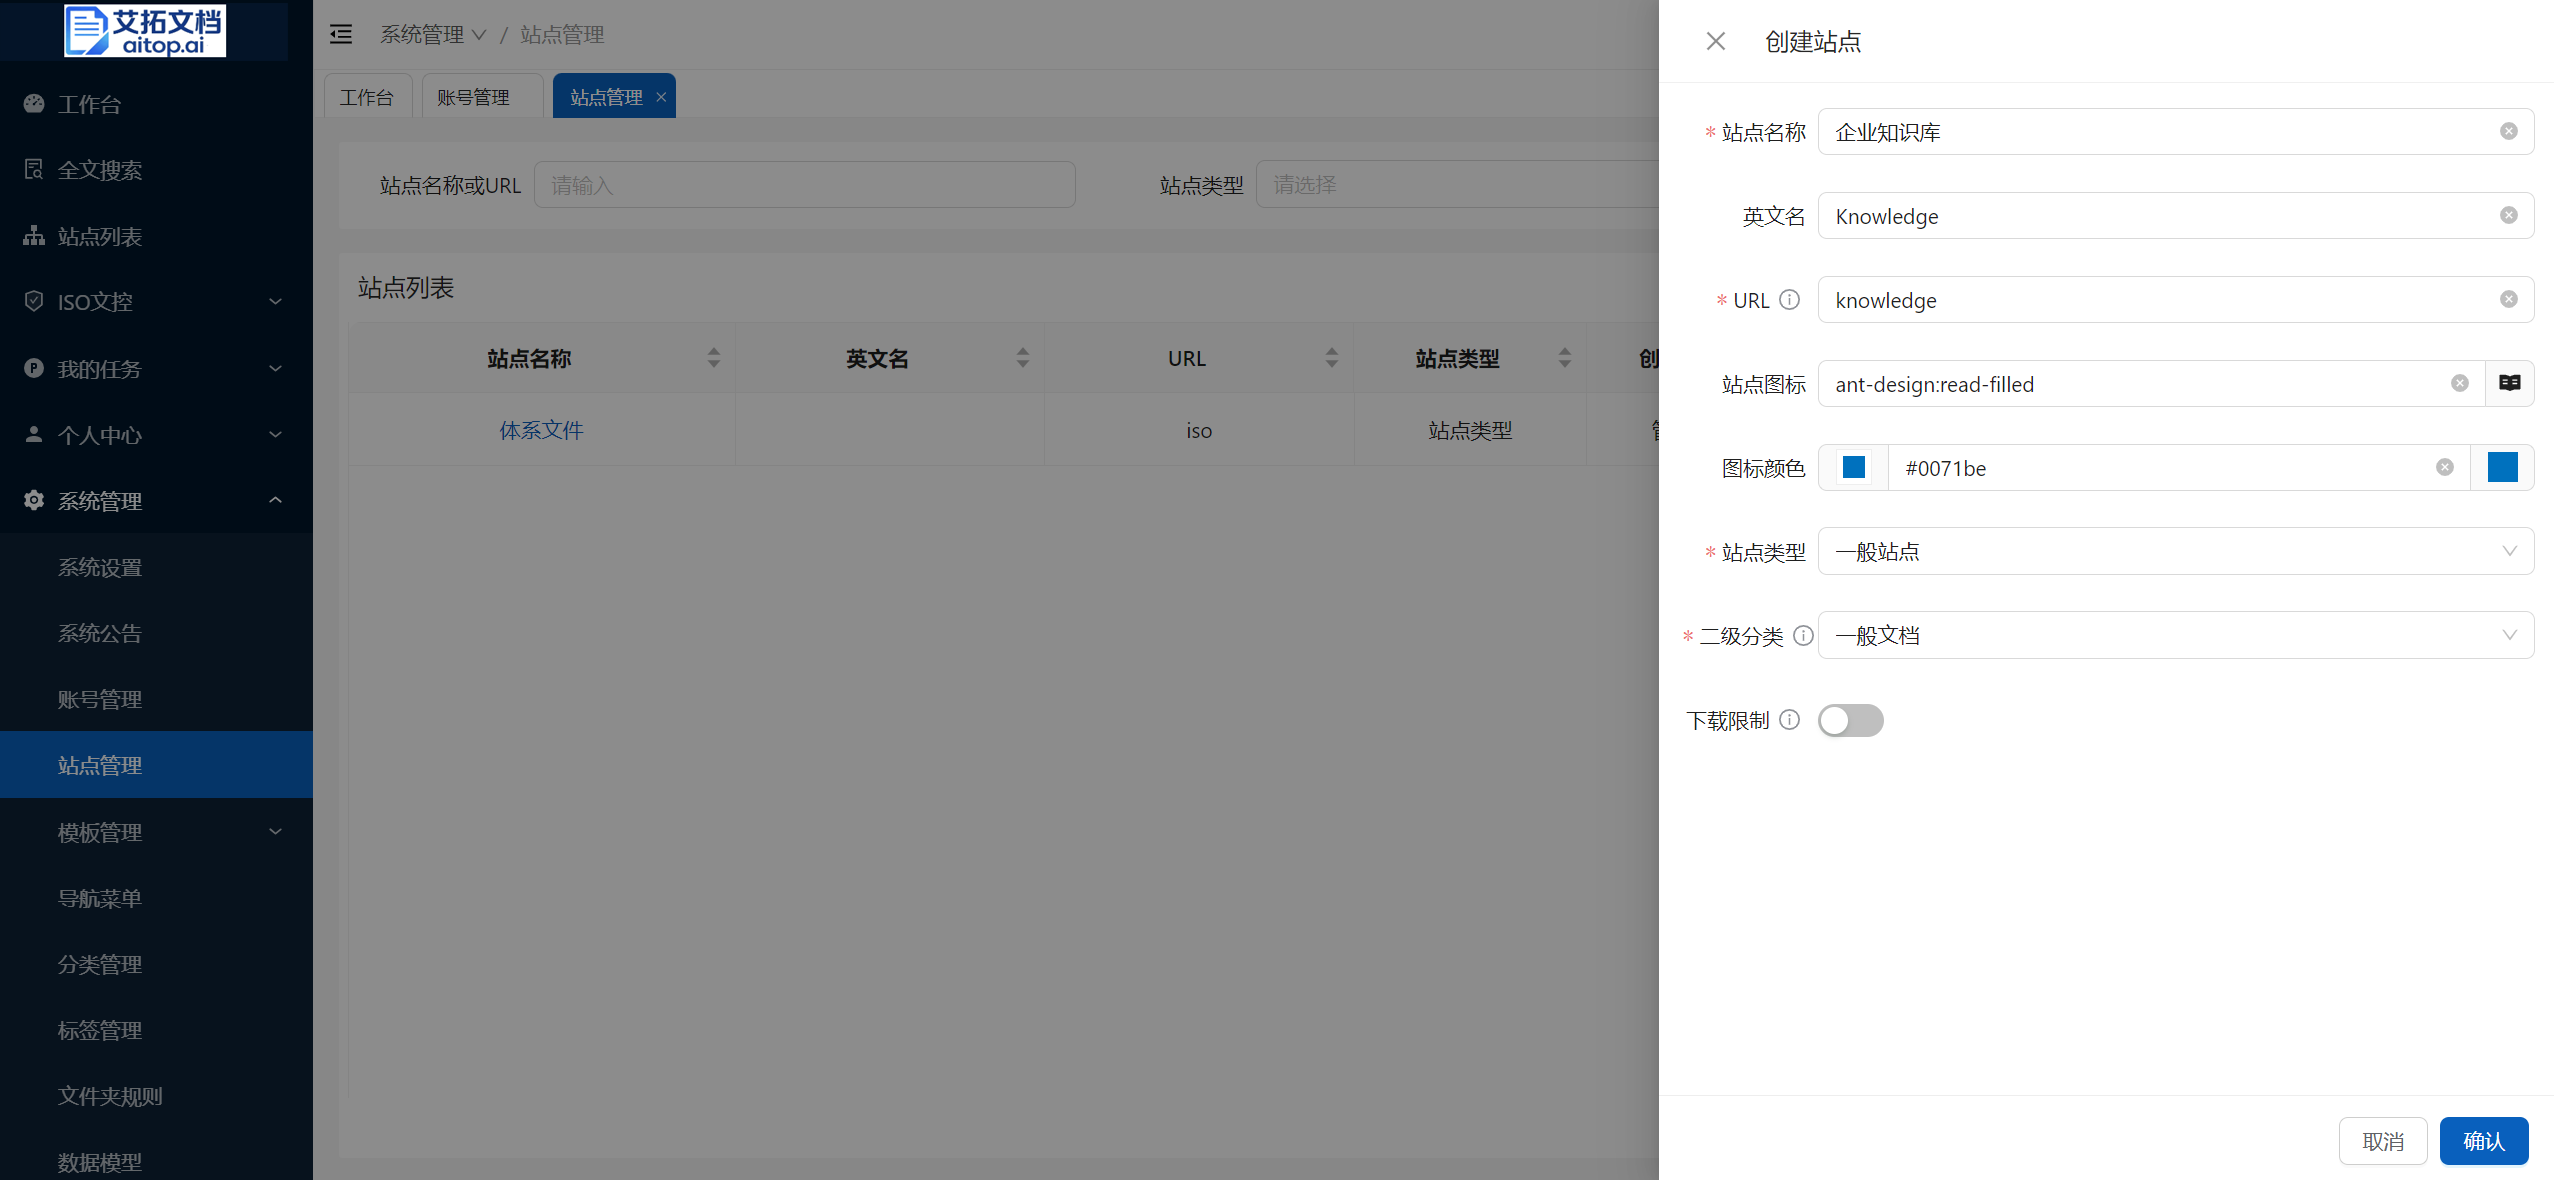
Click System Administration > Site Management
Click Create Site on the toolbar
Fill in the site information and click Confirm
- Site name: The Chinese name of the site
- English name: The English name of the site
- URL: Site ID, generally the abbreviation of the first letter of the site name, must be globally unique
- Site icon: Select the site icon, displayed on the homepage workbench
- Icon color: Select the site icon color, displayed on the homepage workbench
- Site type: System preset extension field, select: General Site
- Secondary classification: Secondary classification of general sites (secondary classification has no actual business meaning, only used for distinction during display. Sites of different secondary classifications have the same functions)
- General documents: Company common business sites, such as: enterprise knowledge base, etc.
- Department documents: Sites allocated for company departments
- Project documents: Sites allocated for company projects
- Download restriction: After checking, other than administrators and file uploaders, others cannot download files. If others need to download files, they need to apply. This situation requires configuring a workflow for download applications for the site. For workflow configuration, please refer to: [TODO]
- Set site permissions
4.1. Return to System Administration > Site Management page, click the site name just created to enter the site page.
4.2. Click Navigation Bar > Site Members and Permissions on the far left of the site page
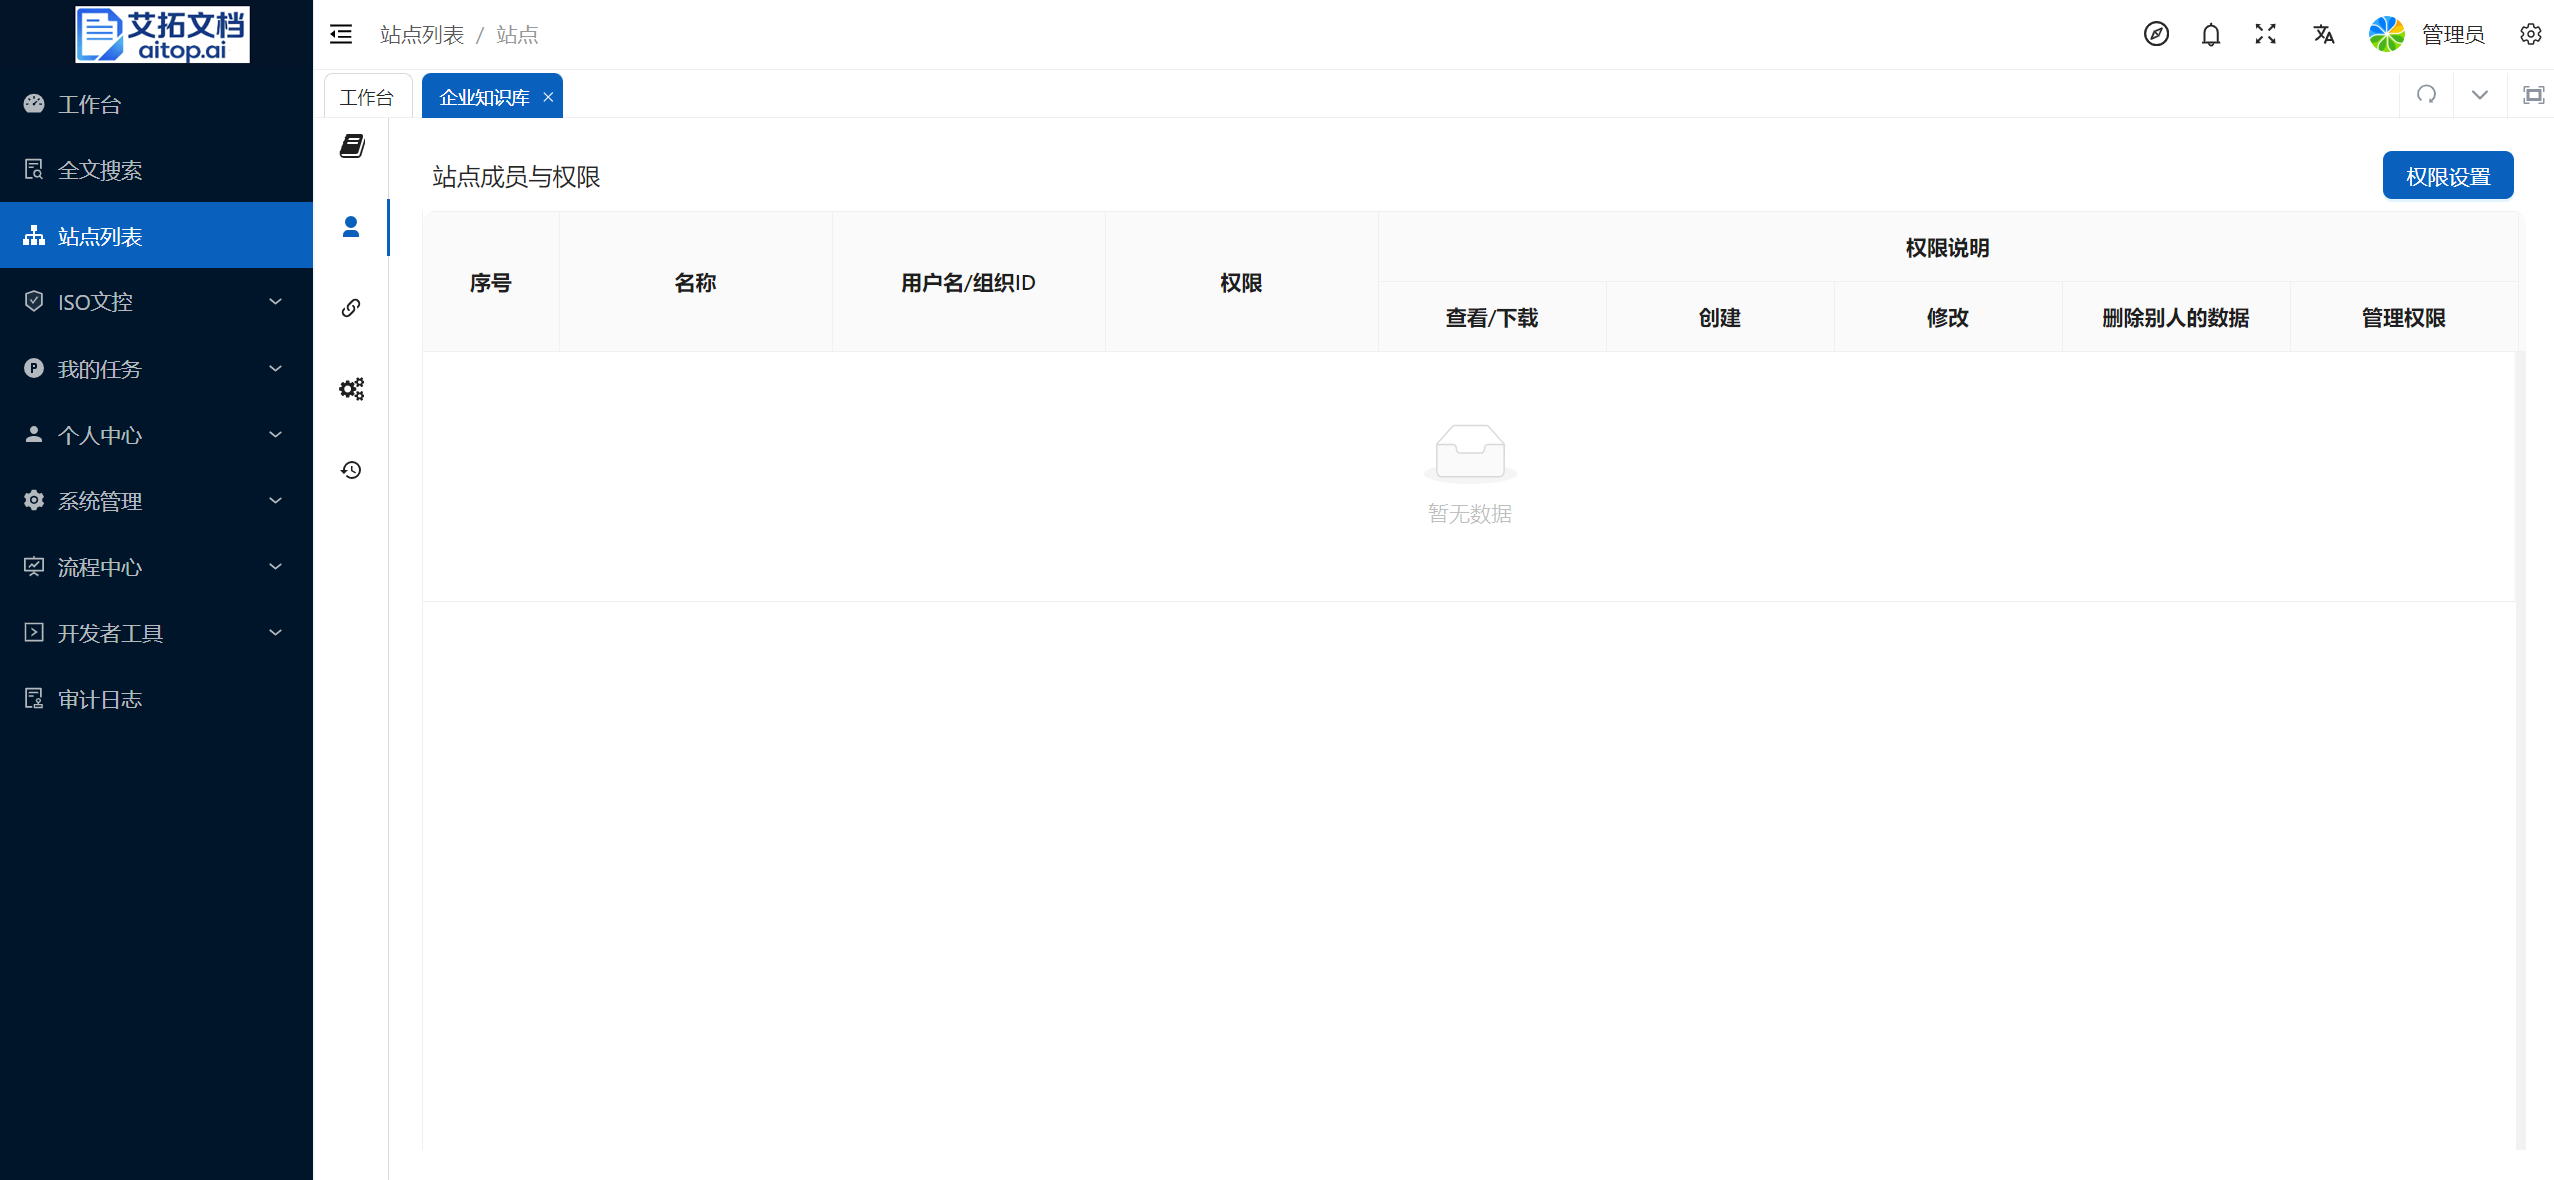
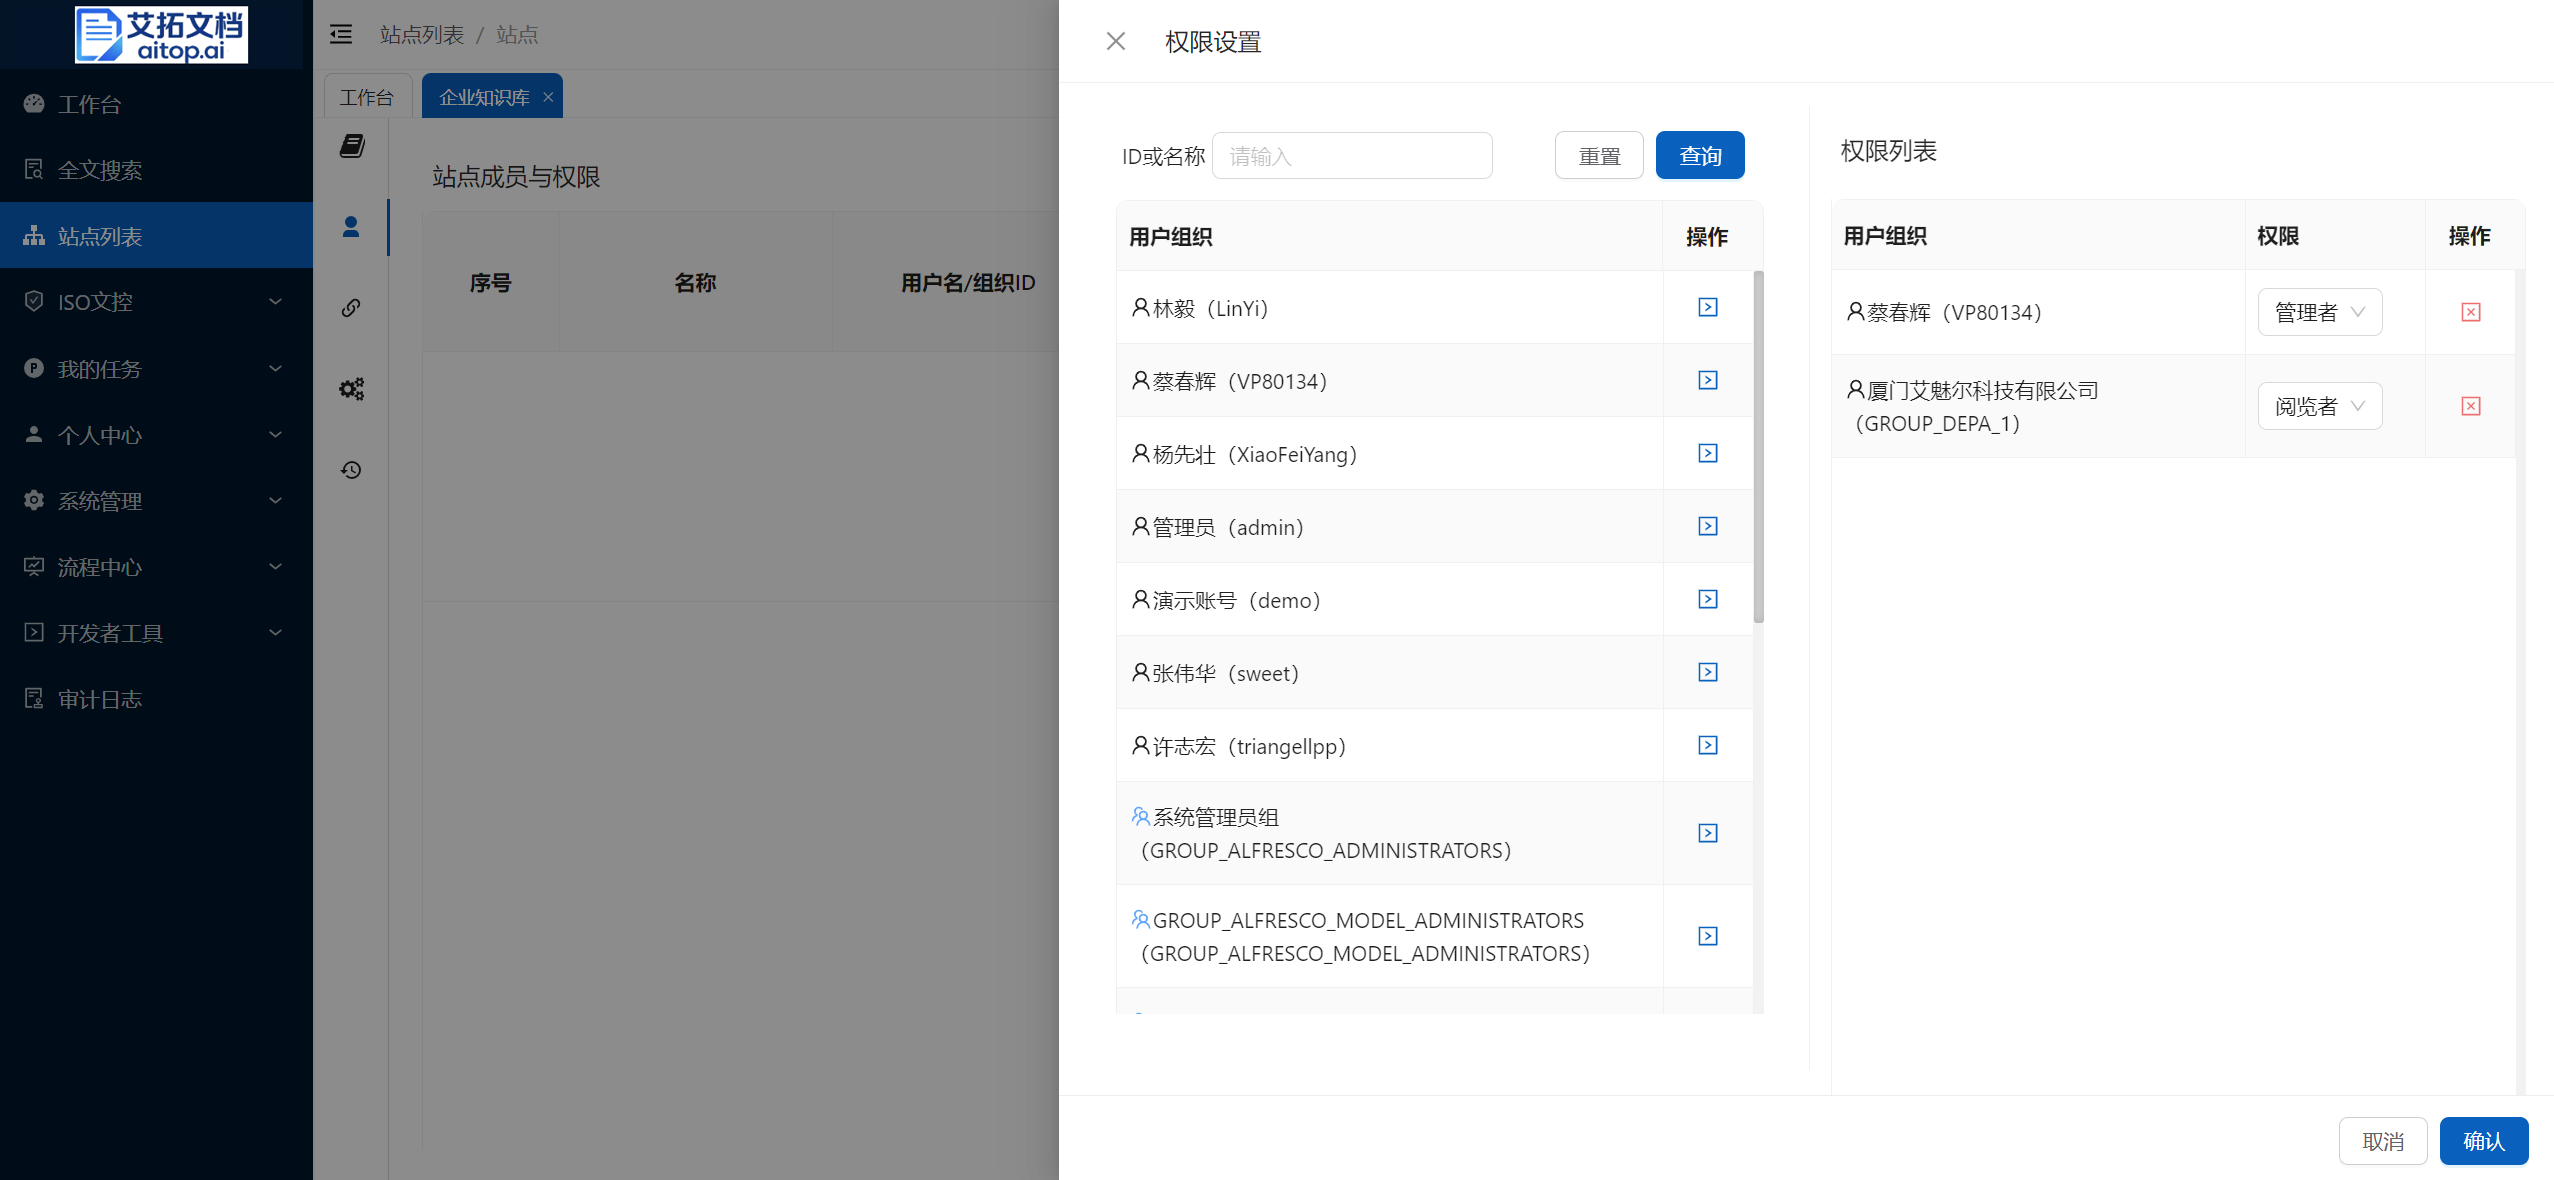
4.3. Click Permission Settings on the toolbar, search for users and organizations on the left, click the button in the operation column to add to the right, select the corresponding permission on the right, and click the Confirm button.
- Other site settings
Click Navigation Bar > Site Settings on the far left of the site page
Approval process: Set the workflows that can be initiated in the site. The workflows used in the system need to be designed first. For workflow configuration, please refer to: [TODO]
Categories: Set whether to display category filtering on the left side of the site document library
Category root node: Categories in the system are a tree concept. This setting specifies from which node the categories in the site start to display. Categories in the system are another dimension of classification for company documents other than the folder structure. The company needs unified overall planning to achieve the goal of precipitation and formation of a knowledge system. The preset category data in the system is for demonstration only. Enterprises should re-plan the category tree according to their actual situation. For maintenance of category data, please refer to: [TODO]
Tags: Set whether to display tag filtering on the left side of the site document library
Auto display details: Set whether to automatically display detailed information on the right side of the site document library
Rule settings: Overall folder rule settings for the site. Using folder rules can automatically trigger scripts (e.g., send notification messages to administrators, automatically convert document formats, etc.) when changes occur in site content (e.g., uploading documents, modifying documents, deleting documents, etc.) to achieve system automation. For specific content of rule scripts, please refer to: [TODO]
System Settings
Click System Administration > System Settings
After modifying the system settings information, click Save
- Auto version: After the document is uploaded, the version function is automatically enabled. Each time the document is updated, a version record will be automatically generated. Note: Enabling auto version will generate additional server disk consumption.
- Keep maximum versions: The maximum number of historical versions to retain, default is 20
- Same name file upload handling: Handling method for uploading files with duplicate names in the same folder
- Office file online preview method: Optional PDF previewer and Onlyoffice previewer
- PDF previewer: Fast response speed
- Onlyoffice previewer: Better compatibility, but relatively slow response speed
- Excel online preview method: Optional PDF previewer and Onlyoffice previewer (Excel to PDF needs to set print pagination in advance. If you find it tedious, you can choose Onlyoffice previewer)
System Announcement
Click System Administration > System Announcement
Click Create Announcement on the toolbar, fill in the title and content, then click Save
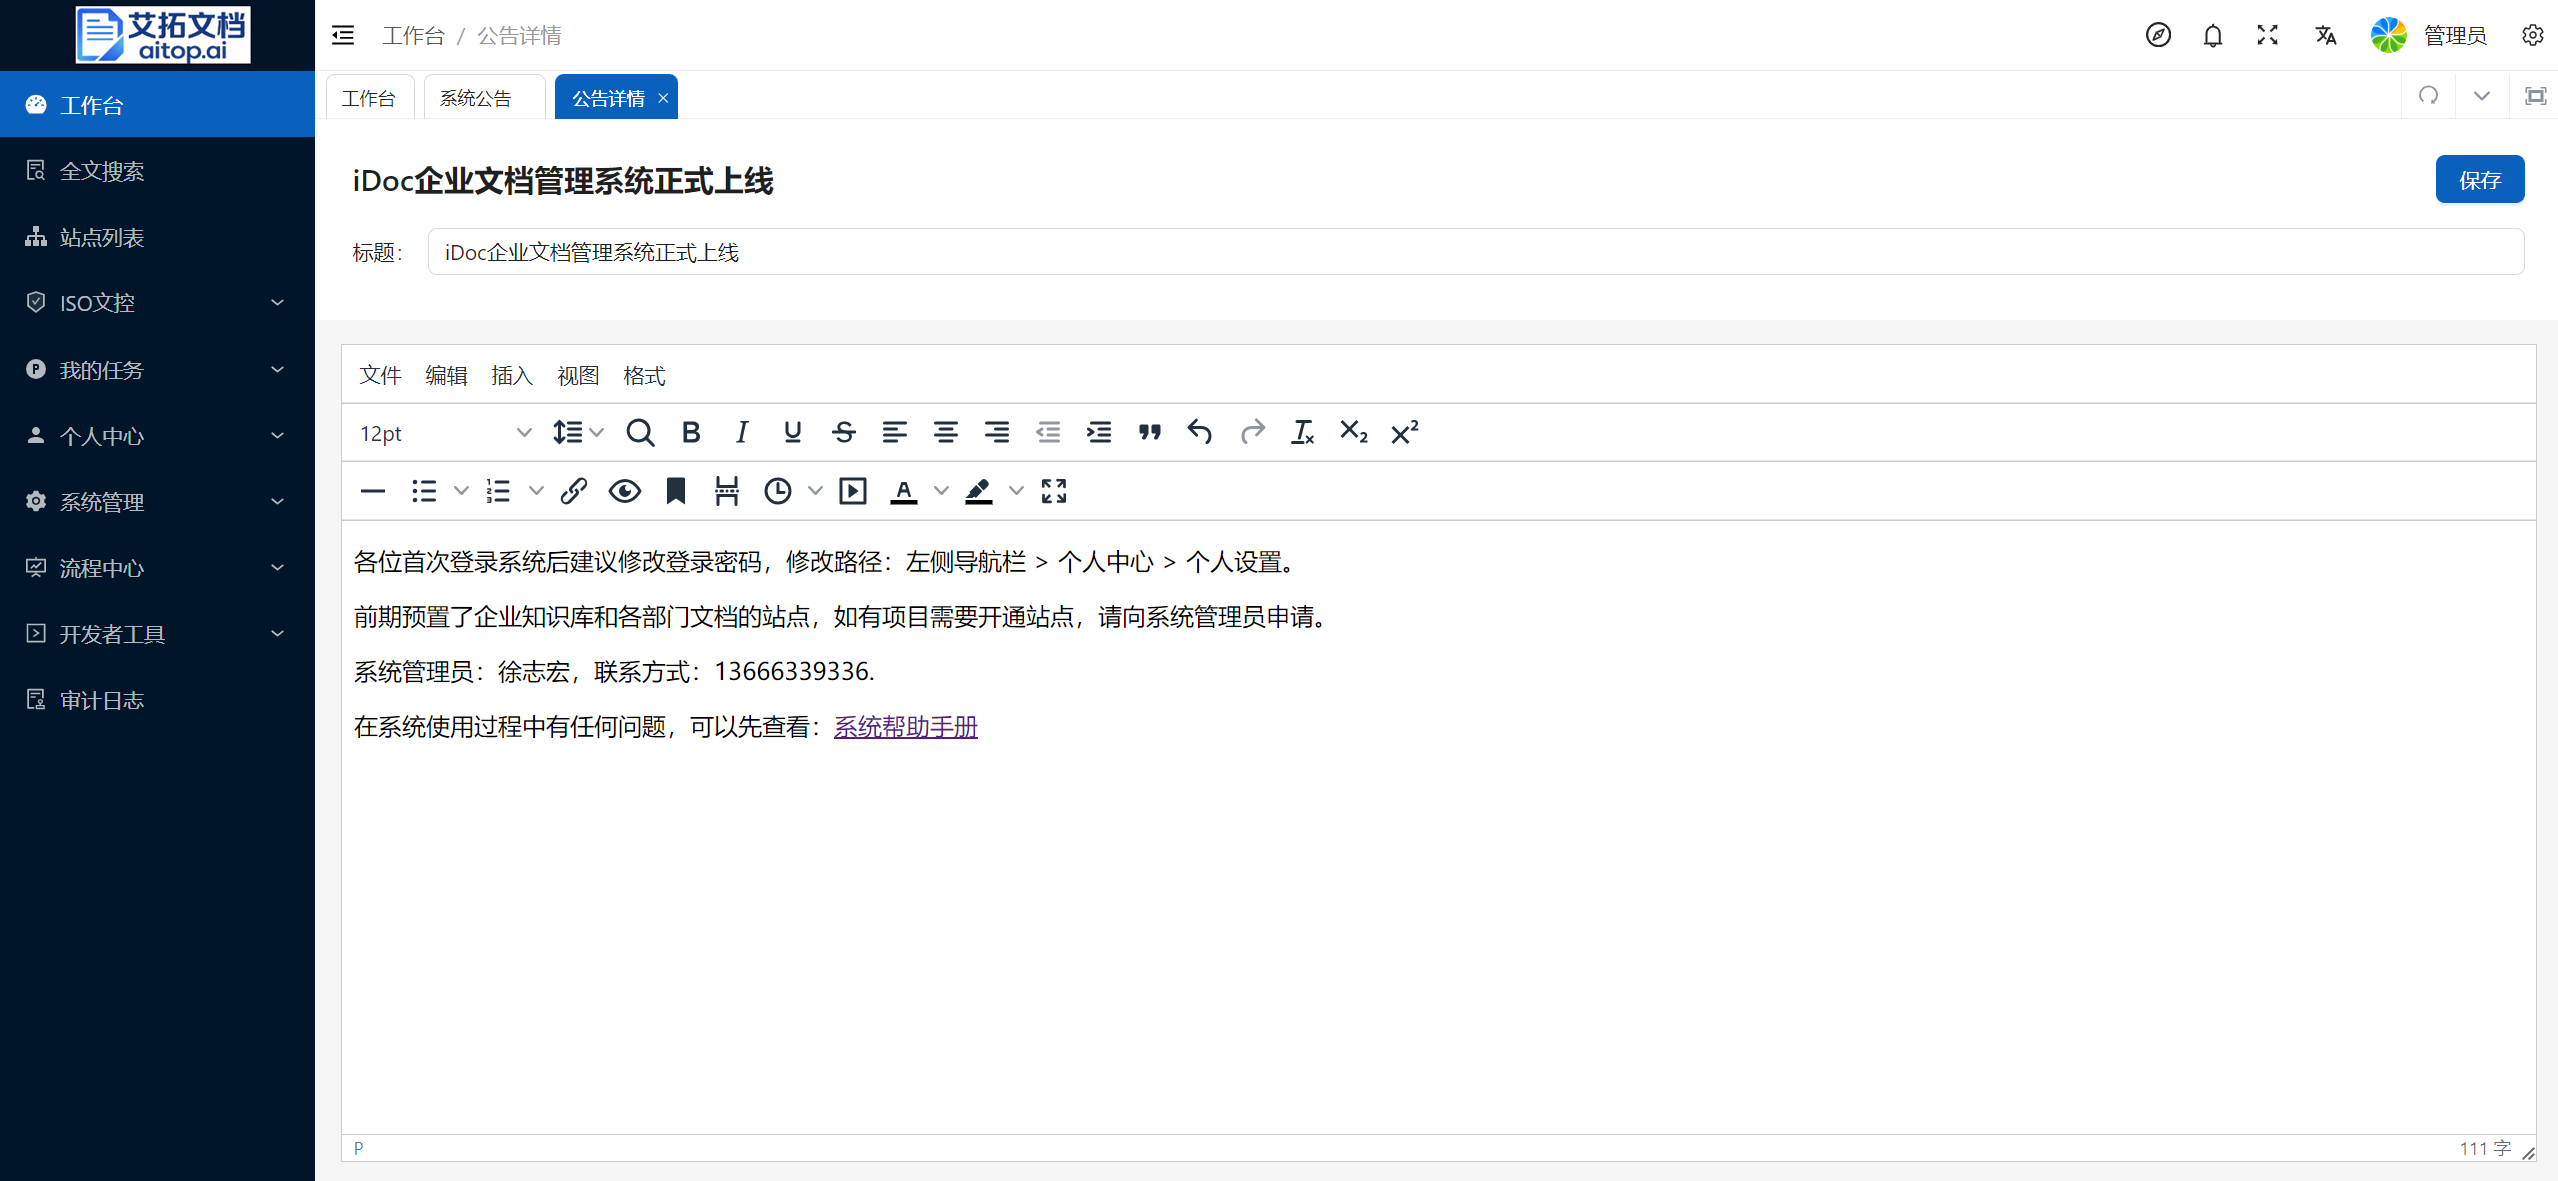
- Return to the System Announcement page, click the Publish switch in the announcement list to publish/cancel publishing announcements. The latest published announcement will be displayed in the welcome area of the homepage workbench.
Account Management
For account management related content, please refer to: Create/Import Organization Users
Site Management
For site management related content, please refer to: Create Site
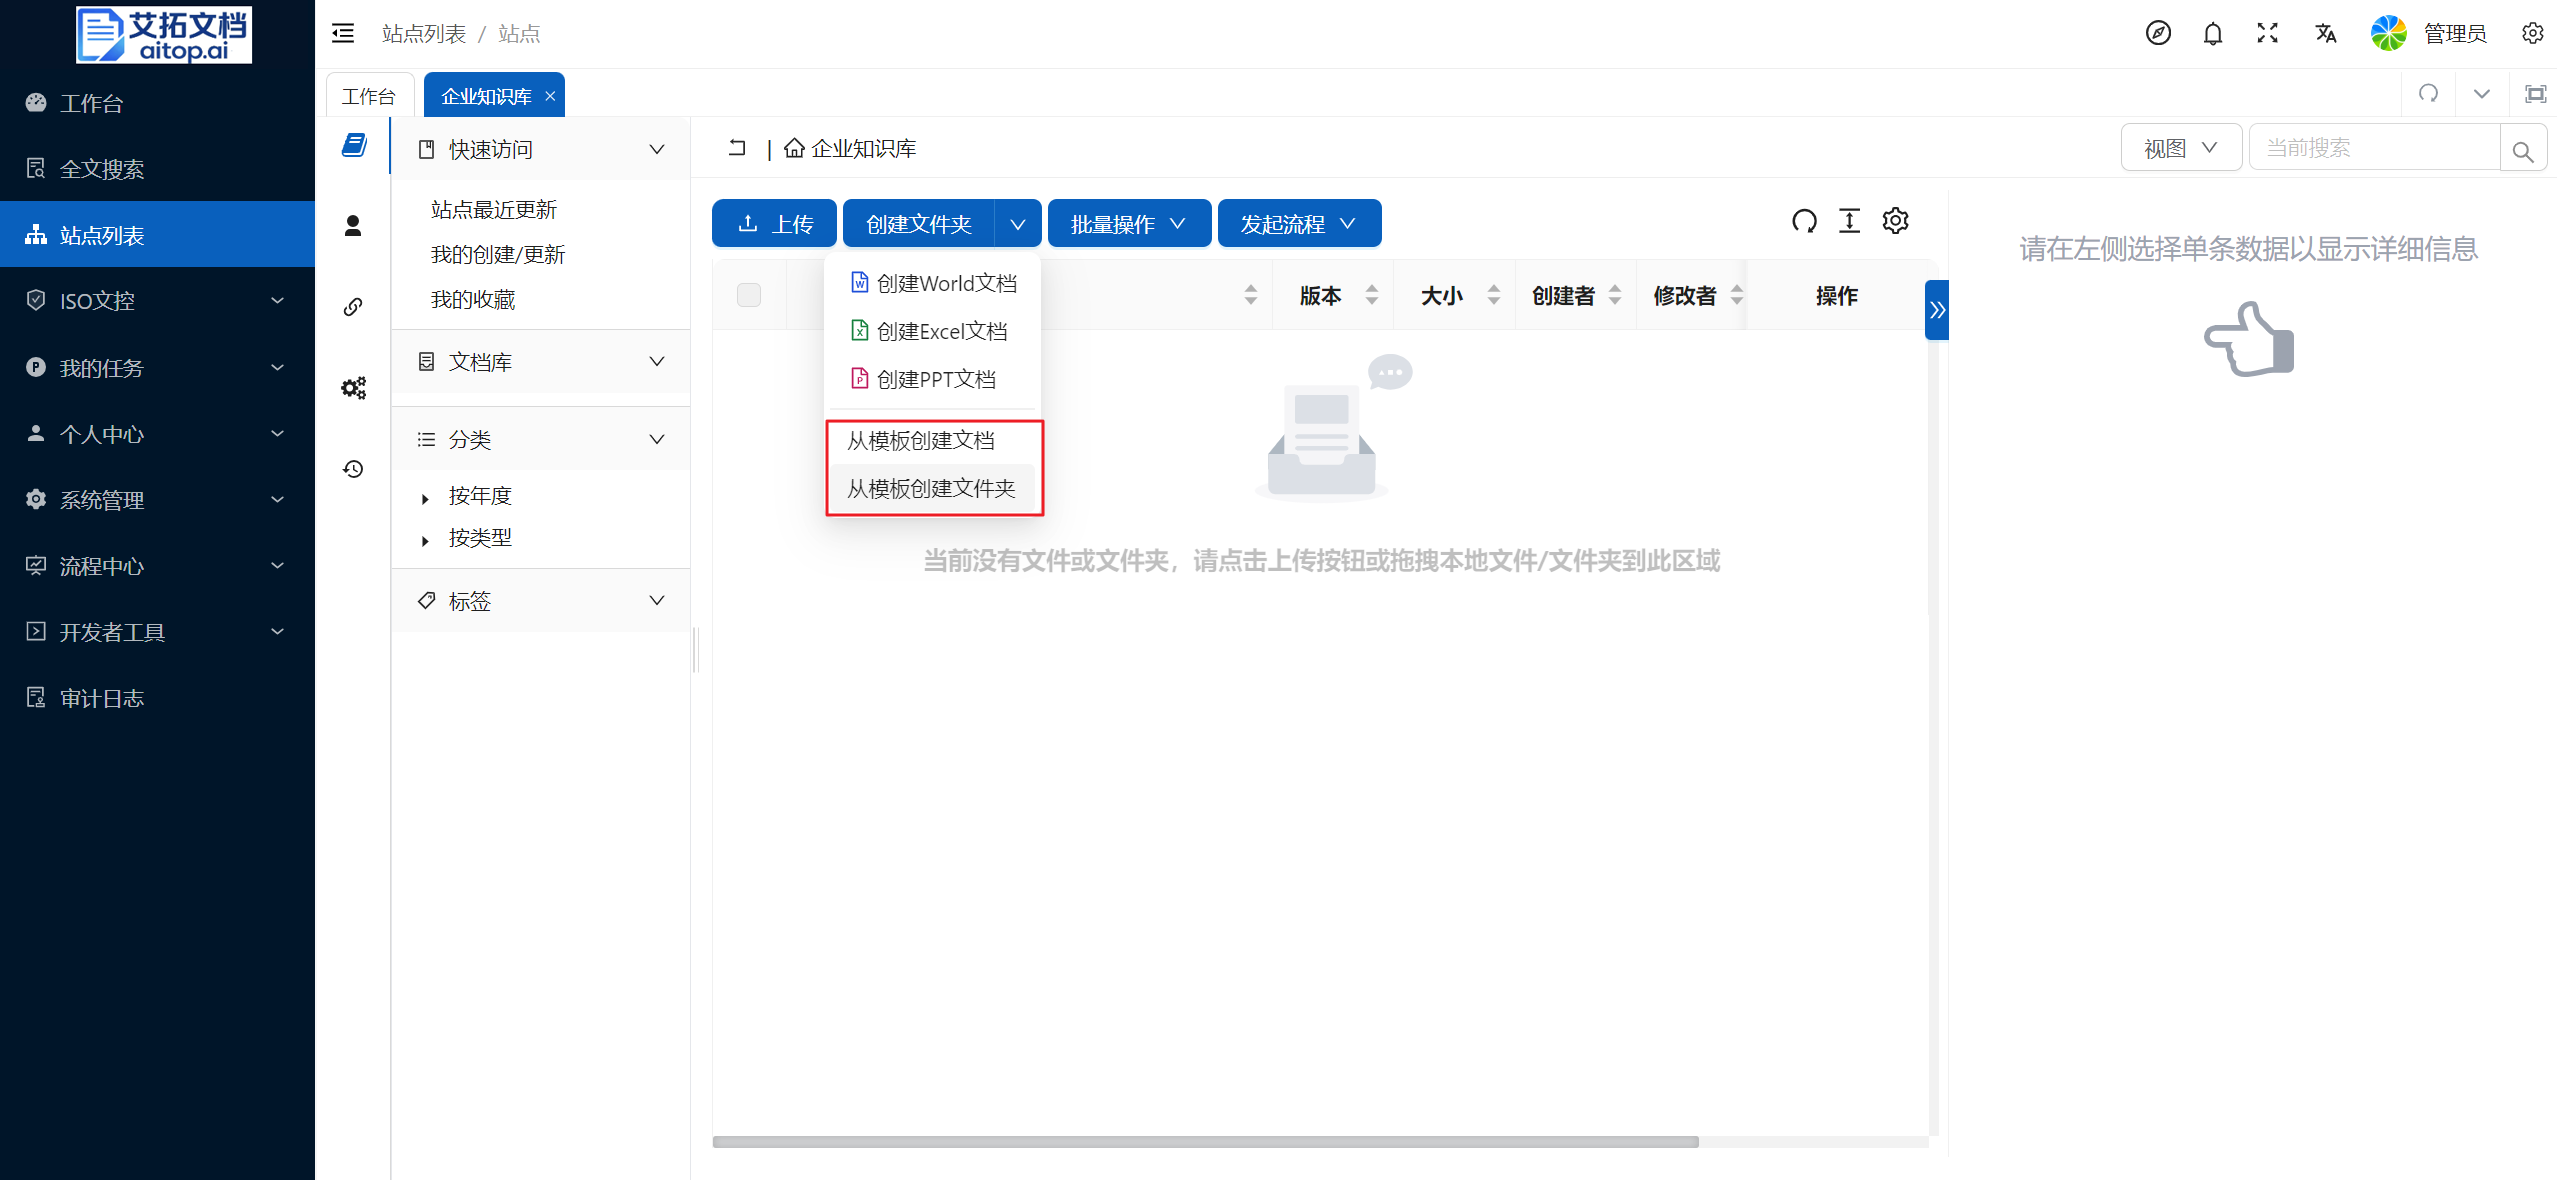
Template Management
Document Template
Document templates are used to quickly reference and copy templates to generate new documents when creating documents online. For example: contract templates, various application templates, etc. Document templates need to be uploaded by administrators in the system background before general users can reference and copy them in the site. Folders can be used to classify templates for easy user access.
Click System Administration > Template Management > Document Templates
Click Create Folder to create a folder
Click Upload to upload local documents to the current folder
Click Upload dropdown > Upload Folder to upload local folders to the current folder
Click Operation column dropdown > Permission Settings to set permissions for the current folder/document. Users without permissions will not be able to search, view, and reference copy the template
Folder Template
Folder templates can generally be used to initialize the overall folder structure of the site. For example, you can preset the folder structure of project management in the folder template. After creating a new project site, you can quickly reference and create the project management related folder structure. Folders can be used to classify templates for easy user access.
Click System Administration > Template Management > Document Templates
Click Create Folder to create a folder
Click Operation column dropdown > Permission Settings to set permissions for the current folder. Users without permissions will not be able to search, view, and reference copy the template
Template Usage
After administrators preset document templates and folder templates, general users can quickly reference and copy templates in the site page.
Open the specific site page and enter the target folder
Click Create Folder dropdown on the toolbar > Create Document from Template/Create Folder from Template, then click Confirm
Navigation Menu
The navigation menu is mainly used to set the left navigation bar of the system. Separate permissions can be set for each menu to control different menu items displayed to personnel with different roles.
Add Menu
Click System Administration > Navigation Menu
Click Add Menu on the toolbar, fill in the menu information, and click Confirm (Menu settings are relatively complex. It is recommended to refer to existing menu settings. If necessary, confirm with developers)
- Menu name: The key of the menu, generally English letters, it is recommended to capitalize the first letter
- Parent menu: If creating a top-level menu, leave it blank
- Route address: The URL address accessed by the browser address bar after clicking the menu
- Component path: The path of the page corresponding to the menu (if unsure, please confirm with developers)
- Icon: The icon displayed on the left side of the menu. Generally, icons are only set for top-level menus
- Display name: The name displayed by the menu
- Sorting: If there are multiple menus at the same level, they will be displayed in order from small to large
- Hide submenus: If you don't want submenus to be displayed in the left navigation bar, you can set them to hidden
- Status: Enable/Disable. Menus in disabled status will not be displayed and cannot be accessed
- Redirect: Redirect to highlight the menu

Set Menu Permissions
In the menu list, click the Permission Settings button in the operation column
In the permission settings box, search for organizations/users on the left, click Add to right in the operation column, and select the corresponding permission on the right. For more information on permission settings, please refer to: [TODO]

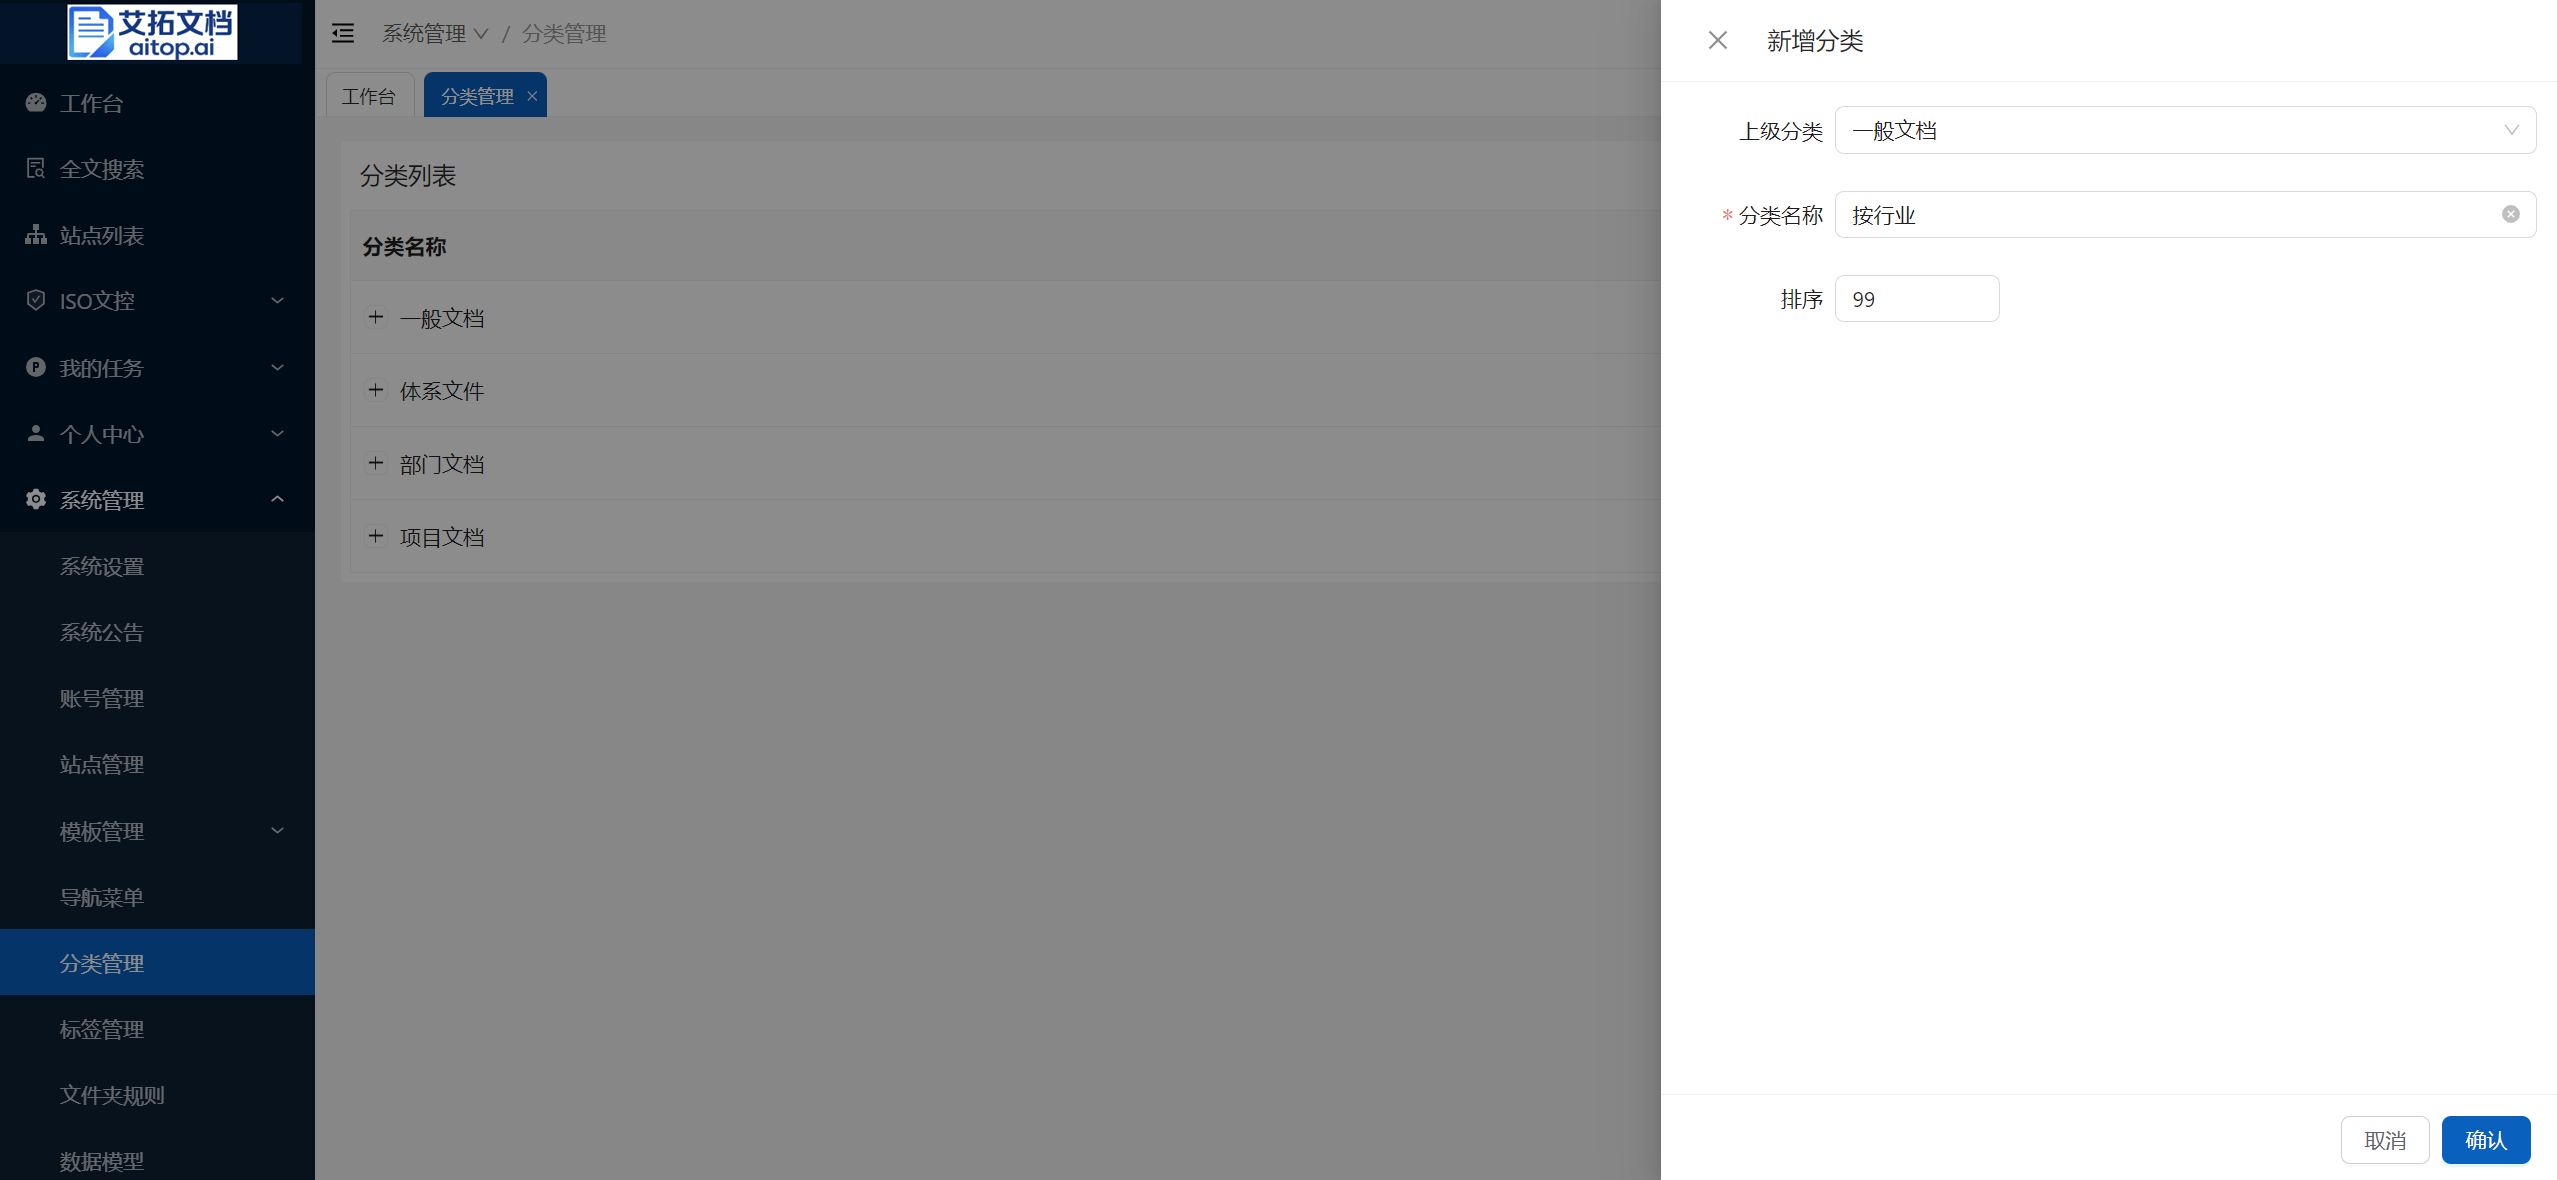
Category Management
Click System Administration > Category Management
Click Add Category on the toolbar, fill in the category information, and click Confirm
- Parent category: If it is a top-level category, leave it blank
- Category name: The display name of the category
- Sorting: If there are multiple categories at the same level, they will be displayed in order from small to large
In the category list, click the Edit button in the operation column to edit existing categories
In the category list, click the Delete button in the operation column to delete existing categories (Note: deleting a parent category will also delete its sub-categories)
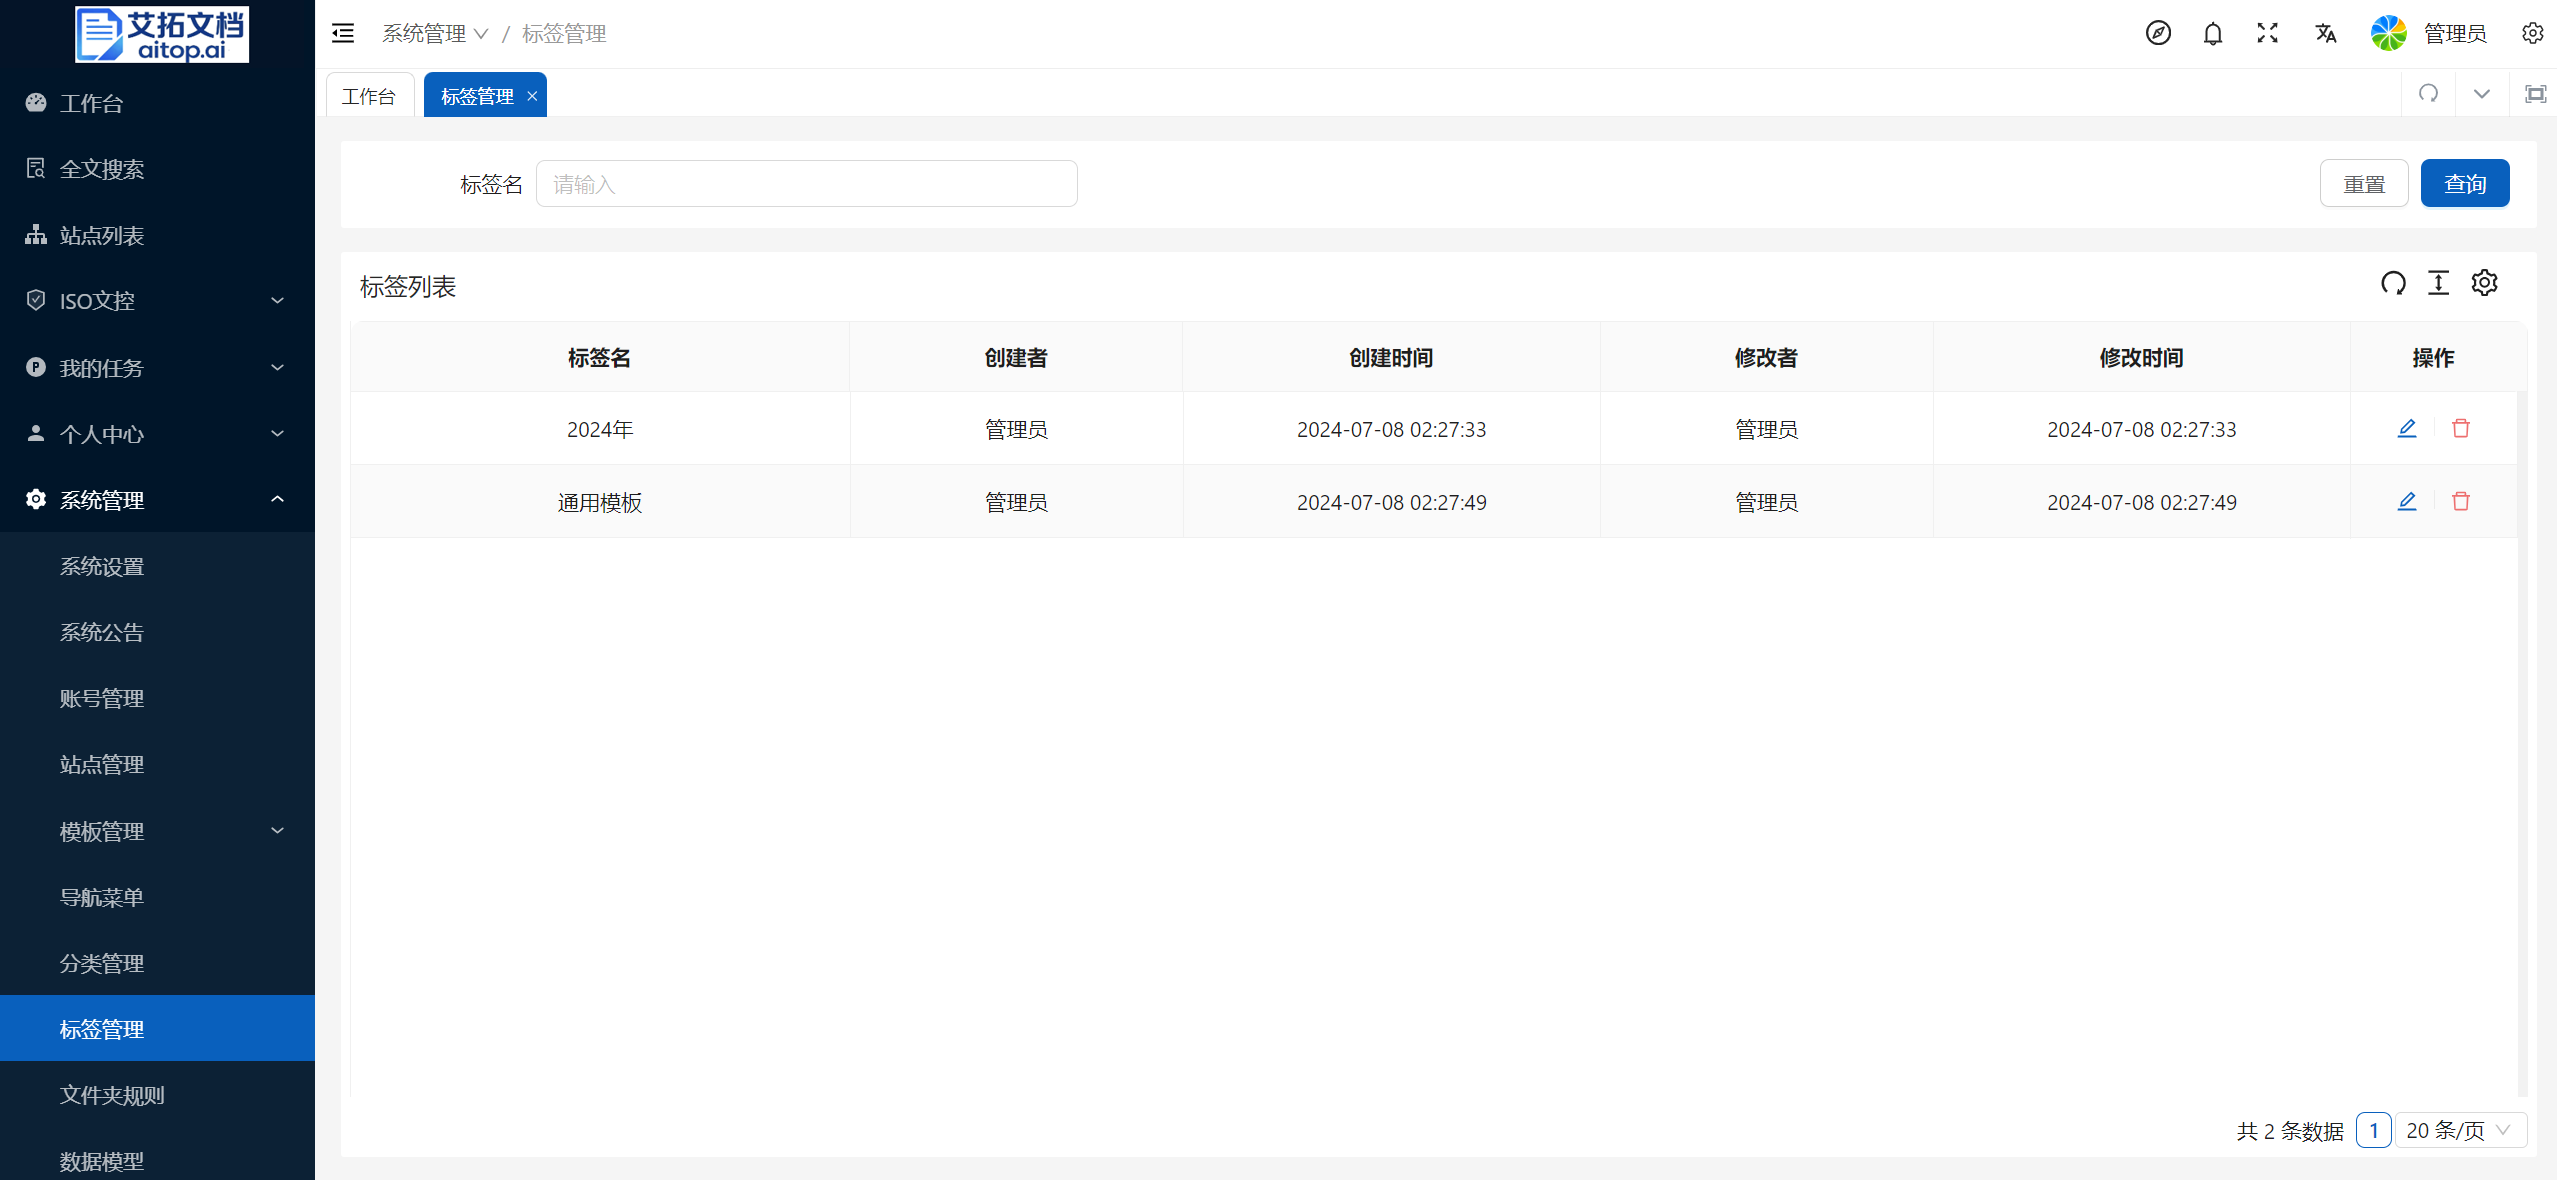
Tag Management
Click System Administration > Tag Management
Tags applied by users to documents during system use will be aggregated in the Tag Management page. Administrators can edit and delete tags
Description
Tags are open to general users, similar to the concept of document keywords, to facilitate quick searching of related documents. Therefore, it is not recommended for administrators to overly interfere with tag data, unless inappropriate tag names appear.
Folder Rules
Description
Folder rules are a set of Javascript scripts running on the backend. You can set folder rules for folders to specify that they trigger script execution at specific time nodes to achieve some automated operations.
For example:
- When documents in the folder are changed, automatically trigger the script to send a message notification to the system administrator;
- When documents are uploaded to the folder, automatically convert the documents to PDF format;
- When documents are uploaded to the folder, add default properties to the documents.
- Click System Administration > Folder Rules
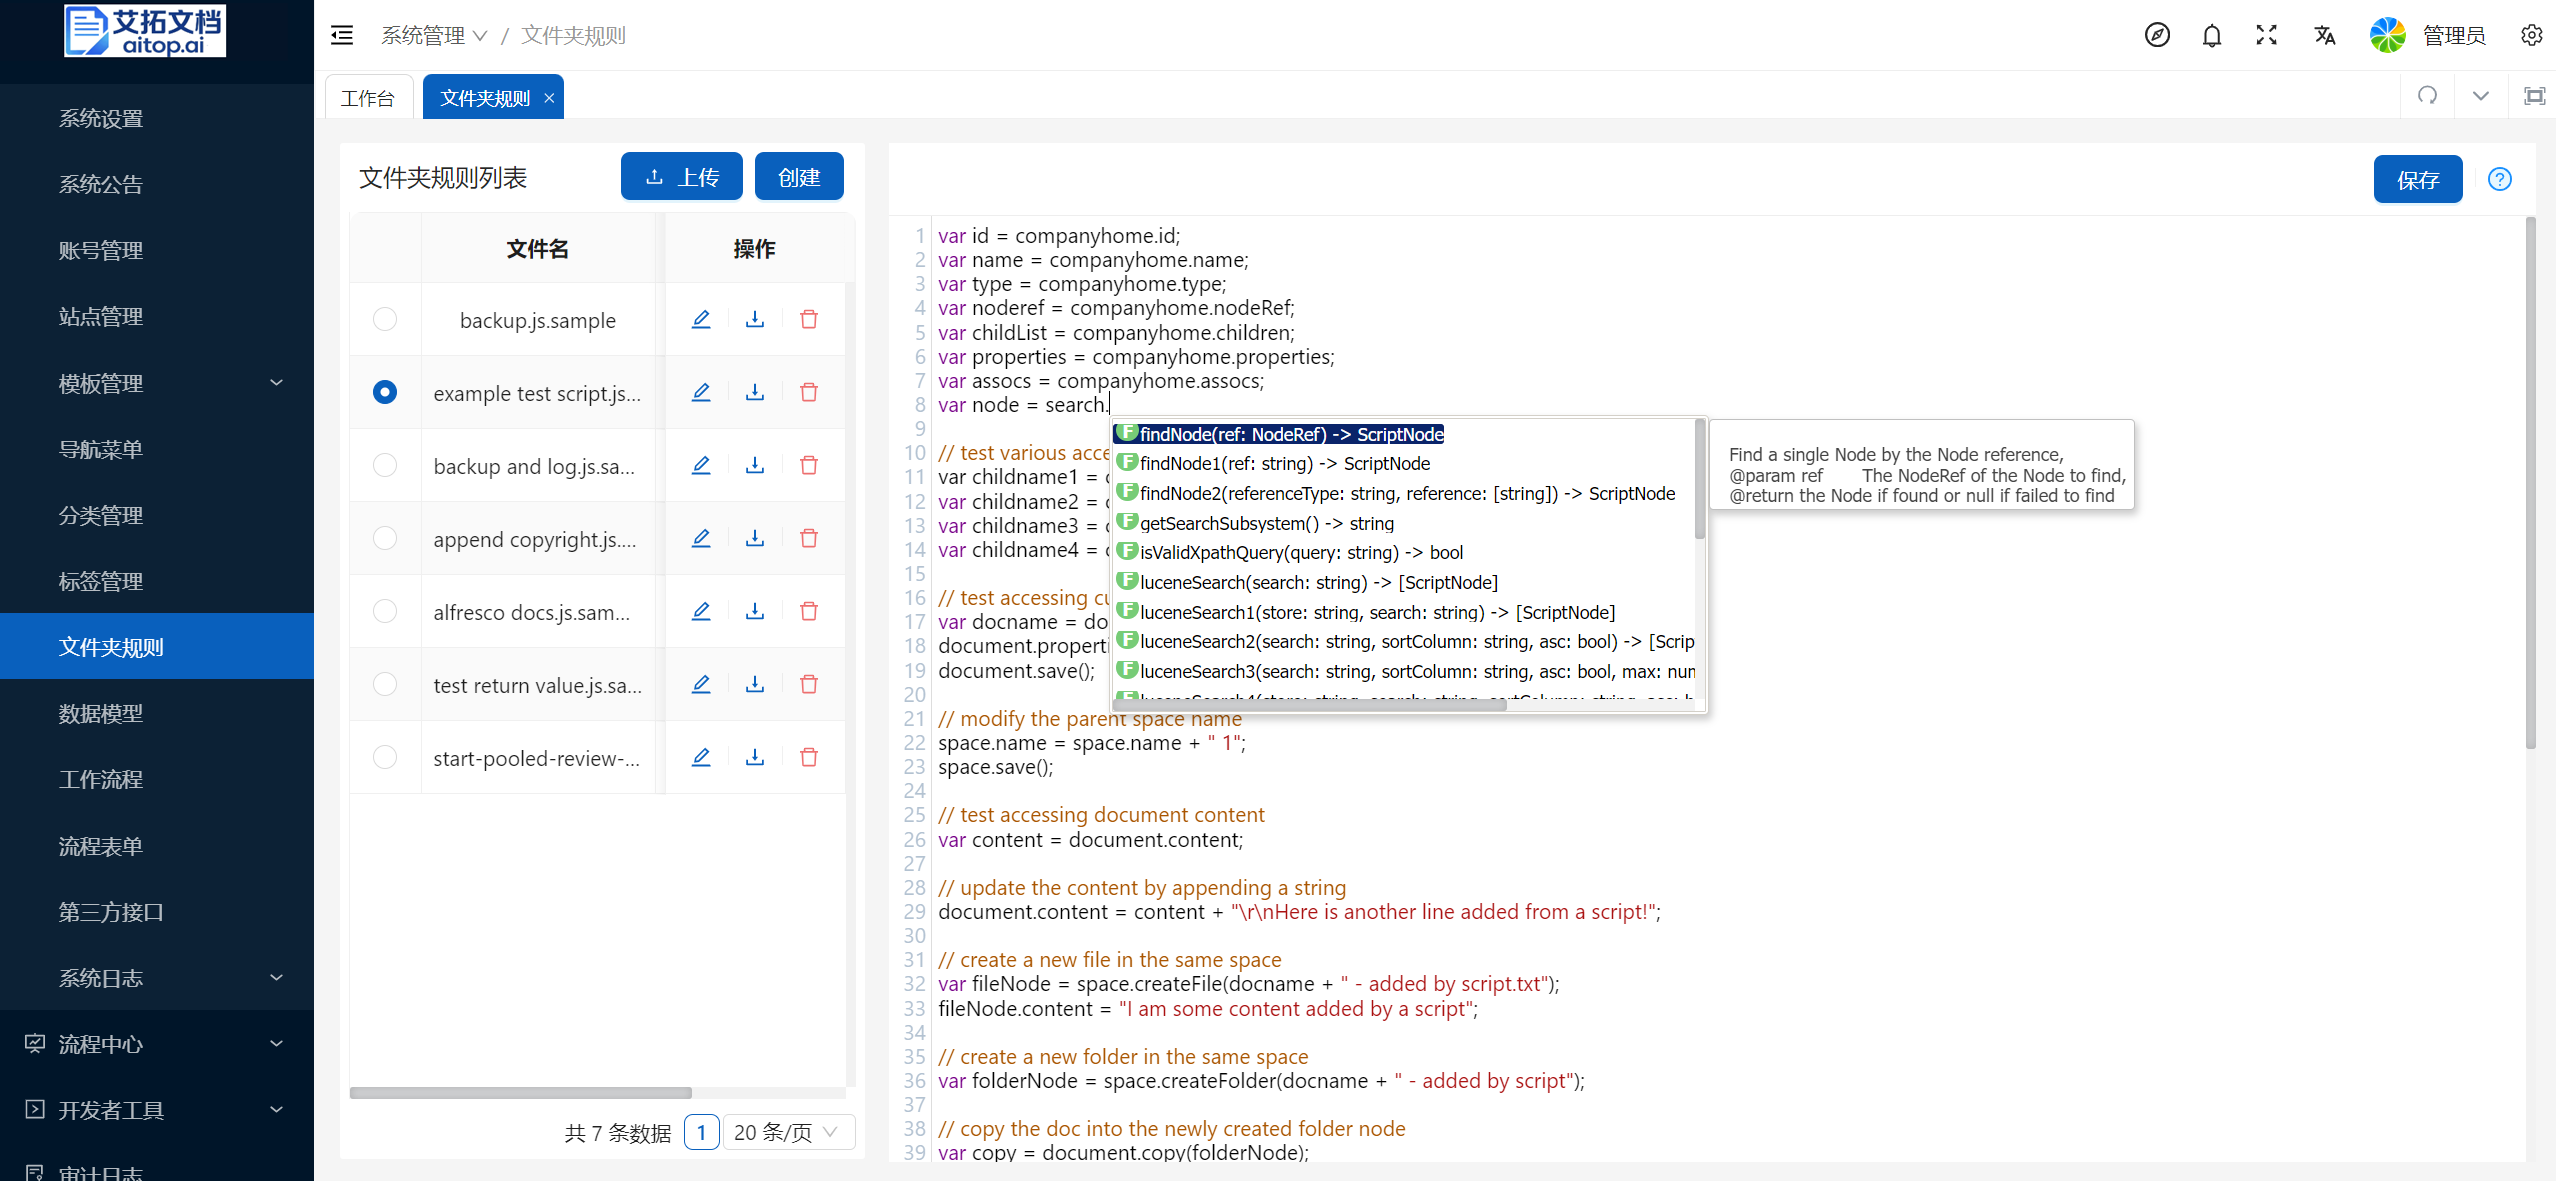
Click Upload or Create button on the left toolbar to create new folder rules
Select data in the Folder Rules list on the left, and you can directly modify the rule script and save on the right
For the Javascript syntax of folder rule scripts, please refer to: Alfresco JavaScript API
During the script writing process, the following shortcuts can assist development:
- Ctrl + Alt + Space: Auto complete
- Ctrl + Alt + F: Format selected/all code
- Ctrl + /: Comment/uncomment selected code
- Ctrl + I: Display variable type
Data Model
Description
Through data models, you can extend properties in different types of documents. For example: for contracts, you can extend properties through data models: contract number, party A, party B, effective date, etc.
For more knowledge about data models, please refer to Data Model
- Click System Administration > Data Model
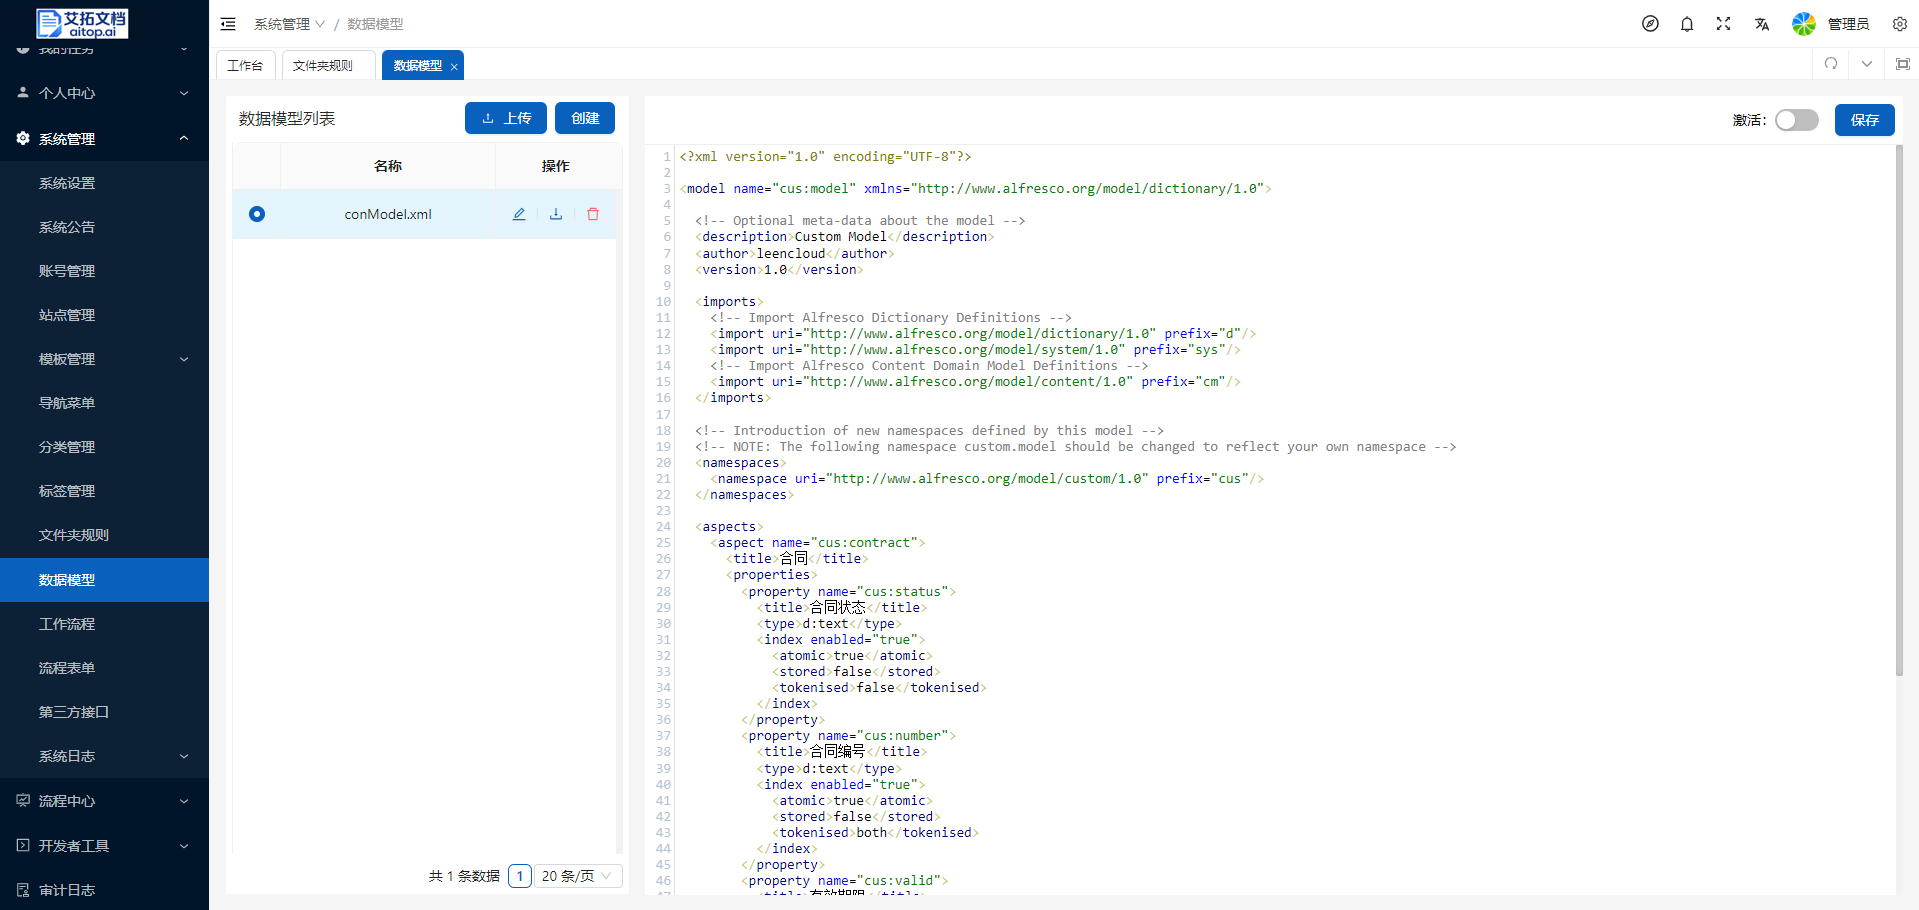
Click Upload or Create button on the left toolbar to create new data models
Select data in the Data Model list on the left, and you can directly modify the data model and save on the right
In the right toolbar, after clicking Activate, the data model will be applied to the system
The following is an example of a data model definition for reference:
<?xml version="1.0" encoding="UTF-8"?>

<model name="cus:model" xmlns="http://www.alfresco.org/model/dictionary/1.0">

	<!-- Optional meta-data about the model -->
	<description>Custom Model</description>
	<author>leencloud</author>
	<version>1.0</version>

	<imports>
		<!-- Import Alfresco Dictionary Definitions -->
		<import uri="http://www.alfresco.org/model/dictionary/1.0" prefix="d"/>
		<import uri="http://www.alfresco.org/model/system/1.0" prefix="sys"/>
		<!-- Import Alfresco Content Domain Model Definitions -->
		<import uri="http://www.alfresco.org/model/content/1.0" prefix="cm"/>
	</imports>

	<!-- Introduction of new namespaces defined by this model -->
	<!-- NOTE: The following namespace custom.model should be changed to reflect your own namespace -->
	<namespaces>
		<namespace uri="http://www.alfresco.org/model/custom/1.0" prefix="cus"/>
	</namespaces>

	<aspects>
		<aspect name="cus:contract">
			<title>Contract</title>
      <properties>
        <property name="cus:status">
          <title>Contract Status</title>
          <type>d:text</type>
          <index enabled="true">
            <atomic>true</atomic>
            <stored>false</stored>
            <tokenised>false</tokenised>
          </index>
        </property>
        <property name="cus:number">
          <title>Contract Number</title>
          <type>d:text</type>
          <index enabled="true">
            <atomic>true</atomic>
            <stored>false</stored>
            <tokenised>both</tokenised>
          </index>
        </property>
        <property name="cus:valid">
          <title>Valid Period</title>
          <type>d:date</type>
          <index enabled="true">
            <atomic>true</atomic>
            <stored>false</stored>
            <tokenised>false</tokenised>
          </index>
        </property>
        <property name="cus:confirm">
          <title>Contract Confirmer</title>
          <type>d:text</type>
          <index enabled="false">
          </index>
        </property>
      </properties>
		</aspect>
  </aspects>
</model>
Workflow Process
Description
Through the workflow process design page in the system background, you can customize workflows.
For workflow design, knowledge of workflow (BPMN2.0) and Alfresco JavaScript API is required. Please refer to:
- Click System Administration > Workflow Process
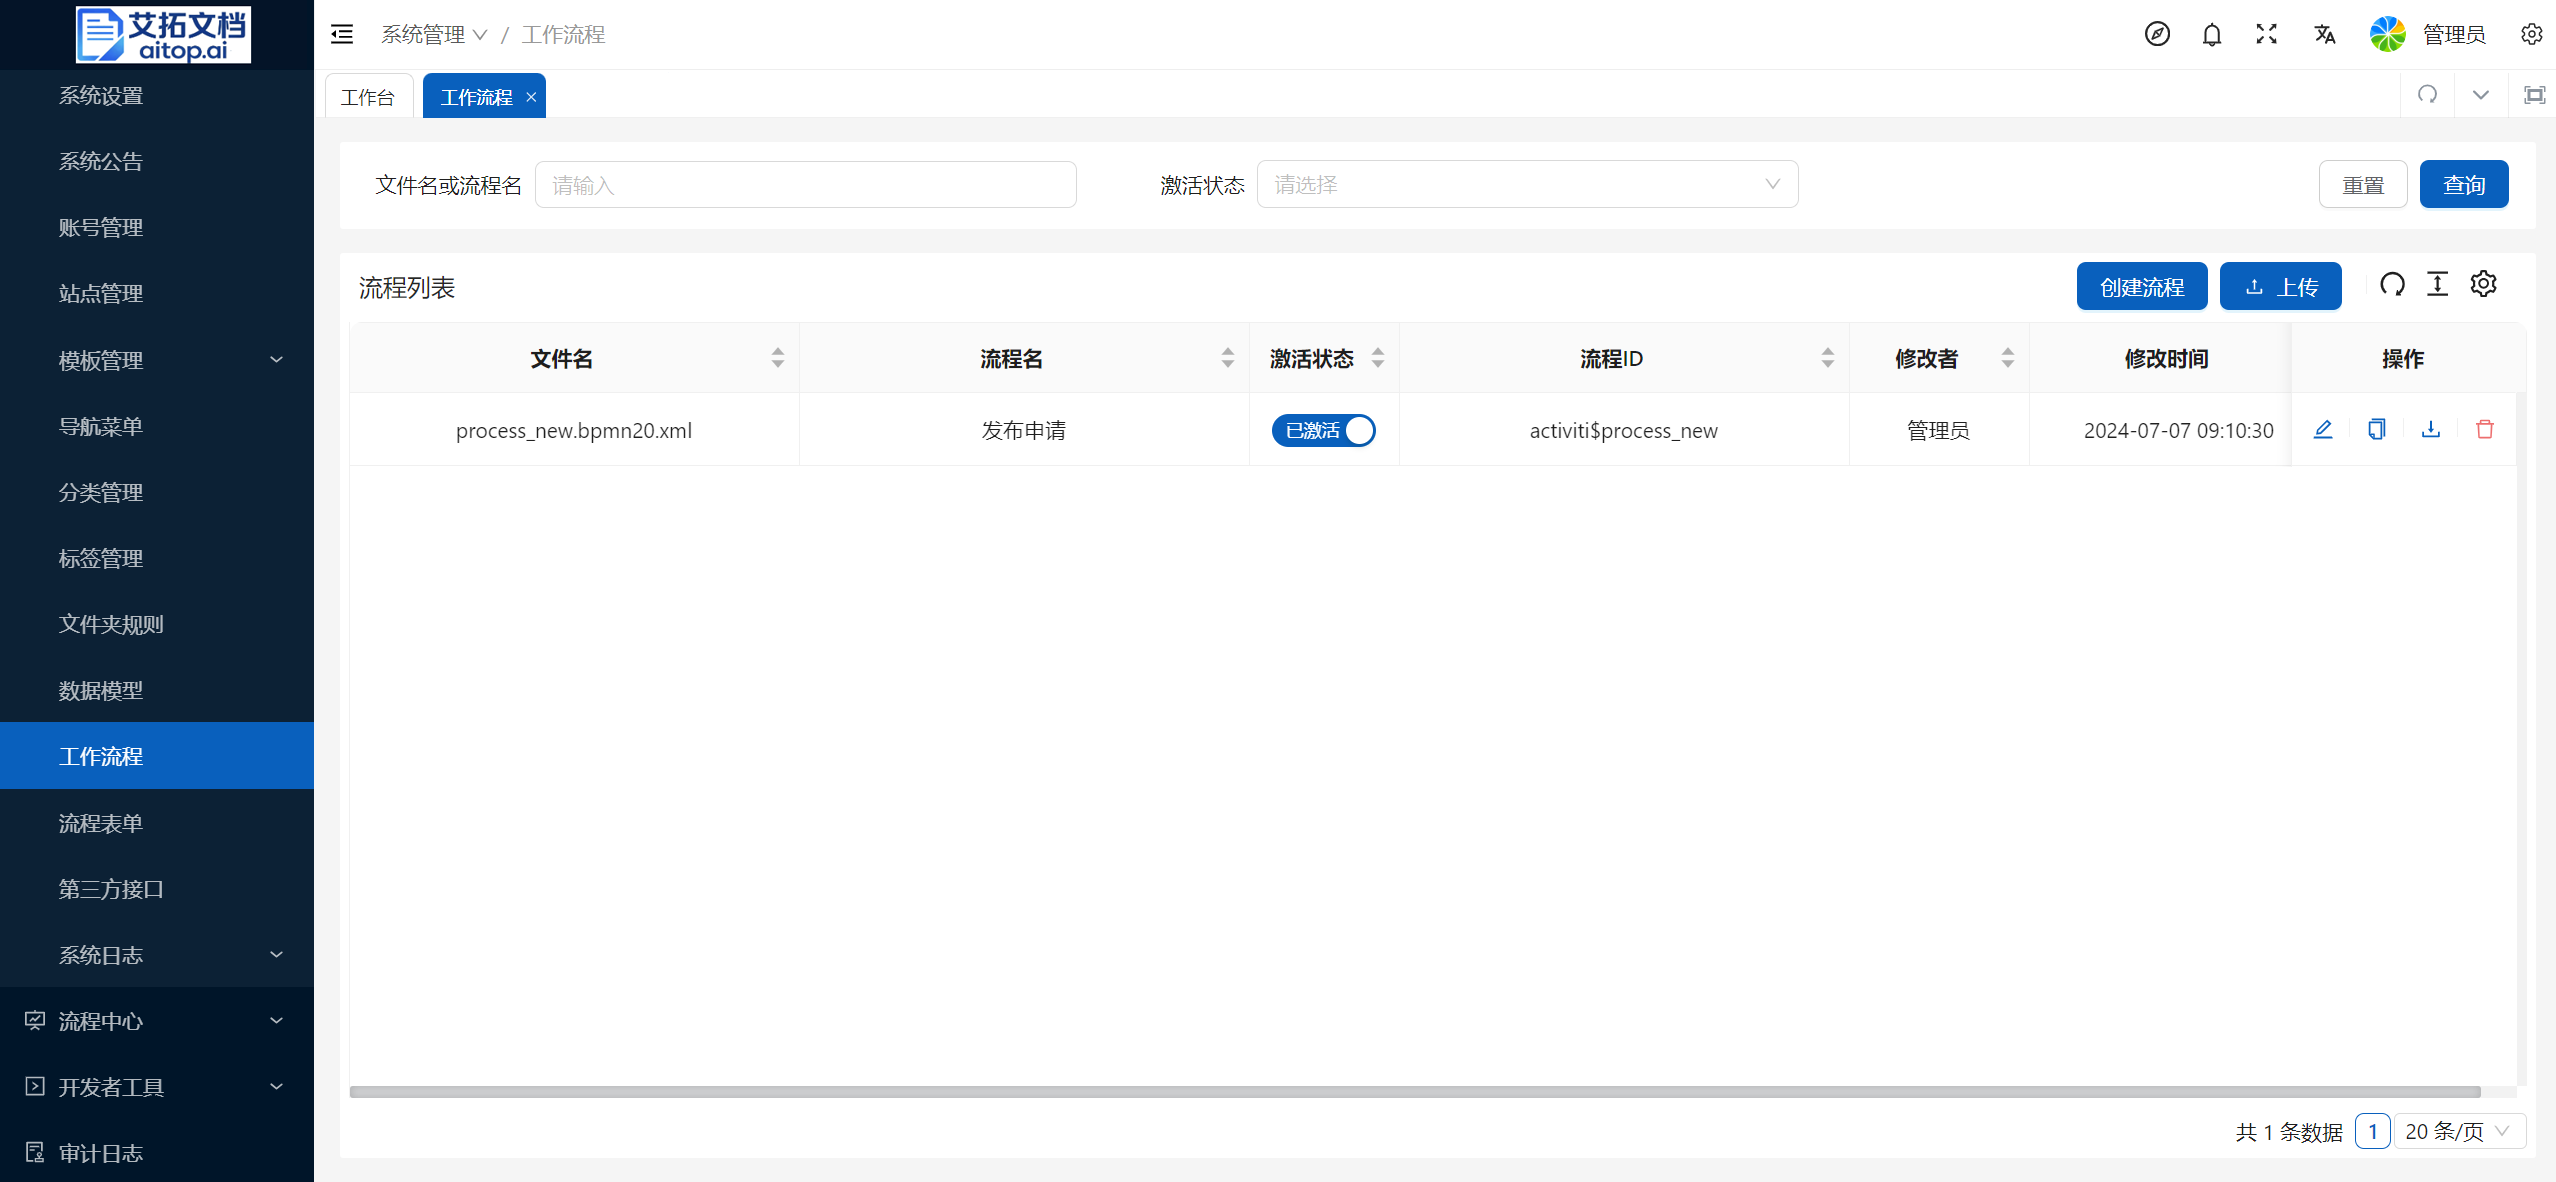
Click Create Process or Upload button on the toolbar to create new processes
Click the list operation column to Edit, Copy, Download, Delete process files
After the process is created, you need to click Activate in the Activate Status column in the process list to officially publish it to the system
Process Form
Description
Through the process form design page in the system background, you can customize workflow approval forms.
For specific content of form design, please refer to:
- Click System Administration > Process Form
Click Create Form or Upload button on the toolbar to create new forms
Click the list operation column to Edit, Copy, Delete form files
After the form is created, you need to click Activate in the Activate Status column in the form list to be selected during process design
Third-party Interface
1. Create Application in Enterprise WeChat
- Use the Enterprise WeChat administrator WeChat account to scan the QR code to log in to the Enterprise WeChat backend
- Click Application Management > Self-built > Create Application, fill in the application information, click Create Application to enter the specific application page
- Application logo: The application icon displayed in the Enterprise WeChat workbench
- Application name: The application name displayed in the Enterprise WeChat workbench
- Application introduction: Optional
- Visible range: Who can access the application in Enterprise WeChat. Generally, select the entire company
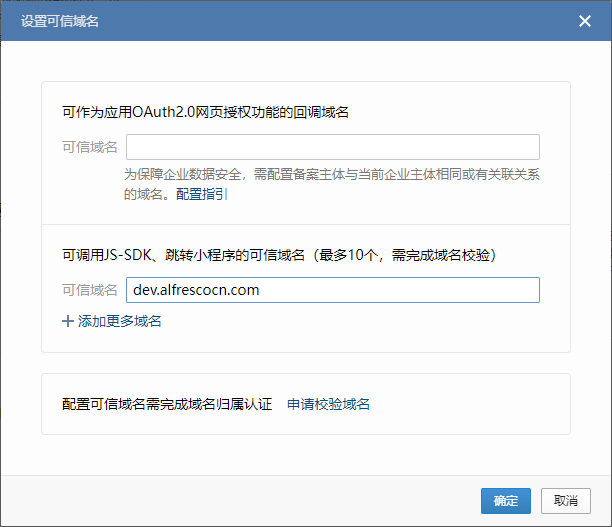
- Set trusted domain
Click Developer Interface > Web Authorization and JS-SDK > Set Trusted Domain, fill in the application domain name in the second column, and click Confirm
- Set enterprise trusted IP
Click Developer Interface > Enterprise Trusted IP > Configuration, fill in the server IP, and click Confirm
2. Configure Enterprise WeChat Application Call Parameters in AiTop
Click System Administration > Third-party Interface > WeChat
Use the company's Enterprise WeChat administrator account to log in to Enterprise WeChat, copy the following information and fill it in the interface settings page, then click Save:
- Enterprise ID (corpid)
- Document Management
- AgentId
- Application credential key (corpsecret)
After setting up, you can batch import organizations and users from Enterprise WeChat on the System Administration > Account Management page
Copy the mobile homepage address, return to Enterprise WeChat backend > Application specific page > Application Homepage, click the Set button, select Web Address, copy the mobile homepage address to the Web Address bar, and check Always enter homepage in WeChat plugin, then click Confirm. After that, you can access AiTop mobile terminal through the Enterprise WeChat workbench.
DingTalk
Description
The specific operation of DingTalk is similar to Enterprise WeChat. Please refer to it.
Click System Administration > Third-party Interface > DingTalk
Use the company's DingTalk administrator account to log in to DingTalk, copy the following information and fill it in the interface settings page, then click Save:
- AgentId
- AppKey
- AppSecret
- After setting up, you can batch import organizations and users from DingTalk on the System Administration > Account Management page
System Log
- Click System Administration > System Log
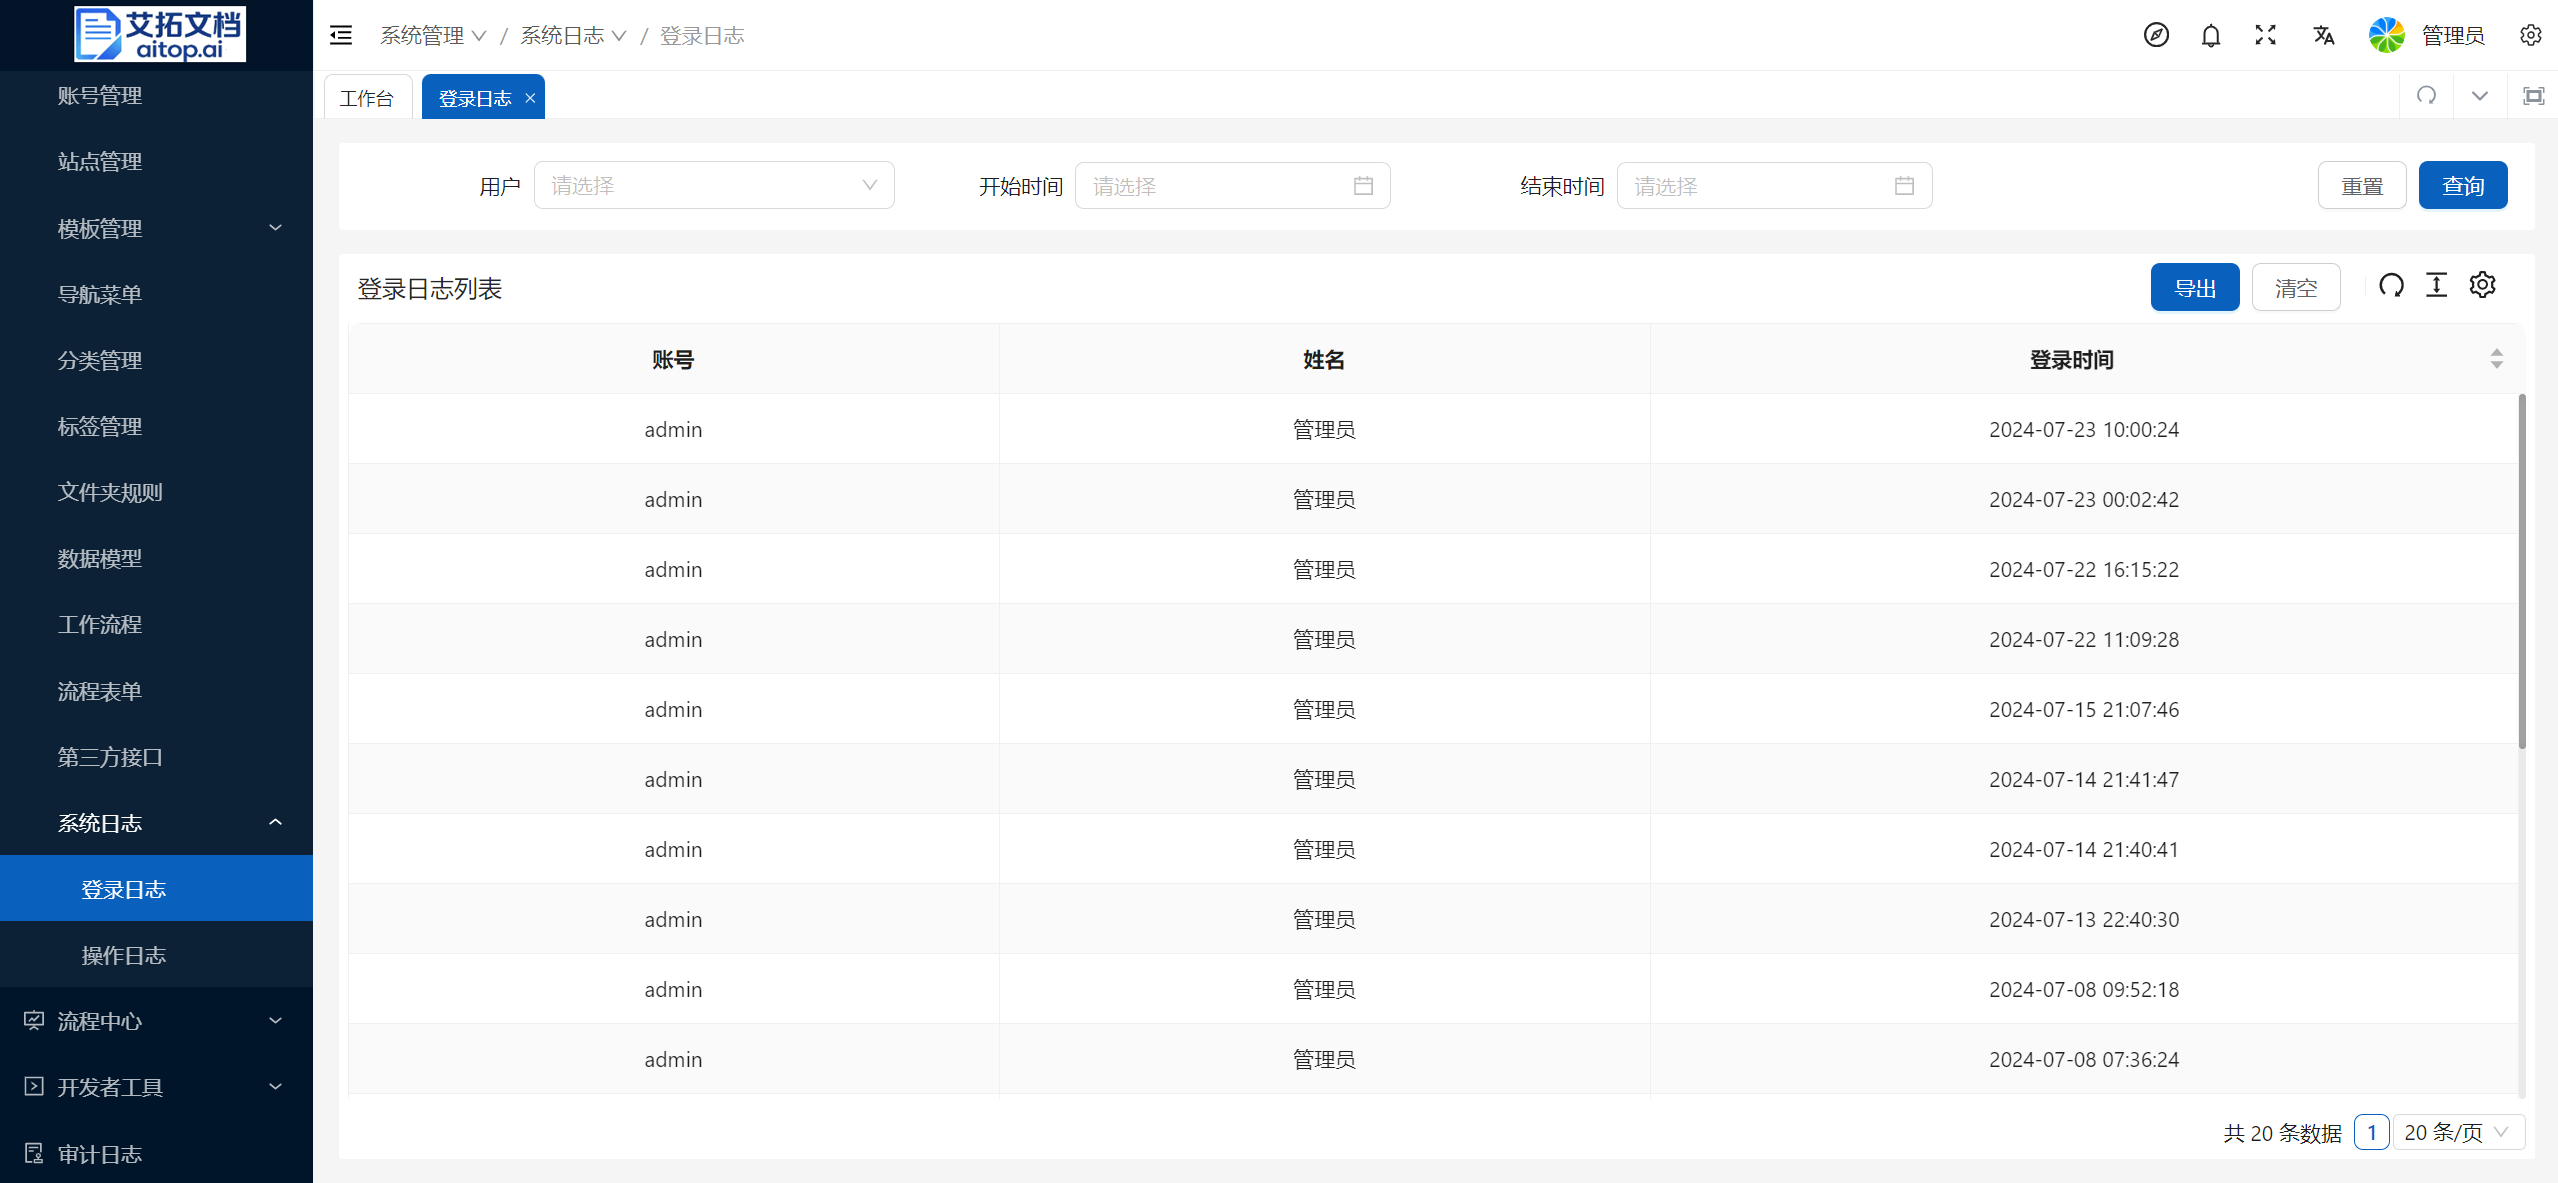
- In System Log, you can view the system's Login Log and Operation Log