General Site
Introduction
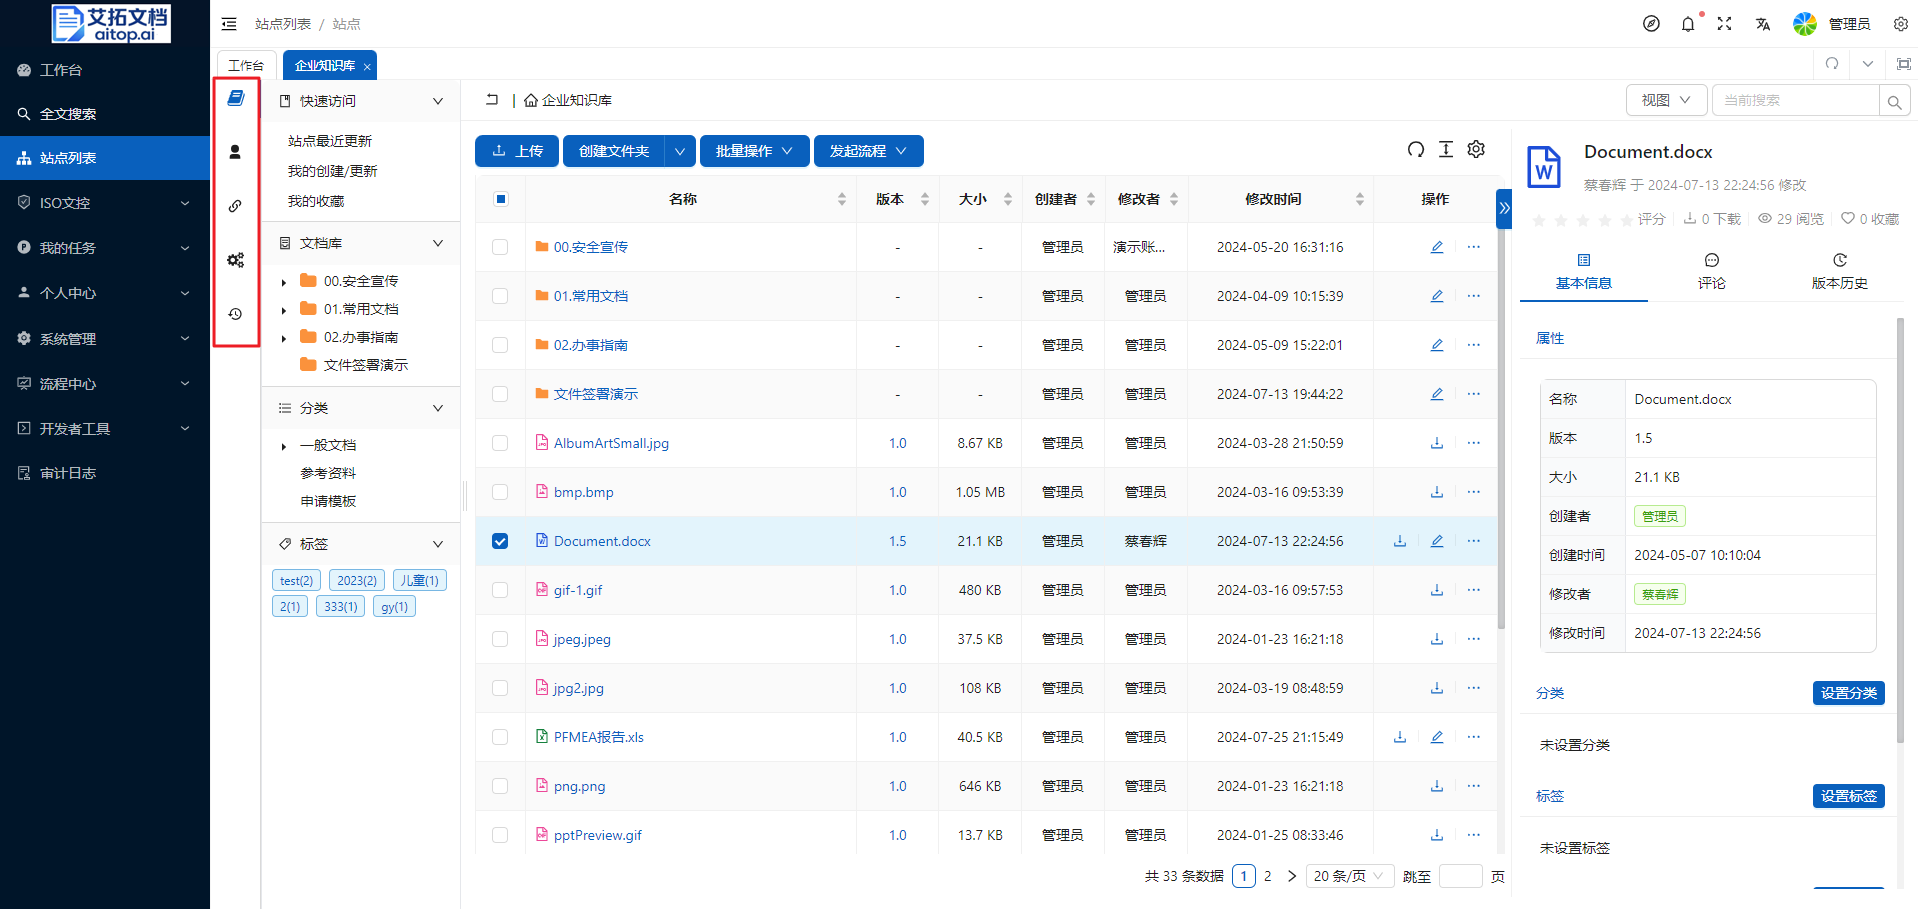
After entering a site, on the leftmost side is the function navigation bar, including:
- Document Library: Main operation page
- Site Members and Permissions: Set site members and permissions
- Share Links: Unified management of external links shared by the site
- Site Settings: Includes approval processes, categories, category root nodes, tags, auto display details, rule settings, etc.
- Operation Records: Site operation logs
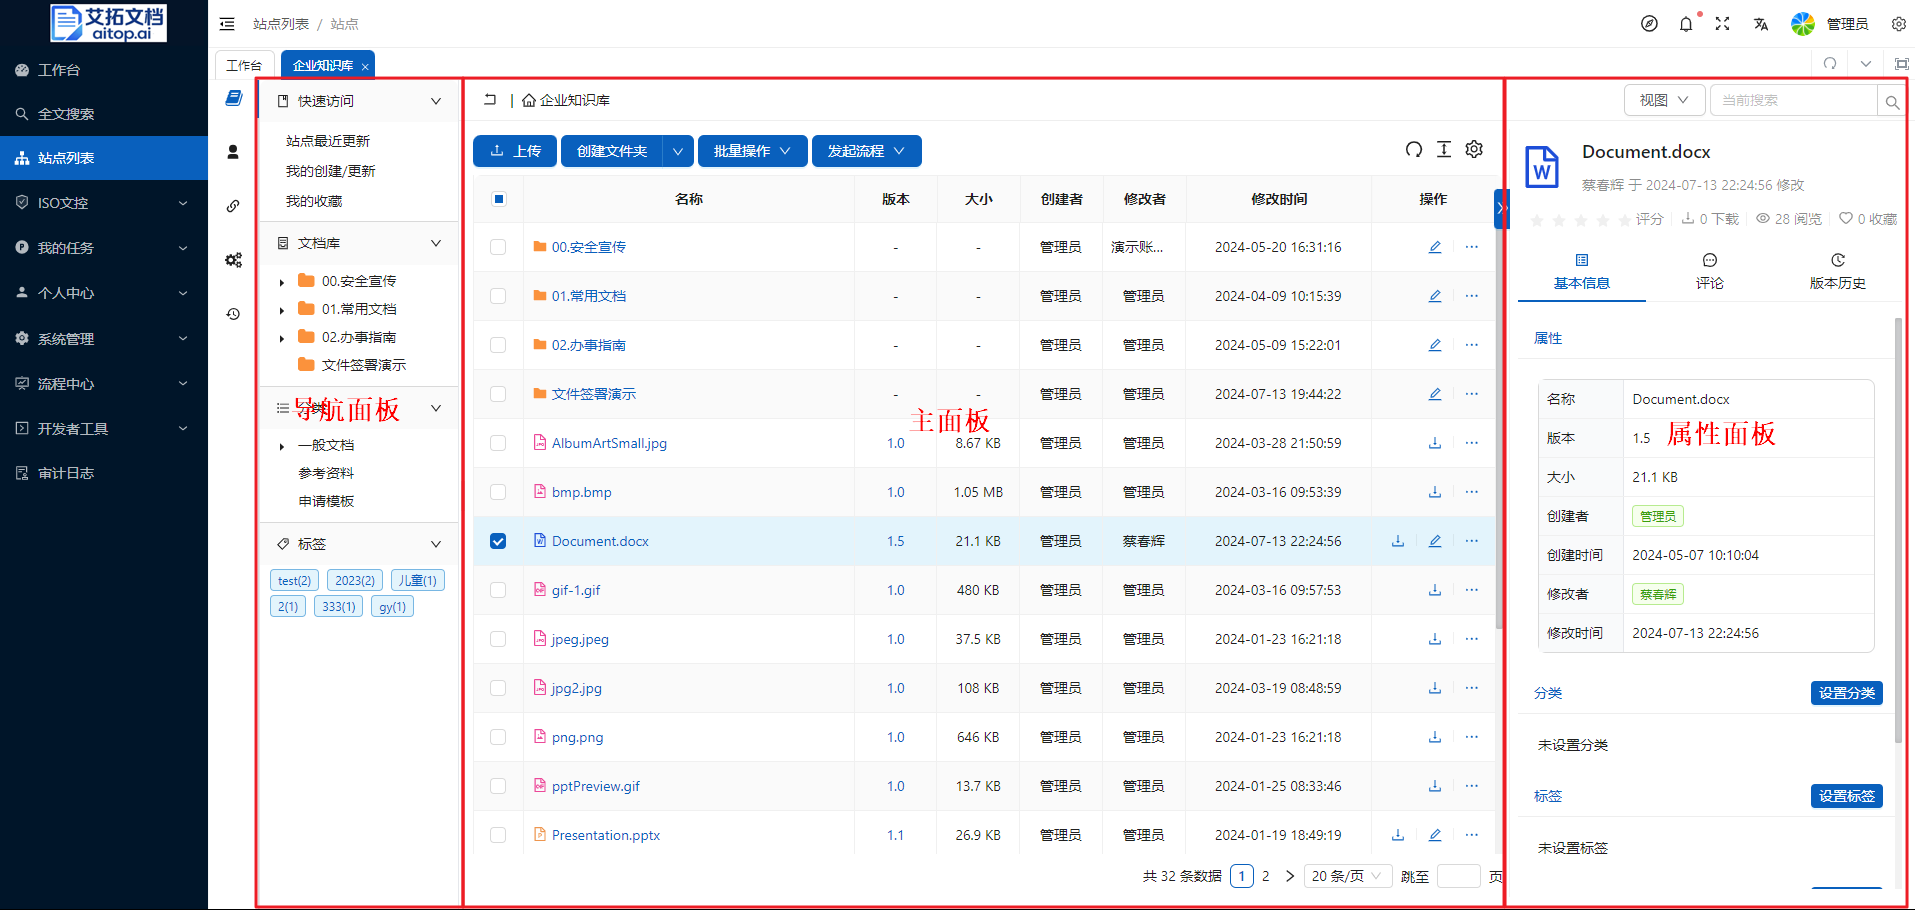
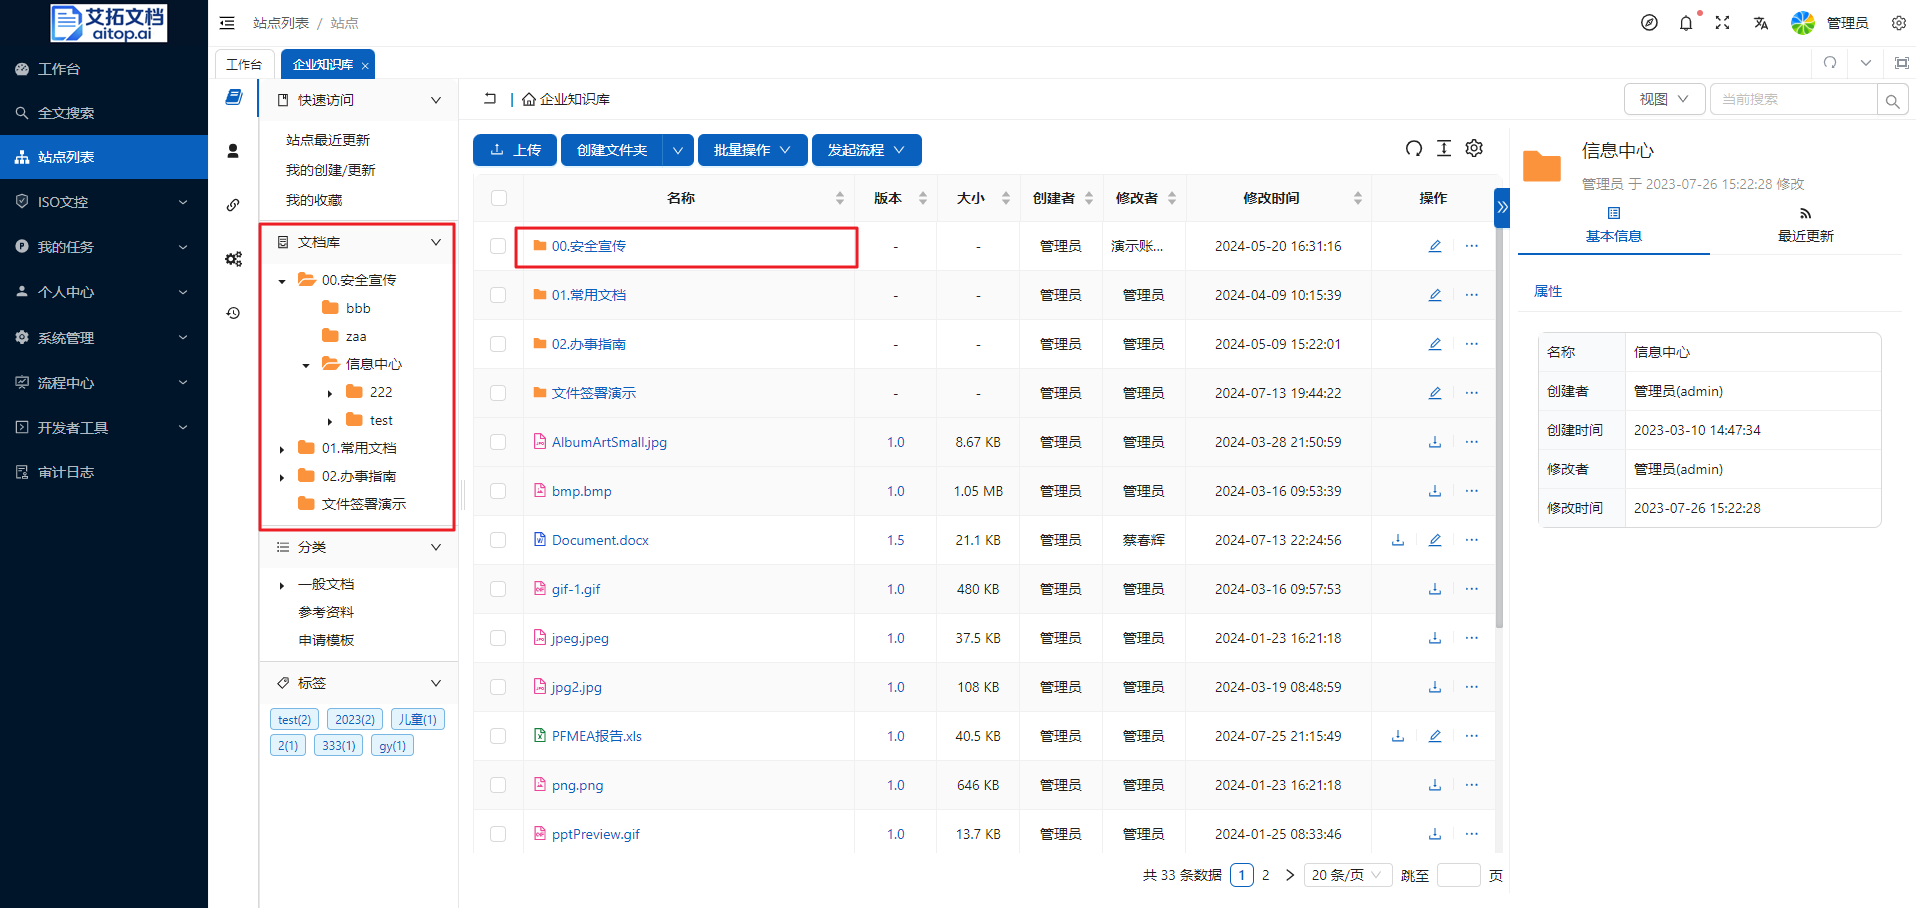
The document library page of a general site mainly consists of the following three parts:
- Navigation Panel: Function navigation area. This panel contains quick access, document library, categories, tags, and other functional navigation areas.
- Main Panel: The content of this panel depends on the content selected in the left navigation panel. This panel usually contains a list of folders and documents, as well as related operation buttons.
- Properties Panel: This panel usually contains property information related to the item selected in the main panel, as well as operation buttons for some functions. The displayed property information and operation buttons depend on the permission settings of the selected item (folder, document).
Creating and Uploading
Create Folders
The purpose of creating folders is to structure documents and manage them through folders. Generally, after a site is created, you should first plan the folder structure and expand or modify it as needed.
- Create top-level folder: After entering the site, without selecting any folder in the left document library, click the "Create Folder" button.
- Create subfolder: After entering the site, first select the parent folder, then click the "Create Folder" button, which will create a subfolder under that parent folder.
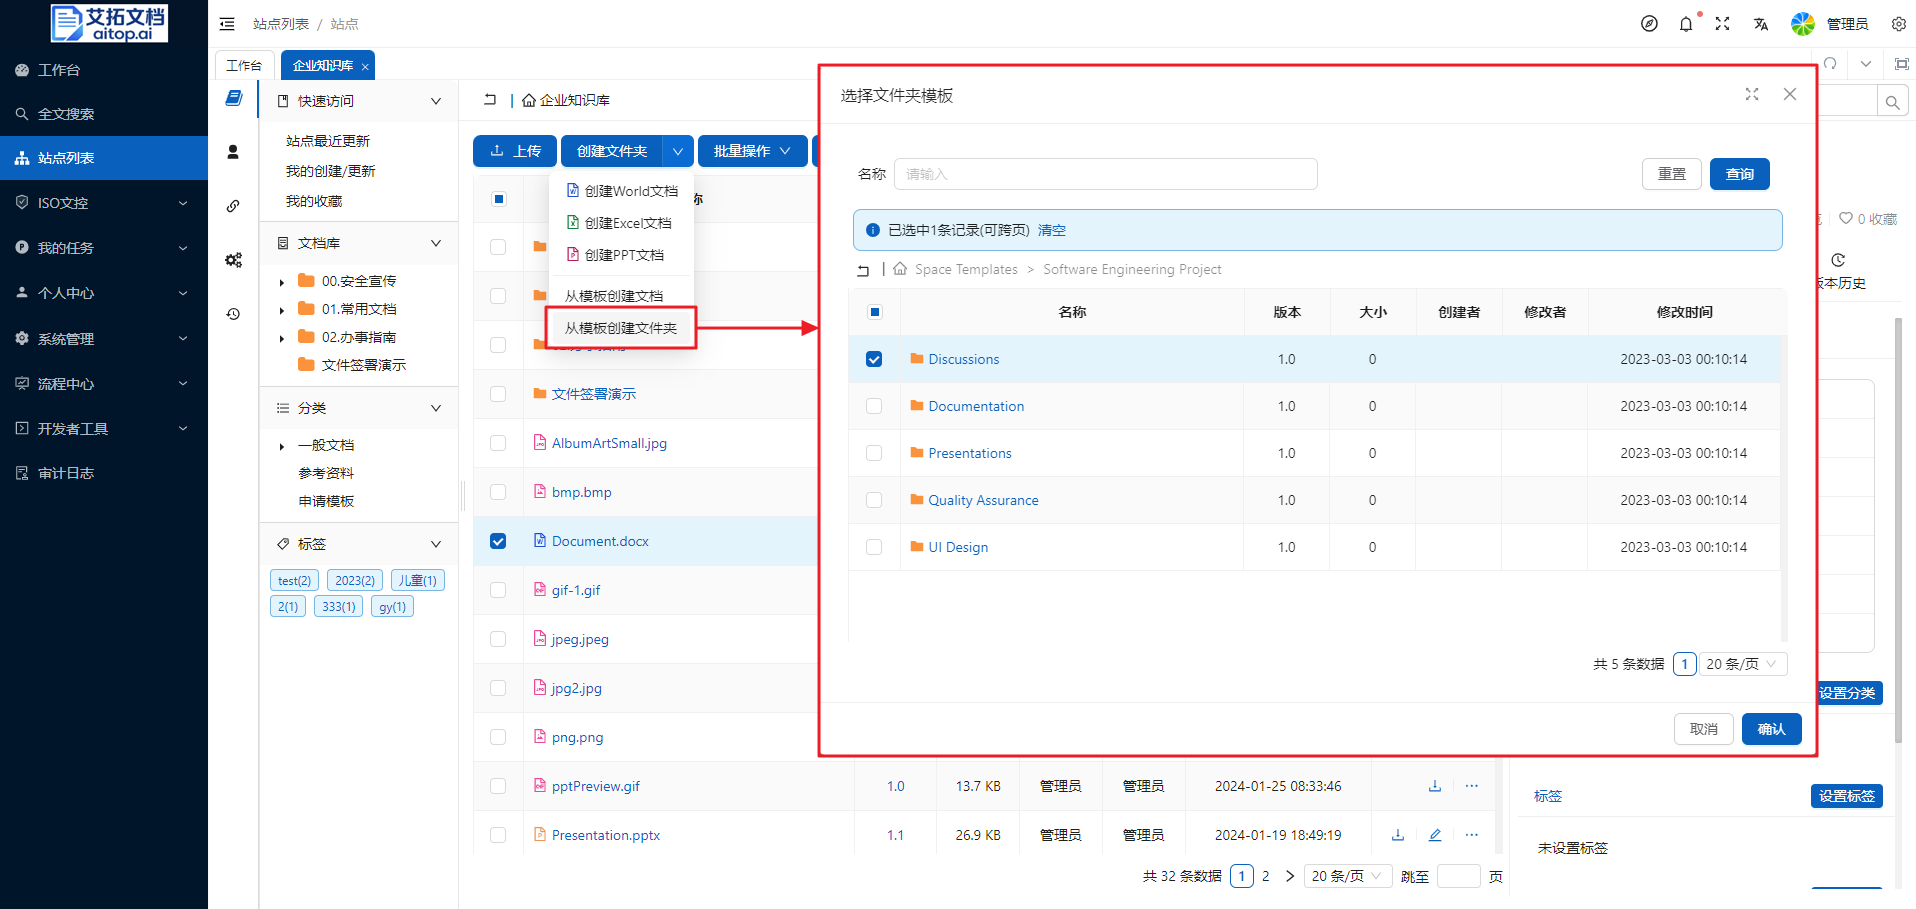
- Create folder from template: To help users quickly initialize the folder structure, you can use the "Create folder from template" function to batch import the preset folder structure in the system into the corresponding directory. The preset folder structure in the system can be maintained by the system administrator in the system background.
Upload Files
There are two ways to upload files:
- Select upload: Click the upload button
- Drag and drop upload: Directly drag files/folders from your local computer to the browser window
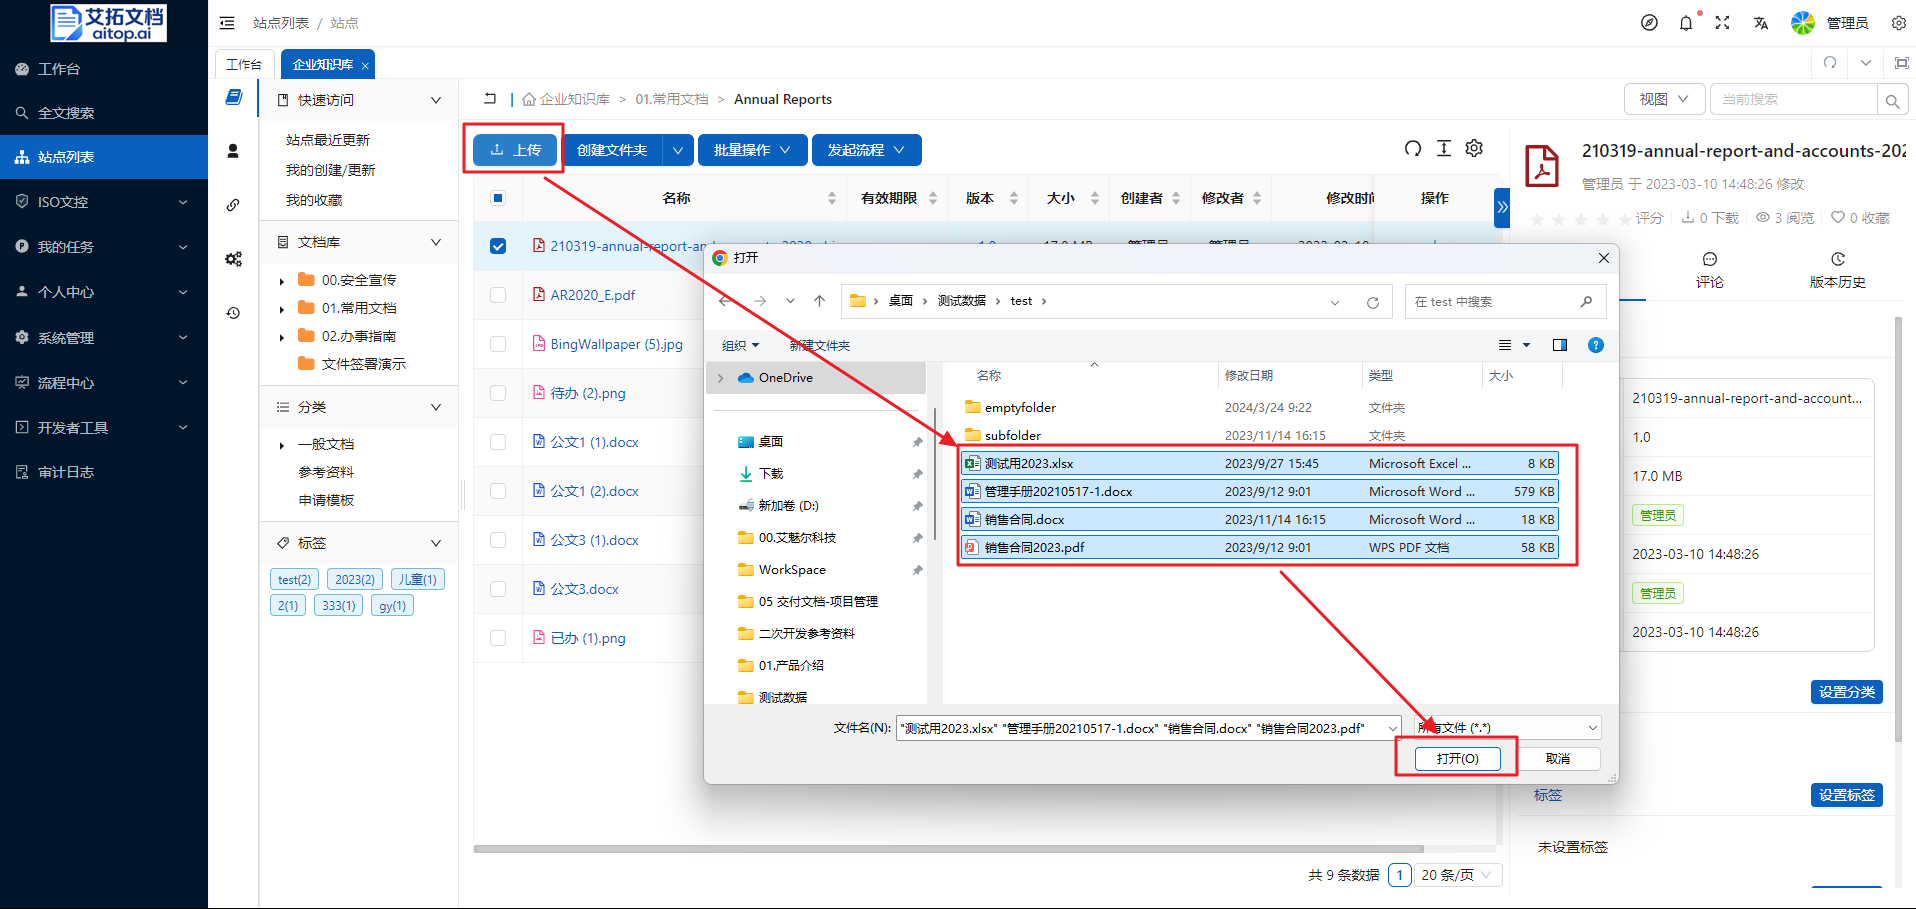
Select Upload
- Select the folder where you want to upload files
- Click the Upload button on the toolbar, a file selection window will pop up, you can select one or more files, click the Open button
- After the upload starts, you can see the list of files you uploaded and the upload progress in the upload window in the lower right corner
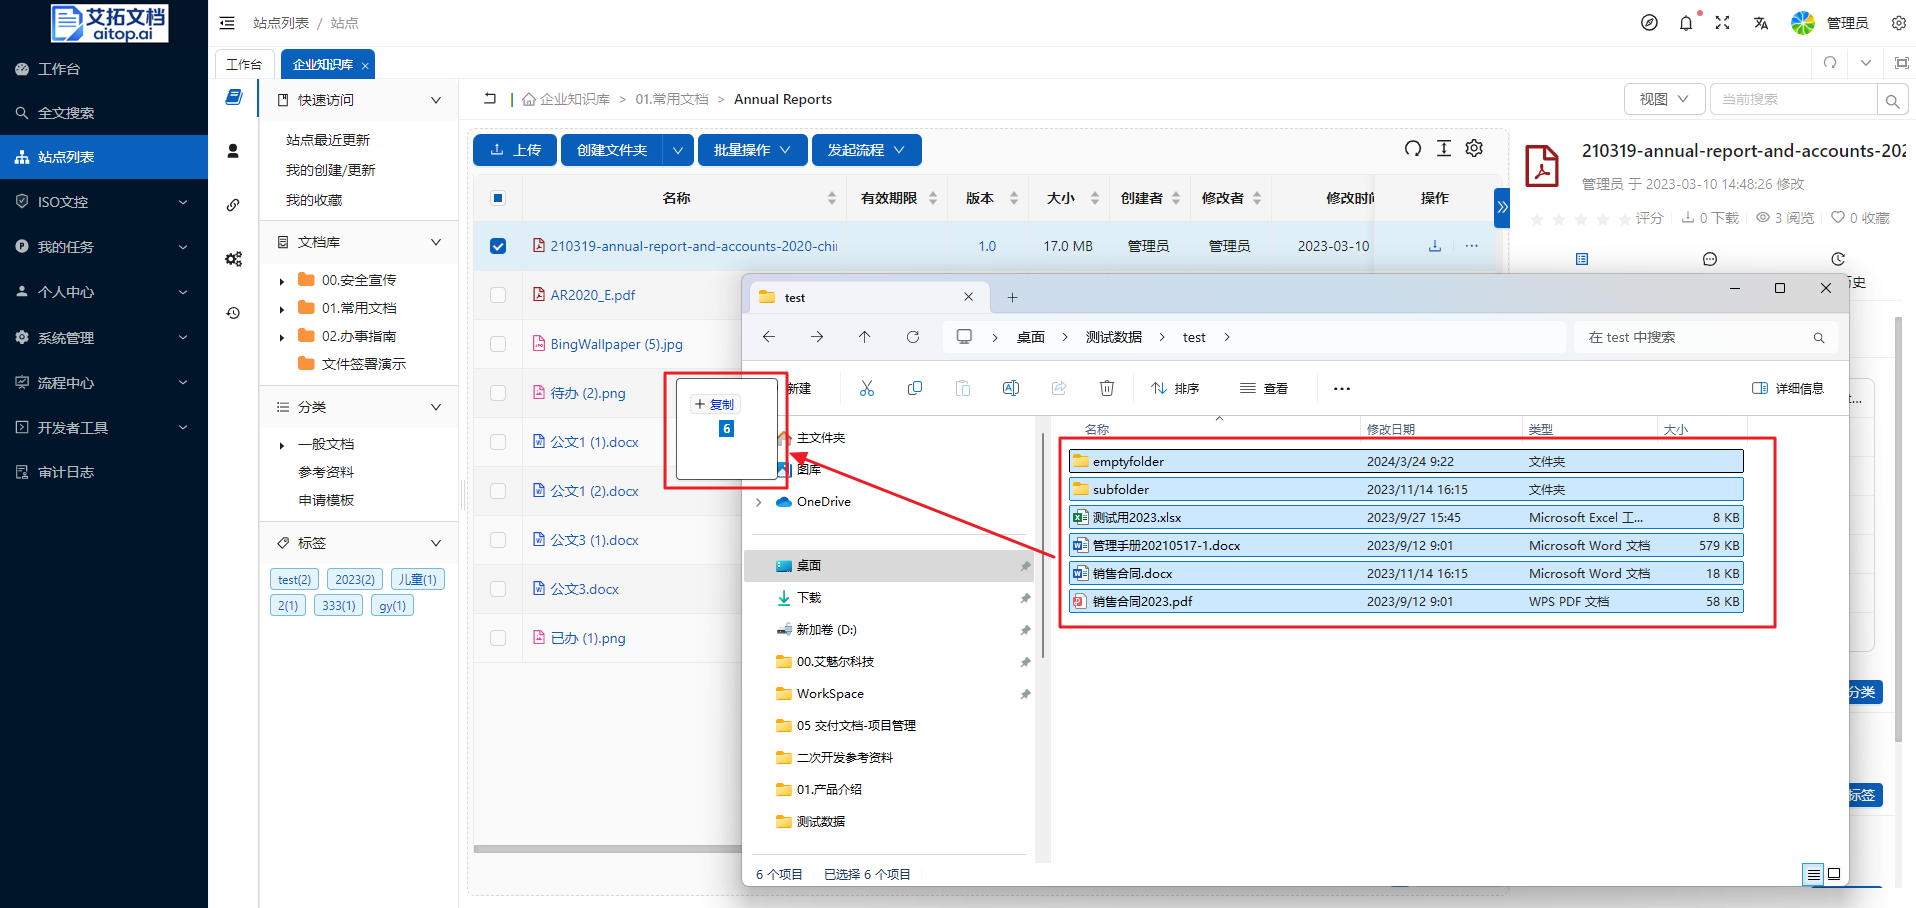
Drag and Drop Upload
- Select the folder where you want to upload files
- Drag files/folders from your local computer to the browser window
Opening
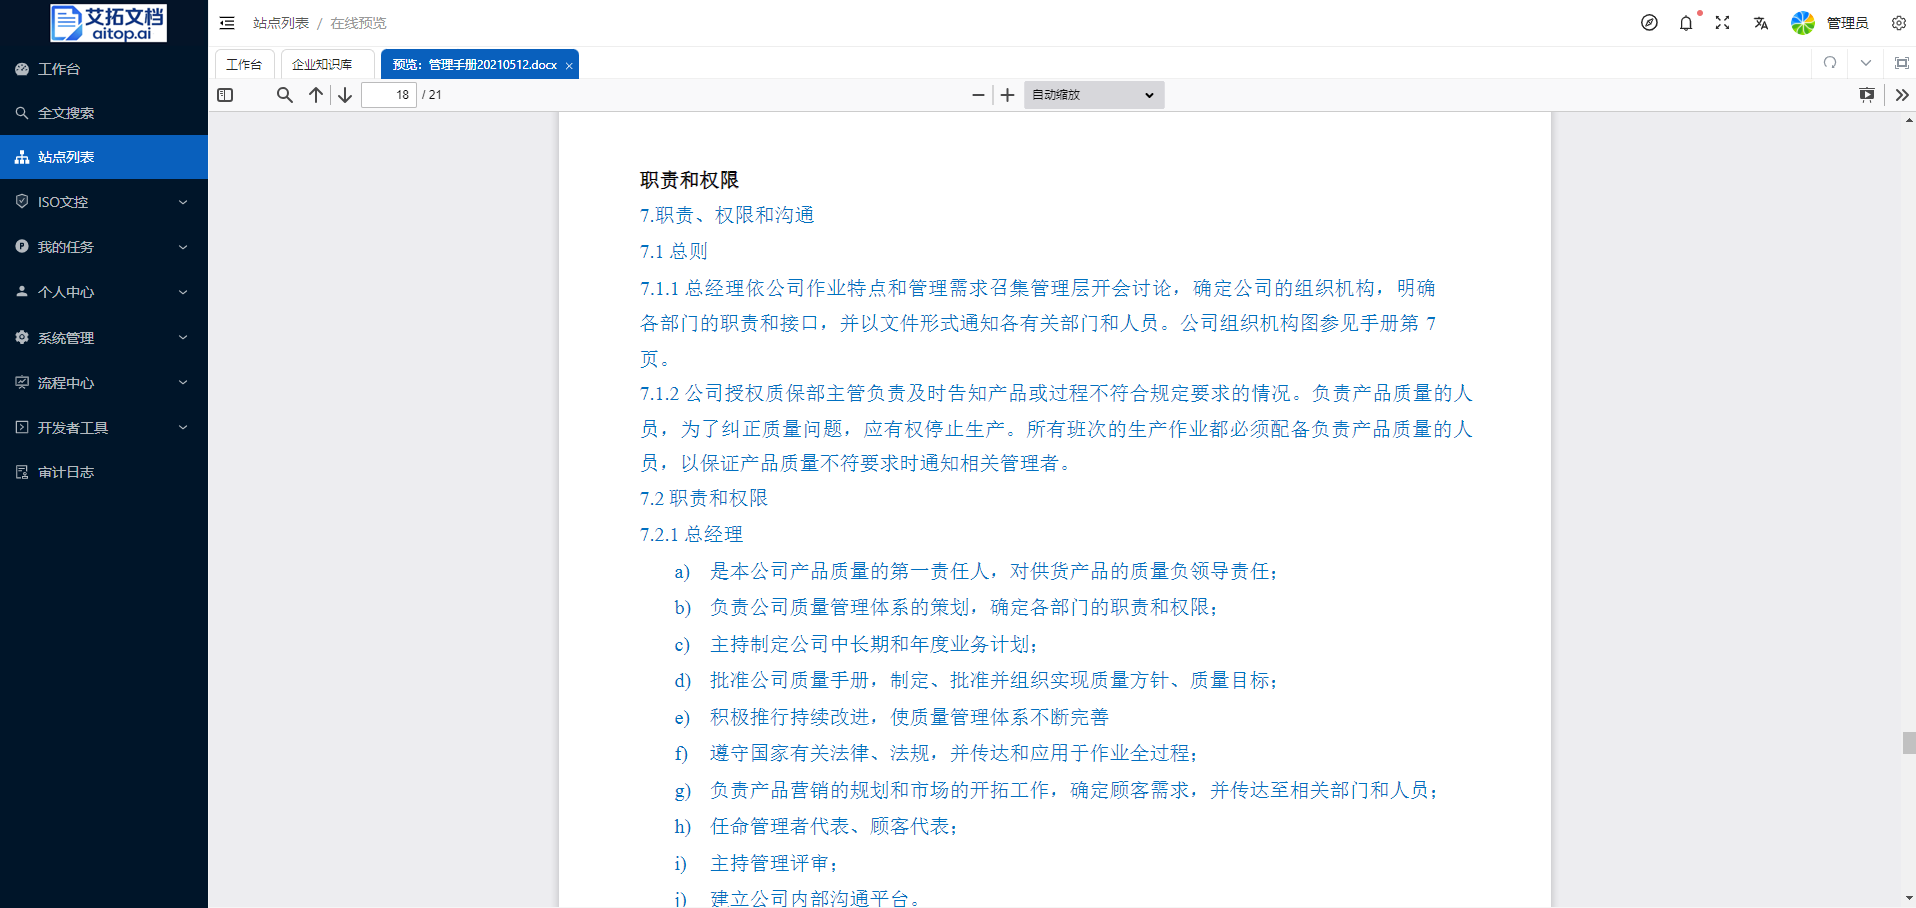
Open Document (Online Browsing)
The system supports online browsing of the following file formats:
- MS Office (Word, Excel, PowerPoint)
- TXT
- Images supported by H5 format
- Audio and video supported by H5 format
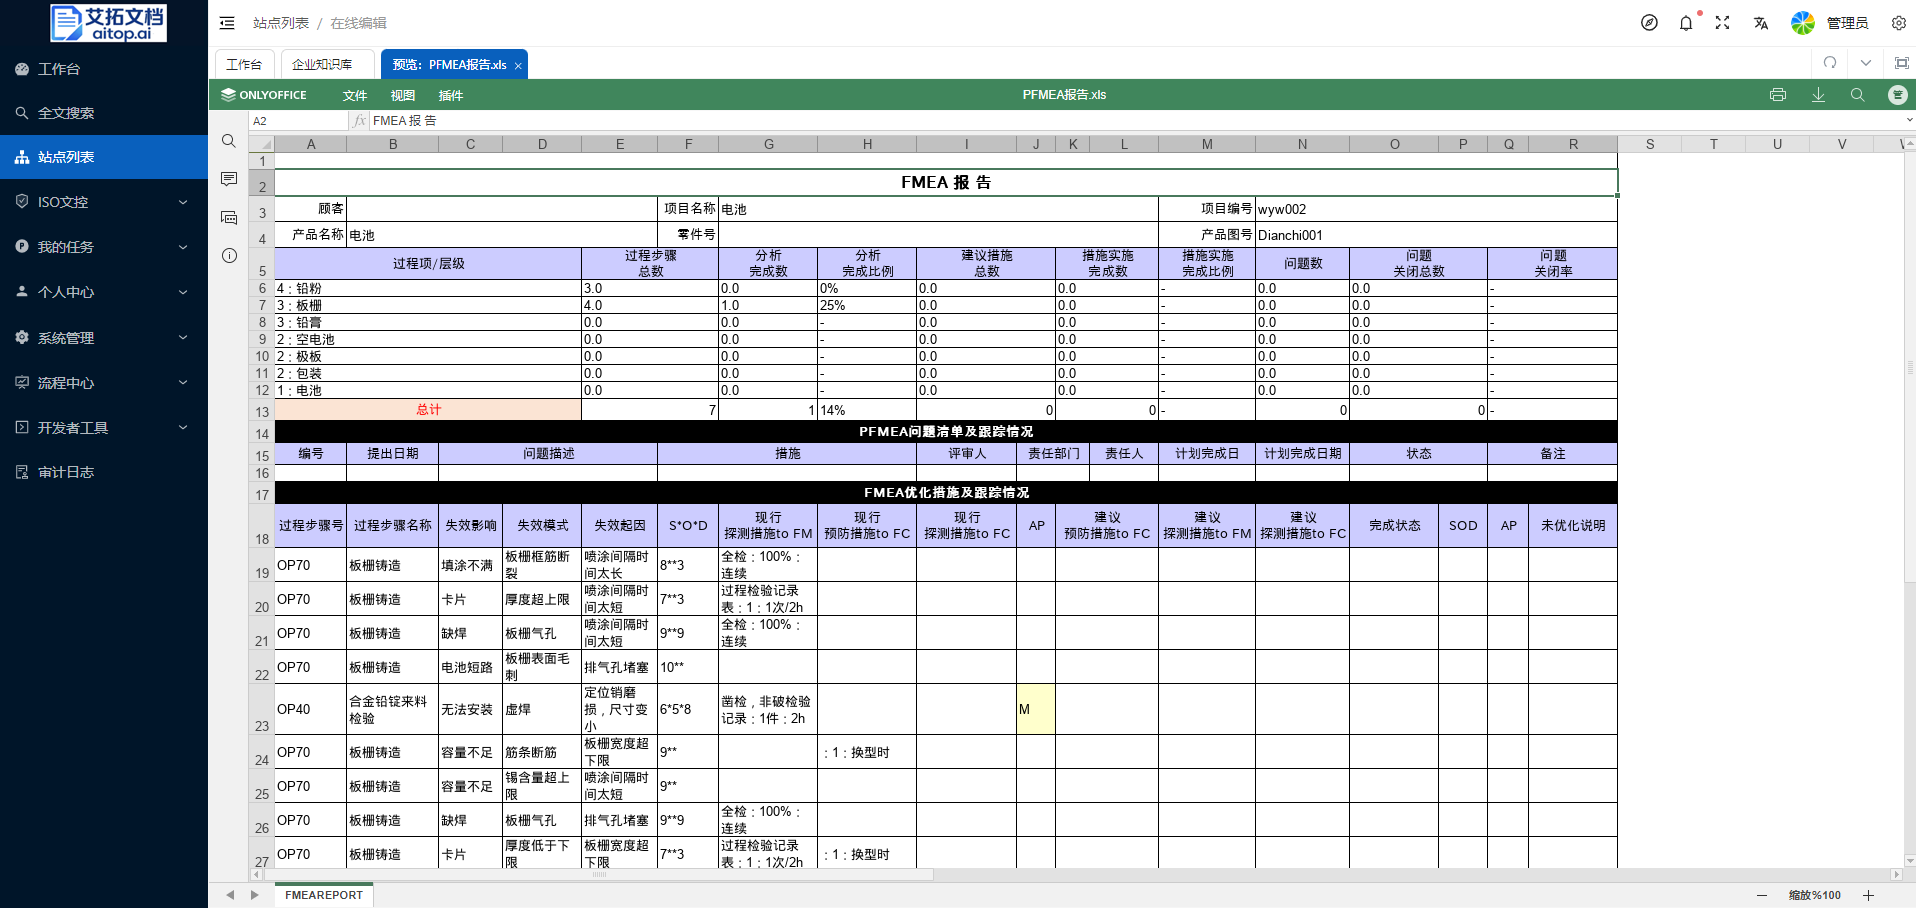
Among them, MS Office has two preview methods to choose from: PDF previewer, Onlyoffice previewer, which can be set by the system administrator in the system background: System Management > System Settings > Basic Settings > Office File Online Preview Method / Excel Online Preview Method
- PDF Previewer
- Onlyoffice Previewer
Open Folder
There are two ways to open a folder, similar to the operation of "File Explorer" on the local computer:
- Expand the folder structure in the left navigation panel and click the folder name
- Click the folder name in the main panel area
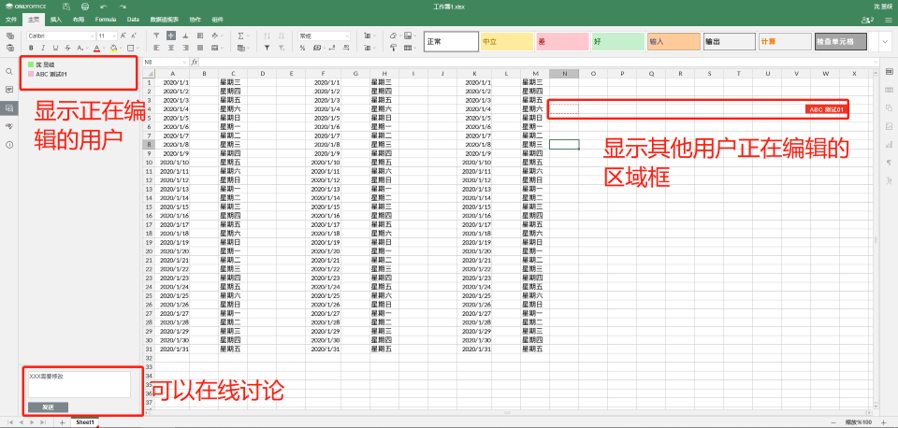
Online Editing
The system supports multi-user real-time online collaborative editing, and different users can edit a document at the same time.
After multiple people edit at the same time, the system automatically saves the changed file when the last person closes the editing interface.
Download
Single Document Download
Click the Download button in the operation column of the file list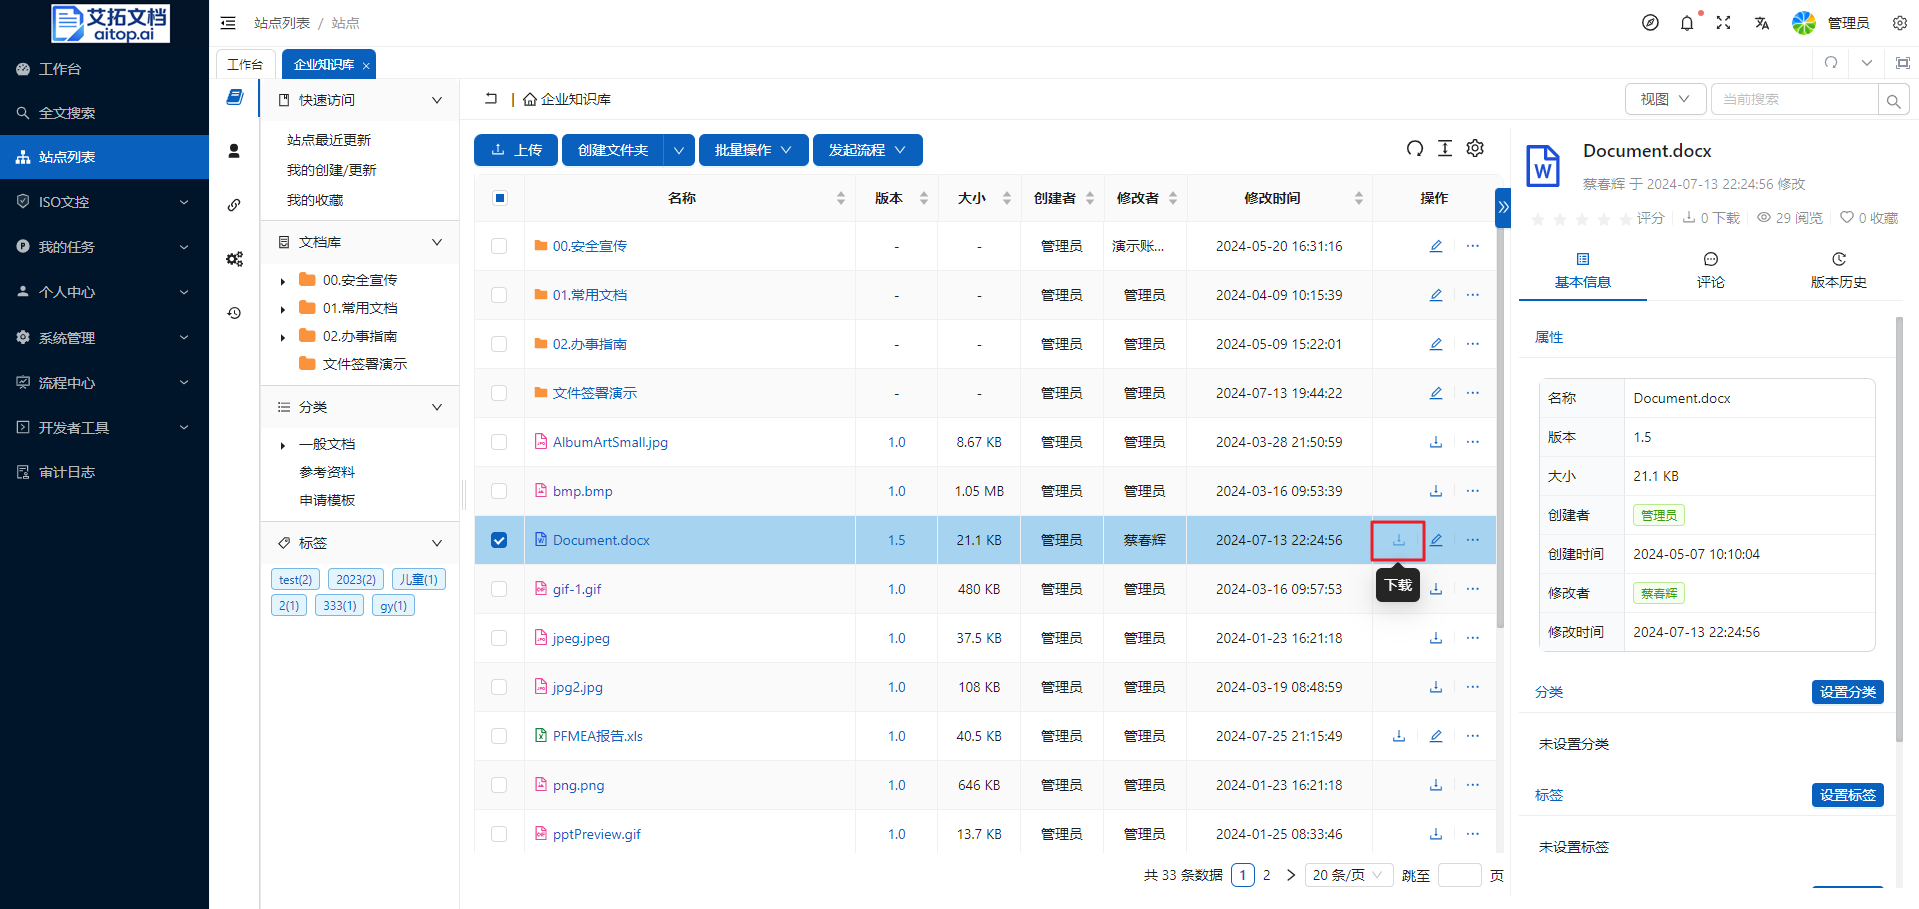
Batch Download
Multi-document/folder packaged batch download: Select the documents/folders to be packaged and downloaded in the file list, then click Batch Operation > Package Download on the toolbar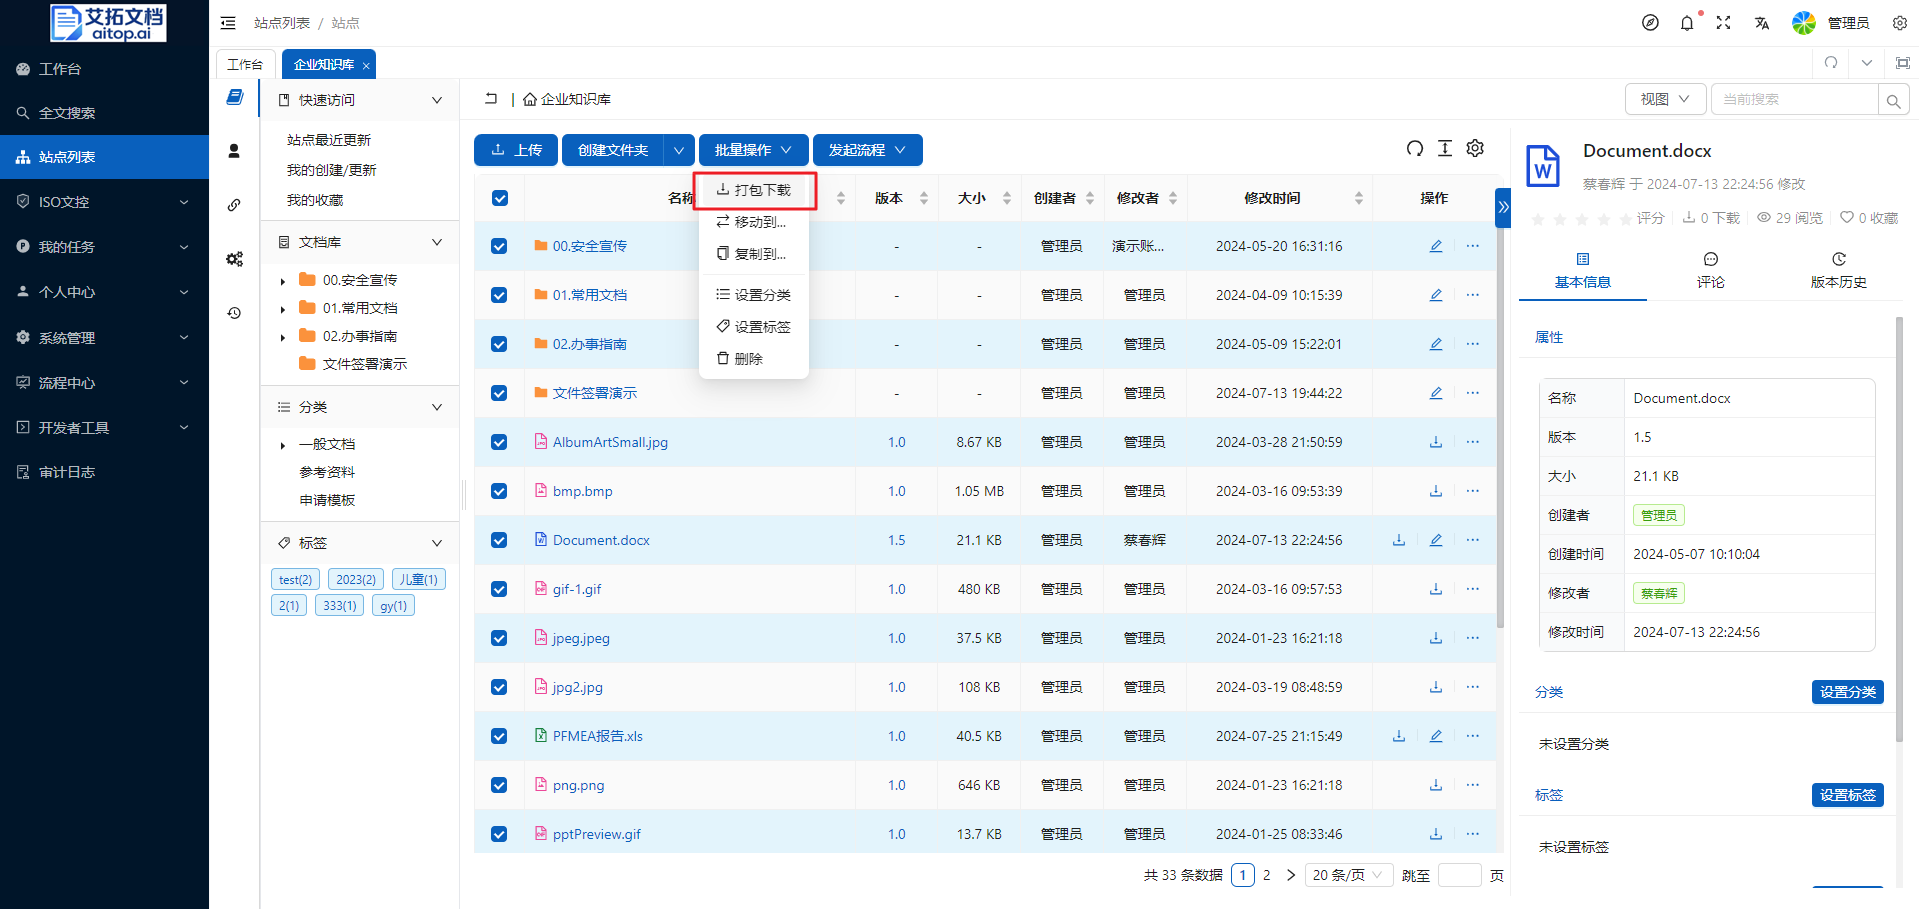
Version Management
There are two ways to generate file versions in the system: online editing and manual upload of new versions.
The maximum number of versions that can be retained for each file can be set by the system administrator in the system background: System Management > System Settings > Basic Settings > Keep Maximum Versions
Online Editing
Office documents support multi-user real-time online editing.
- Prerequisite for automatic version generation in online editing: The system administrator enables the Auto Version option in System Management > System Settings > Basic Settings
- Logic of automatic version generation in online editing: Multiple people edit at the same time, when the last editor closes the editing window, the system automatically saves and generates a new version after about 10 seconds
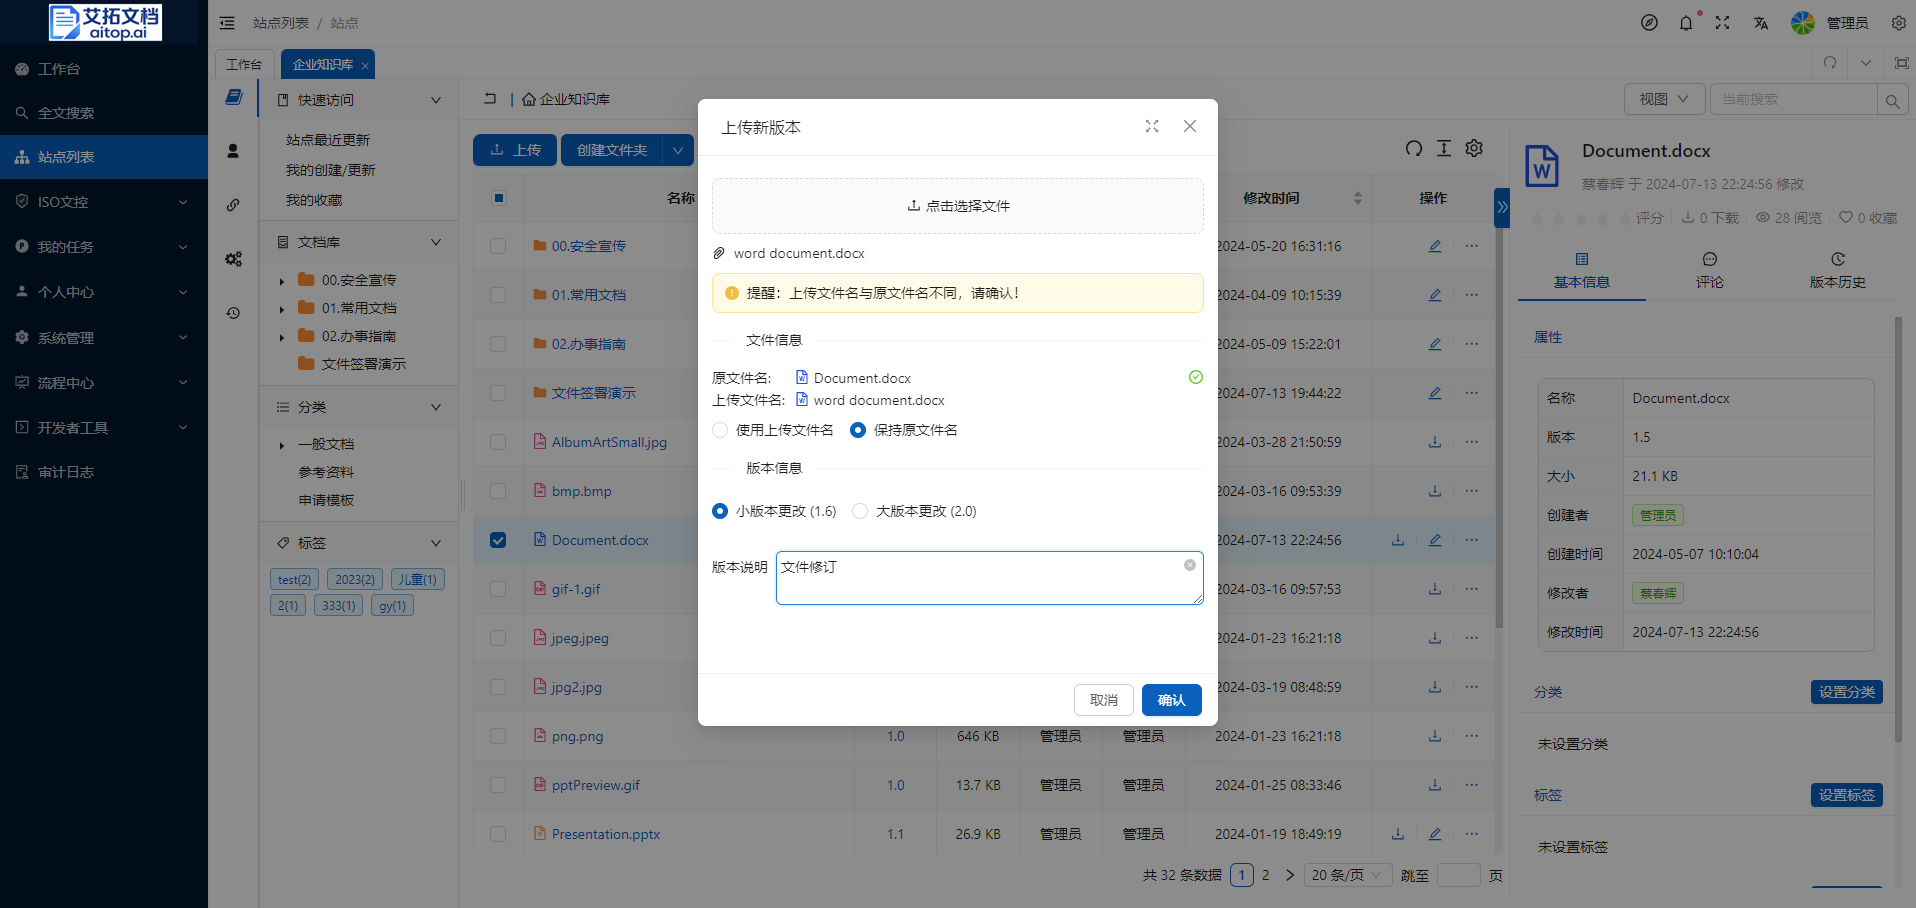
Manually Upload New Version
- Click the More button in the operation column of the file list, select Upload New Version
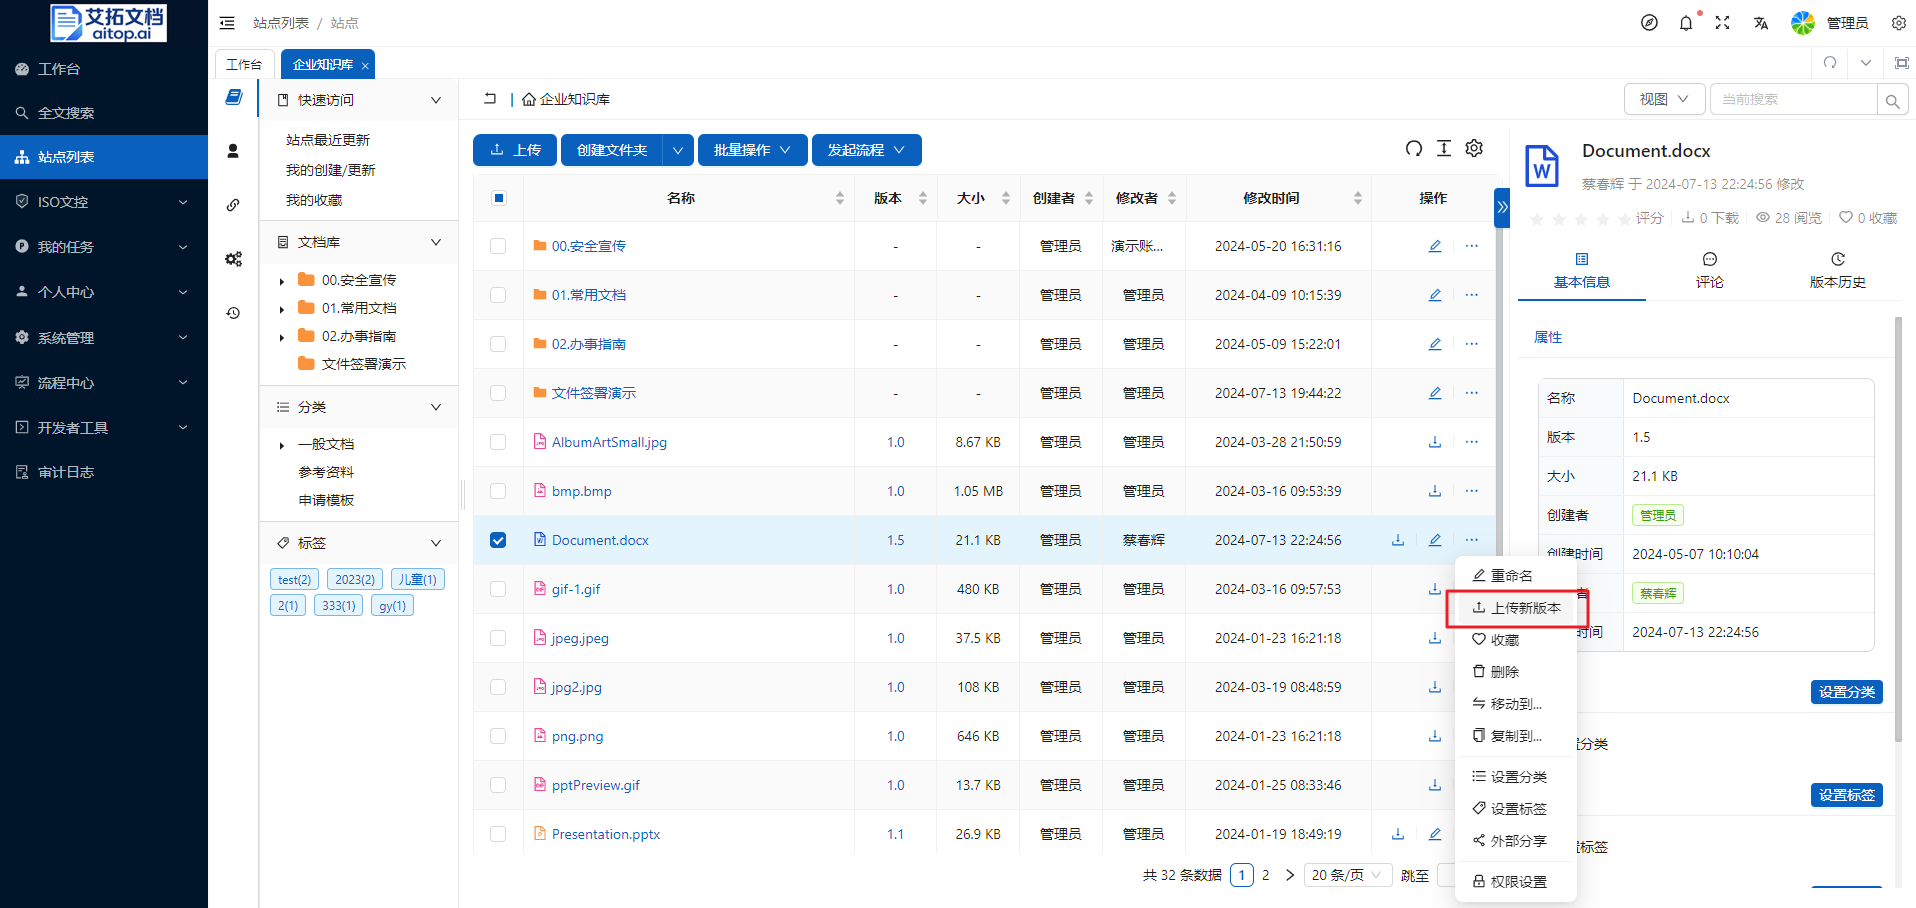
- In the Upload New Version pop-up box, select a local file as the new version (if the old and new file names are inconsistent, the system will automatically give a prompt), select version information, fill in the version description, and then click the Confirm button
View and Compare Versions
After selecting a file in the file list, you can view the version history in the properties panel on the right, and perform operations such as version rollback and version comparison.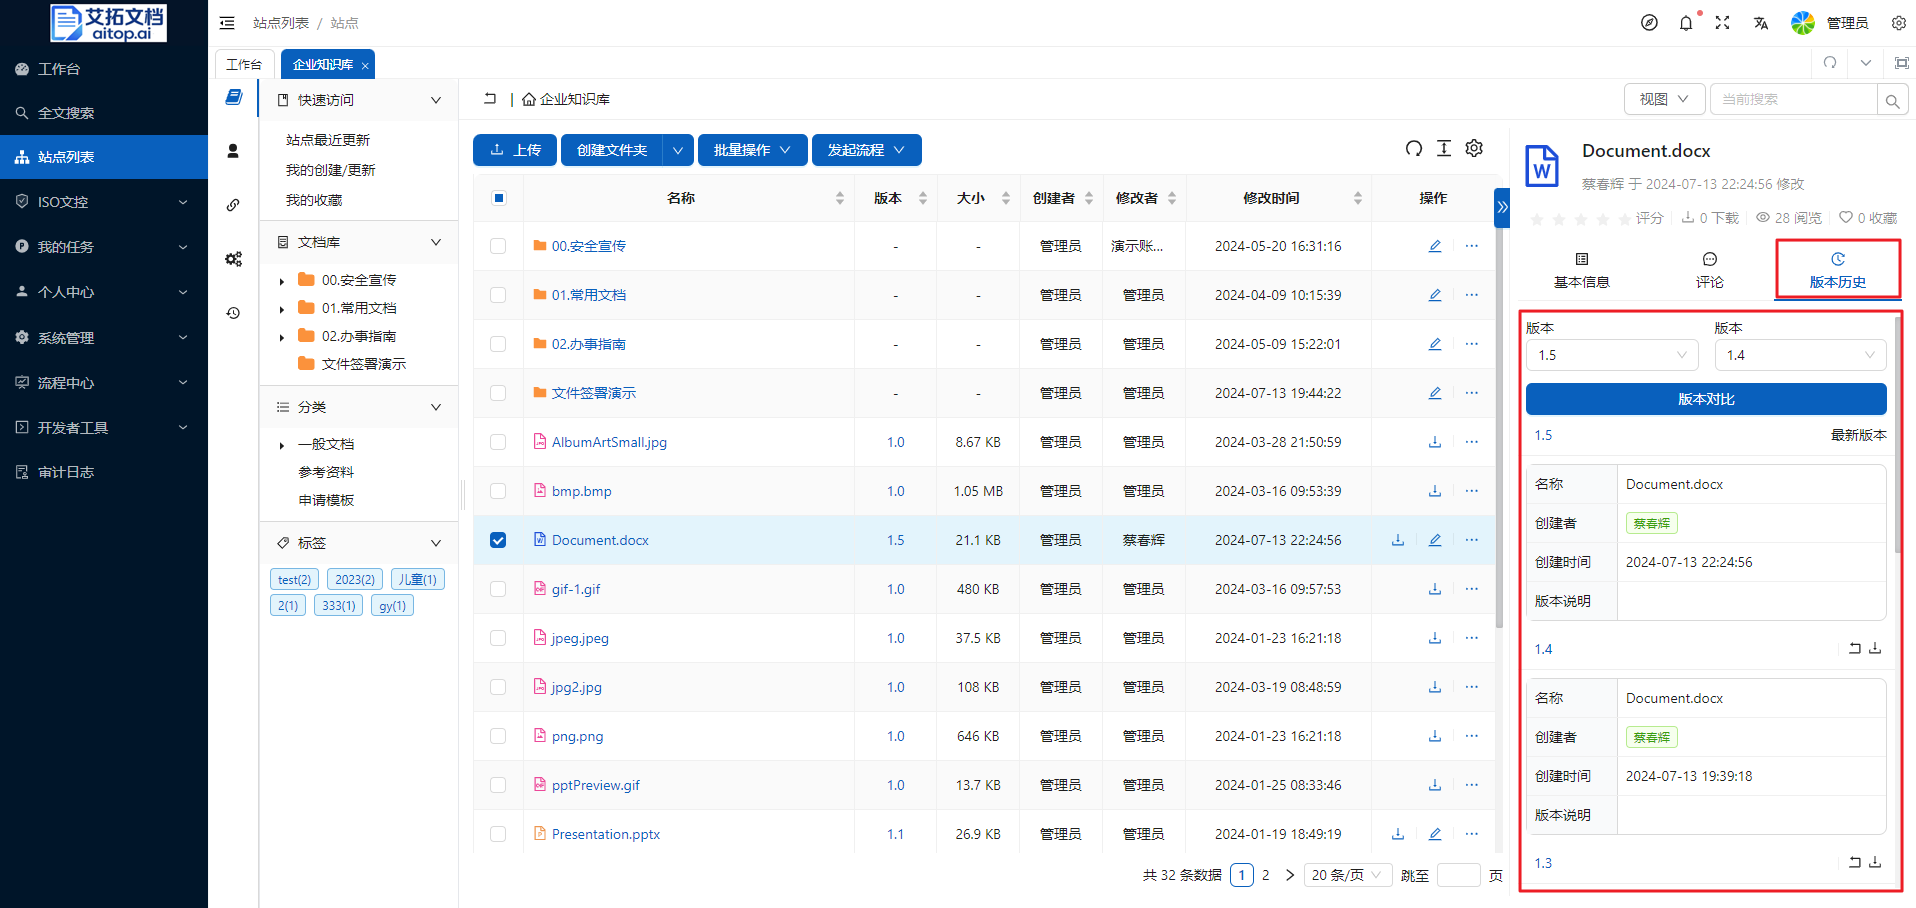
Permission Settings
Permission Description
The permissions in the system are divided into three levels: Viewer, Editor, Manager

General Principles for Permission Settings
Permission settings follow the principle of from broad to strict.
That is, set the broadest permissions at the site level, and then tighten the permissions of subfolders layer by layer.
Otherwise, if the site/parent folder does not have permissions, but the subfolder has permissions, it will cause a problem: without permission to access the site/parent folder, you cannot access the subfolder.
Security Based on Users and Groups
Permissions can be assigned to users or to groups.
Groups can be created by system administrators. The benefit of assigning permissions to groups is that when members join/leave the group, they will also automatically gain/lose the permissions owned by the group.
When the system enables automatic synchronization of users/groups with third-party systems, such as OA, HR systems, Enterprise WeChat, DingTalk, AD domain, etc., as long as the group permissions are allocated initially, subsequent personnel joining and exiting can be left to the system to complete automatically, without manual permission setting.
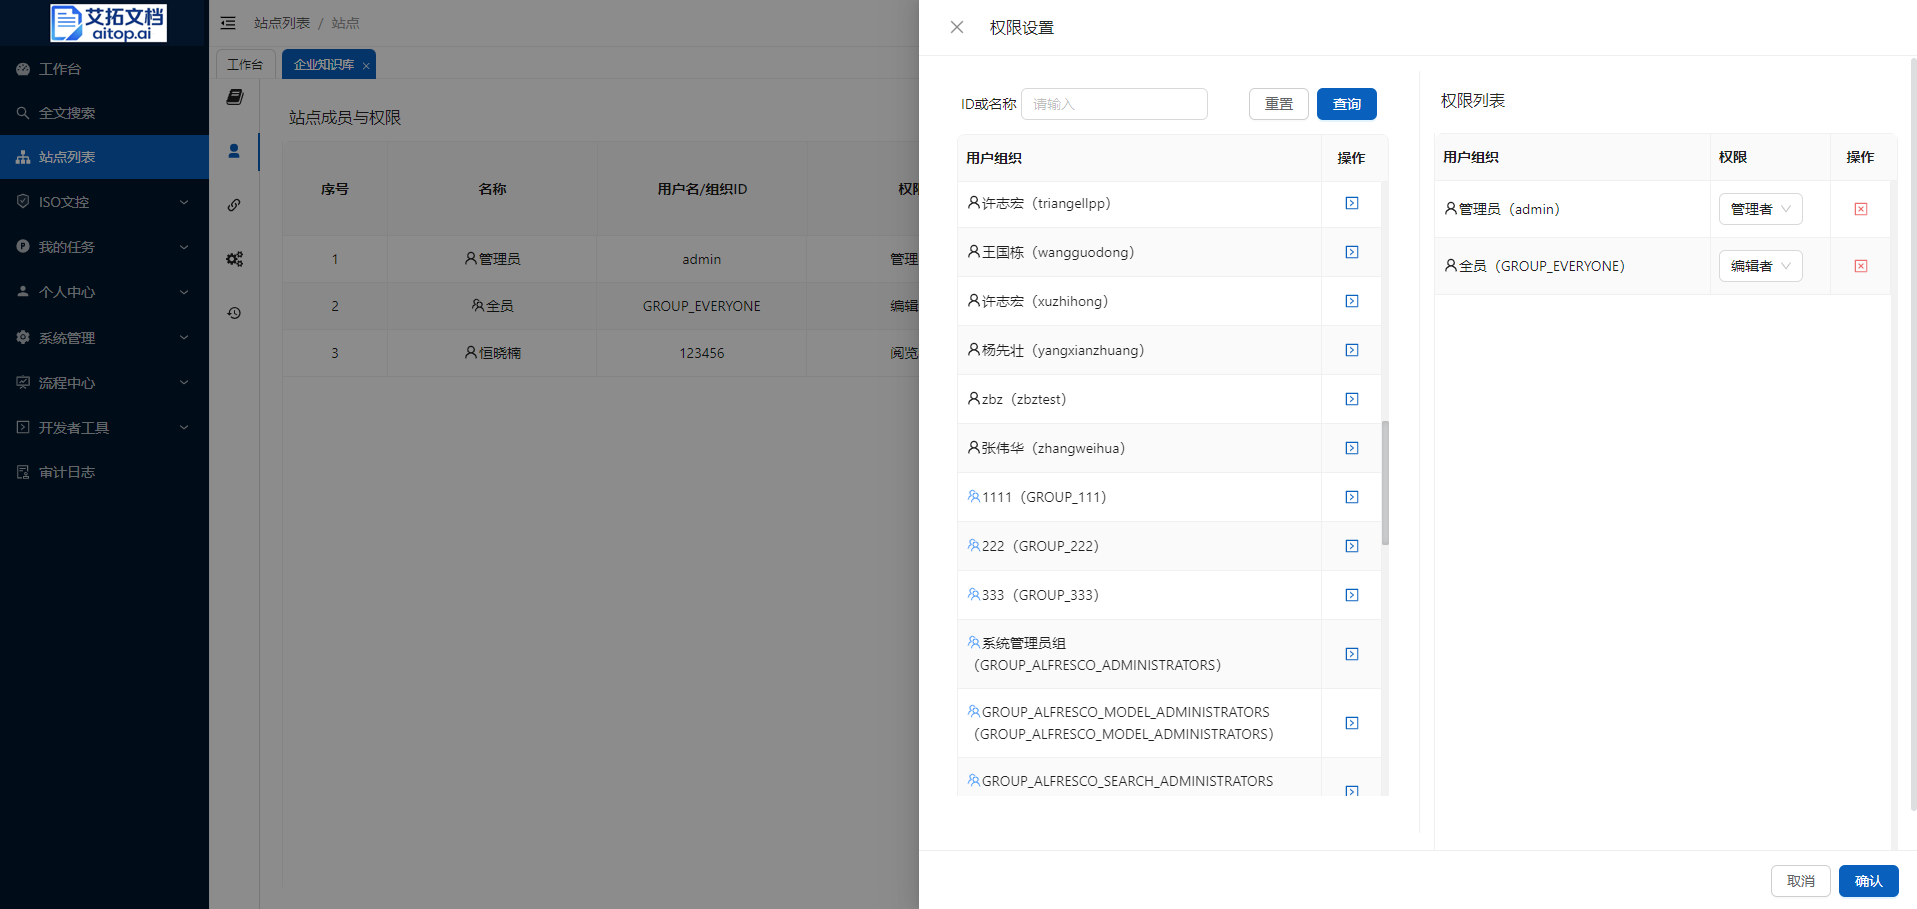
Site Permissions
Site administrators can set site permissions.
- Enter the site
- Click the leftmost Function Navigation Bar > Site Members and Permissions
- Click Site Settings on the toolbar
- In the permission settings pop-up box, retrieve users and organizations on the left, add them to the permission list on the right, set the corresponding permissions, and then click the Confirm button
Folder/Document Permissions
The system supports setting separate permissions for any folder/document. When no special permissions are set, it will inherit the permission settings of the upper-level folder by default. Top-level folders inherit the site's permission settings by default. Users can choose to inherit or cut off the permission inheritance relationship.
Folder/document administrators can set folder/document permissions.
- Enter the site
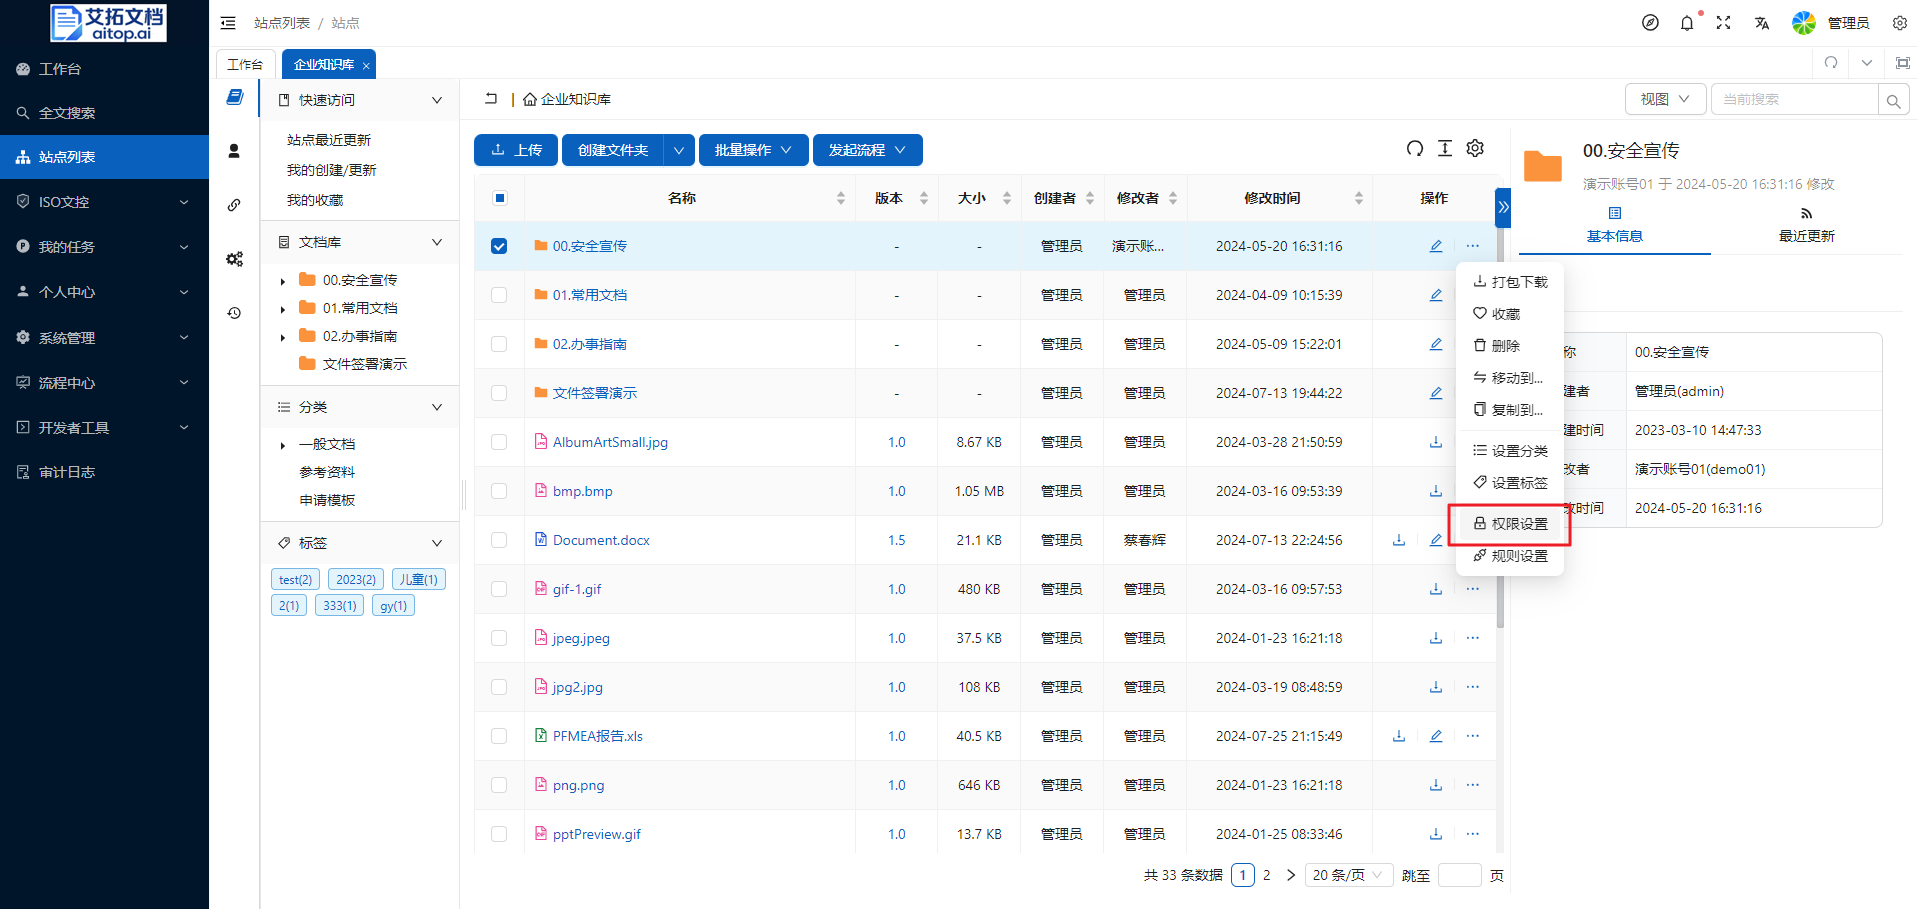
- Click the More button in the operation column of the file list, select Permission Settings
- In the permission settings pop-up box, retrieve users and organizations on the left, add them to the permission list on the right, set the corresponding permissions, and then click the Confirm button
- Above the permission list in the permission settings pop-up box, you can also set whether to inherit upper-level permissions
Search
The system fully complies with the security permissions of the logged-in user.
This means that if a logged-in user is searching for a document, the document will only appear in the search results if the user has appropriate security permissions ("View" or higher security permissions).
If the user does not have appropriate security permissions, they will not be able to find the document in the search results, even if the document exists in the system.
When a document is uploaded to the system, the system automatically extracts document metadata (title, type, author, creation date/time, size, etc.) and begins indexing the text content of the uploaded document in the background.
After indexing is complete, documents can be searched based on document metadata and document content.
This system supports indexing and full-text search for more than 20 file types, including almost all file types commonly used in daily work.
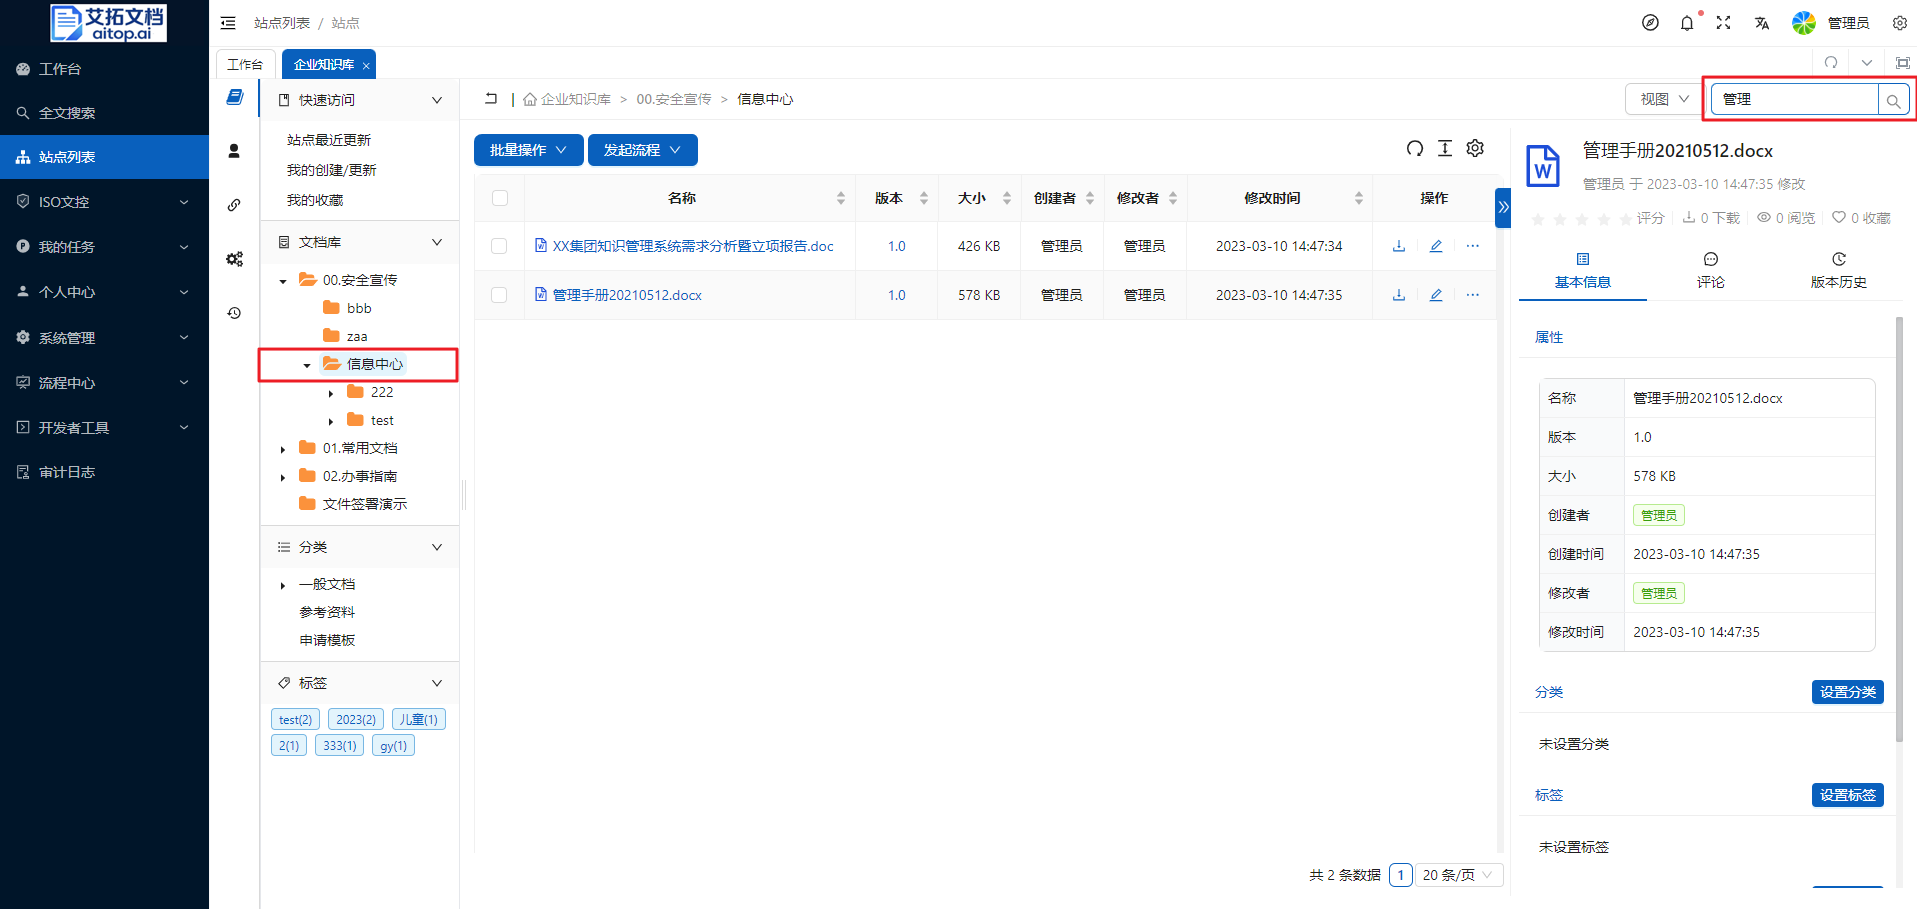
Normal Search
To use normal search, first determine the search scope. Users can locate to a folder by themselves, type search keywords in the search bar, and press "Enter" to search for keywords in that folder. Normal search only matches file names and does not perform full-text search.
Full-Text Search
Full-text search allows users to use keywords to search document content and displays matching keywords and context.
Full-text search has an intelligent suggestion function for the keywords entered by the user. The system will automatically give phrases matching the keywords entered by the user to facilitate users to search more accurately.
Full-text search can perform secondary filtering on search results to find content more accurately.

Tags
Description
The main differences between tags and categories are:
- Tags are all at the same level, there is no concept of sub-tags, while categories are tree-structured and have the concept of sub-categories
- General users can add tag keywords, while the tree structure of categories needs to be set up by the system administrator in the system background, and general users can only select existing categories in the system for documents
In general, tags are used to facilitate users to find documents; categories are used to precipitate corporate knowledge systems.
Tags allow users to mark documents according to the characteristics of the documents, helping users find the files they need more conveniently and quickly. Tags are similar to the concept of document keywords.
Set Tags
- Enter the site
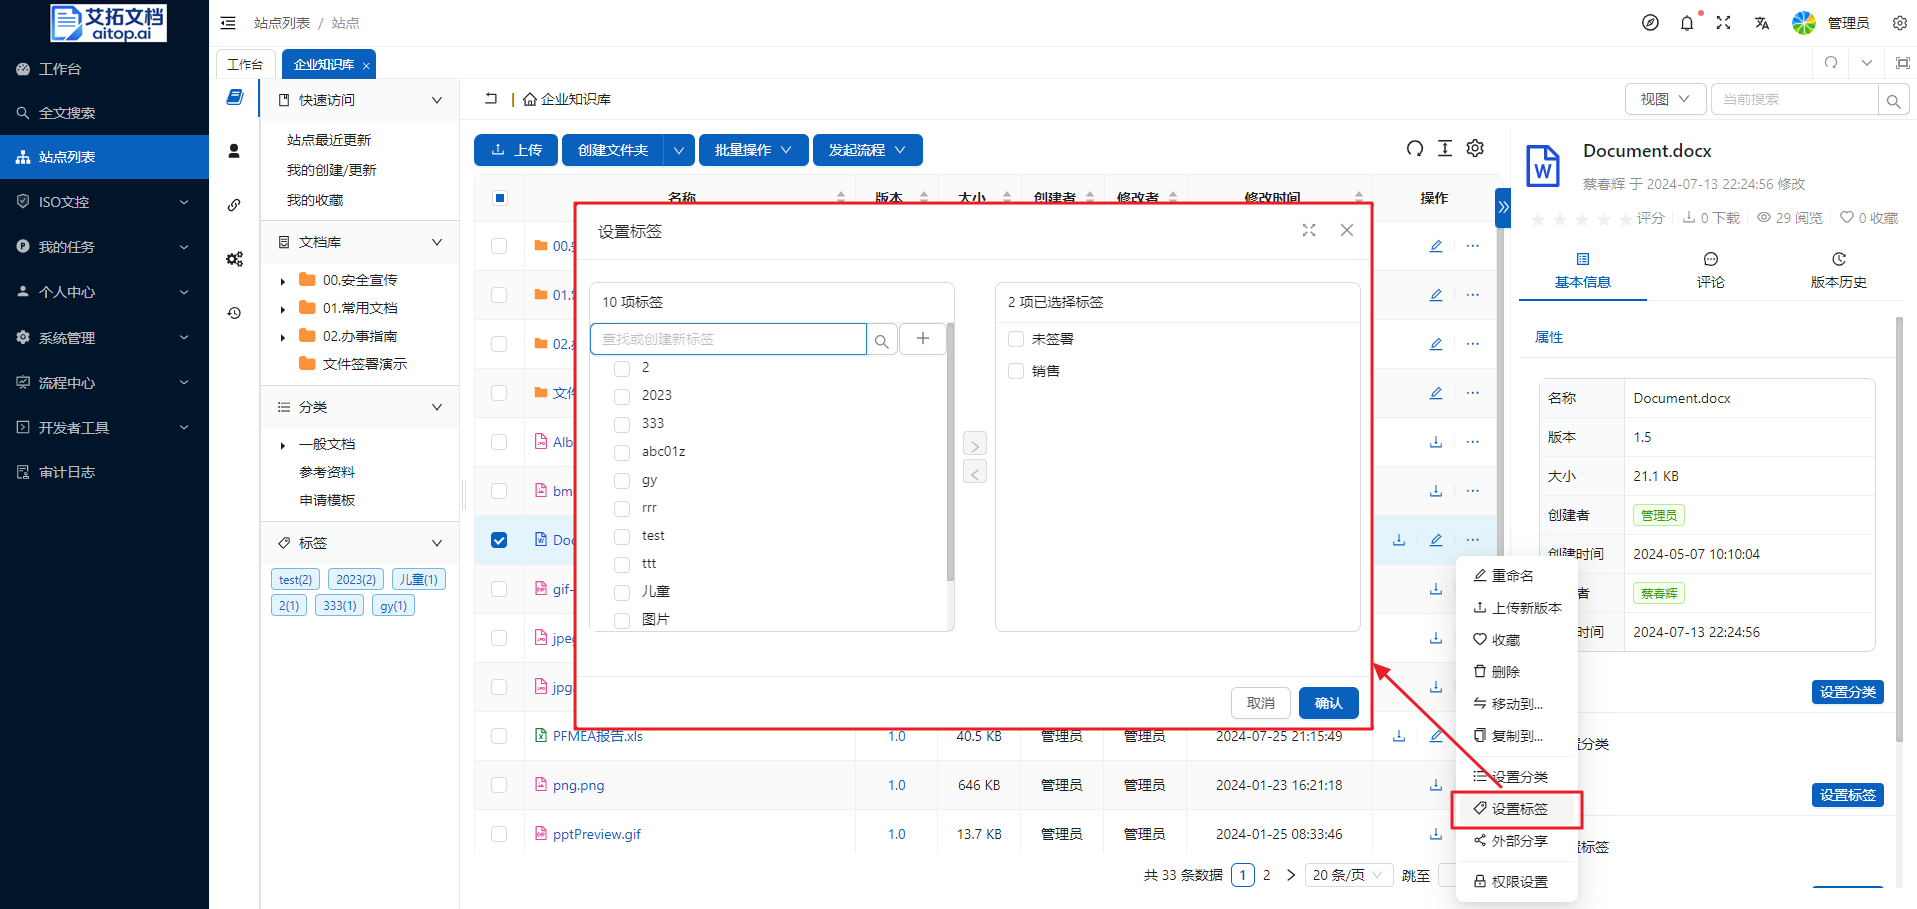
- Click the More button in the operation column of the file list, select Set Tags
- In the Set Tags pop-up box, select existing tags, or create and select new tags, then click the Confirm button
Batch Set Tags
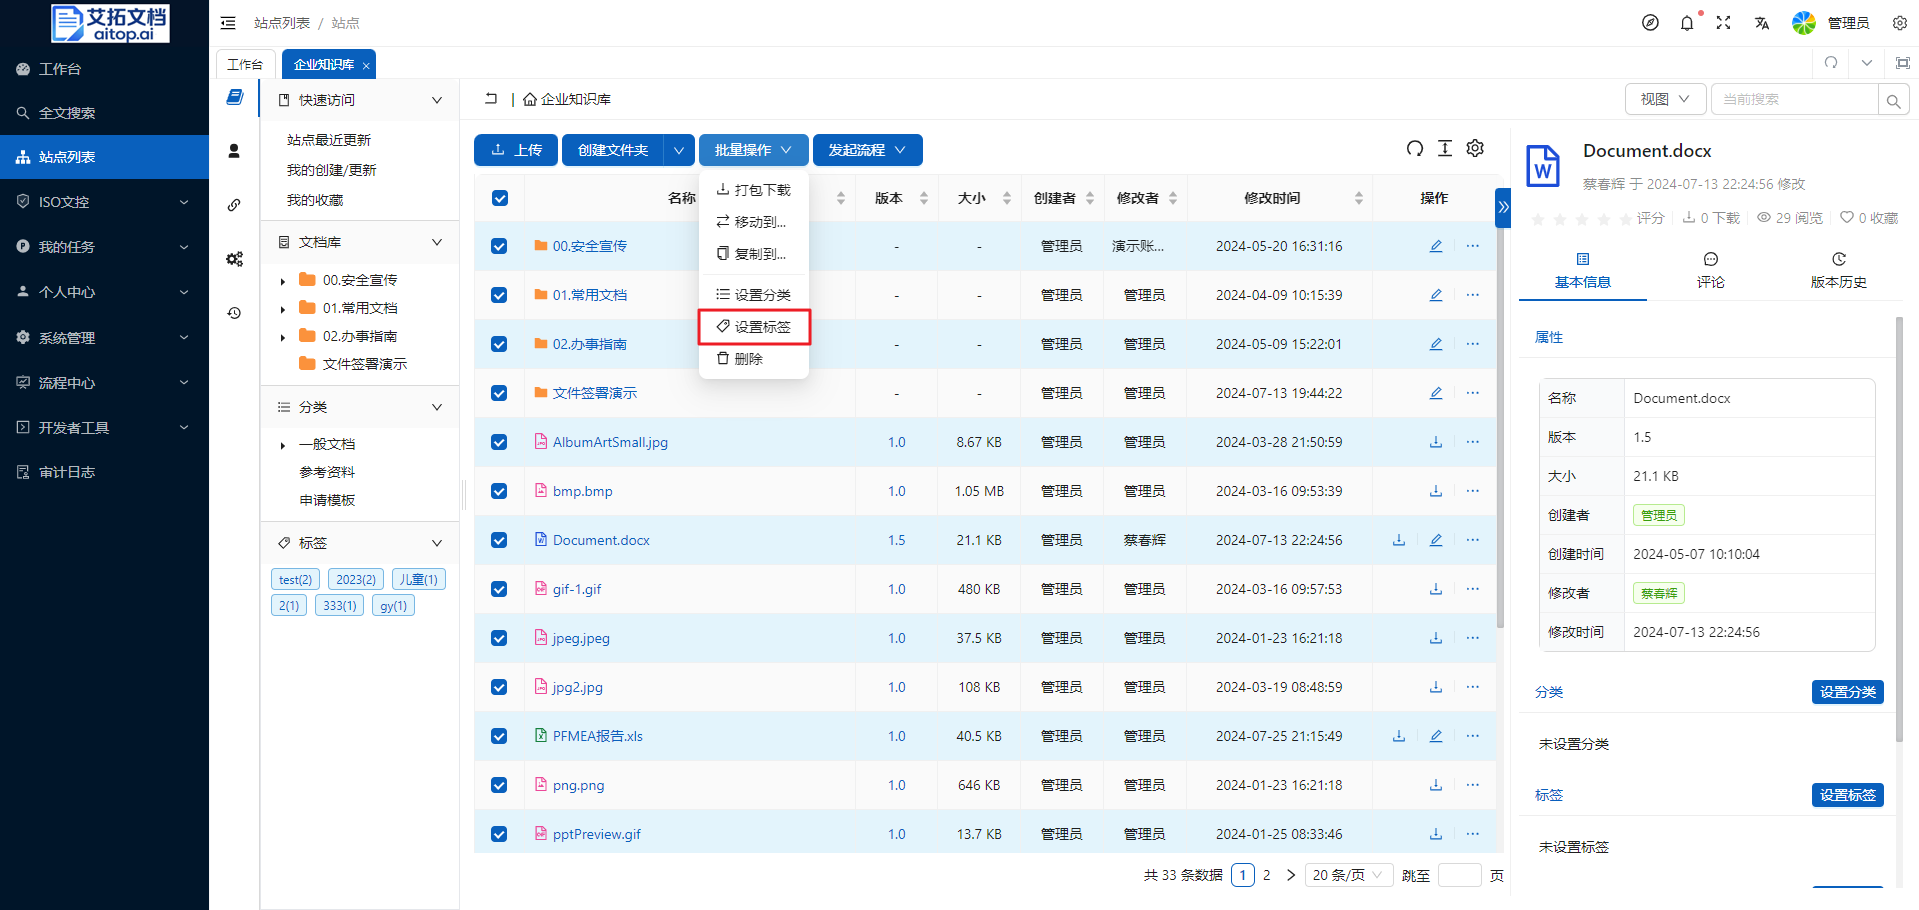
- Select the documents/folders to set tags in the file list, then click Batch Operation > Set Tags on the toolbar
- In the Set Tags pop-up box, select existing tags, or create and select new tags, then click the Confirm button
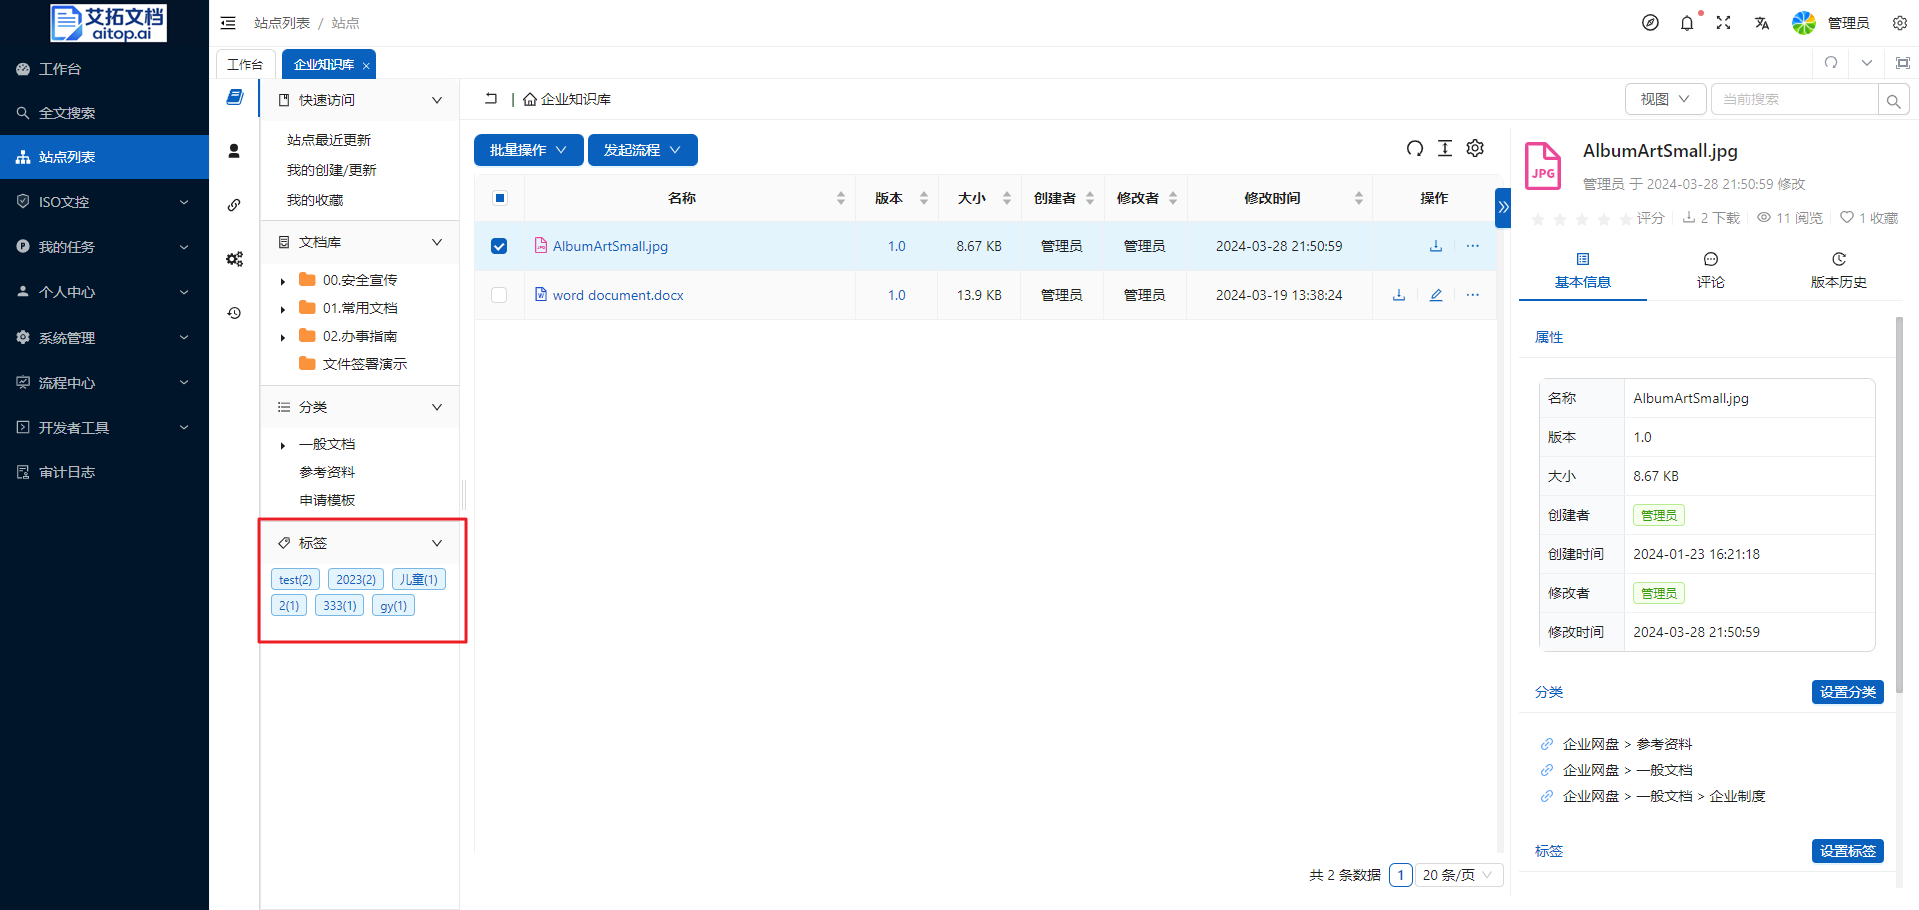
Find Documents by Tags
When documents in the site have set tags, in the Tags area of the Navigation Panel on the left of the document library, the tags used and the number of documents corresponding to each tag will be displayed. Click the tag to automatically filter out the documents corresponding to the tag.
Categories
Compared with tags, categories have a tree structure. Categories give users the ability to organize documents from a dimension other than the folder structure. Using categories allows valuable documents to be precipitated and build a corporate knowledge system.
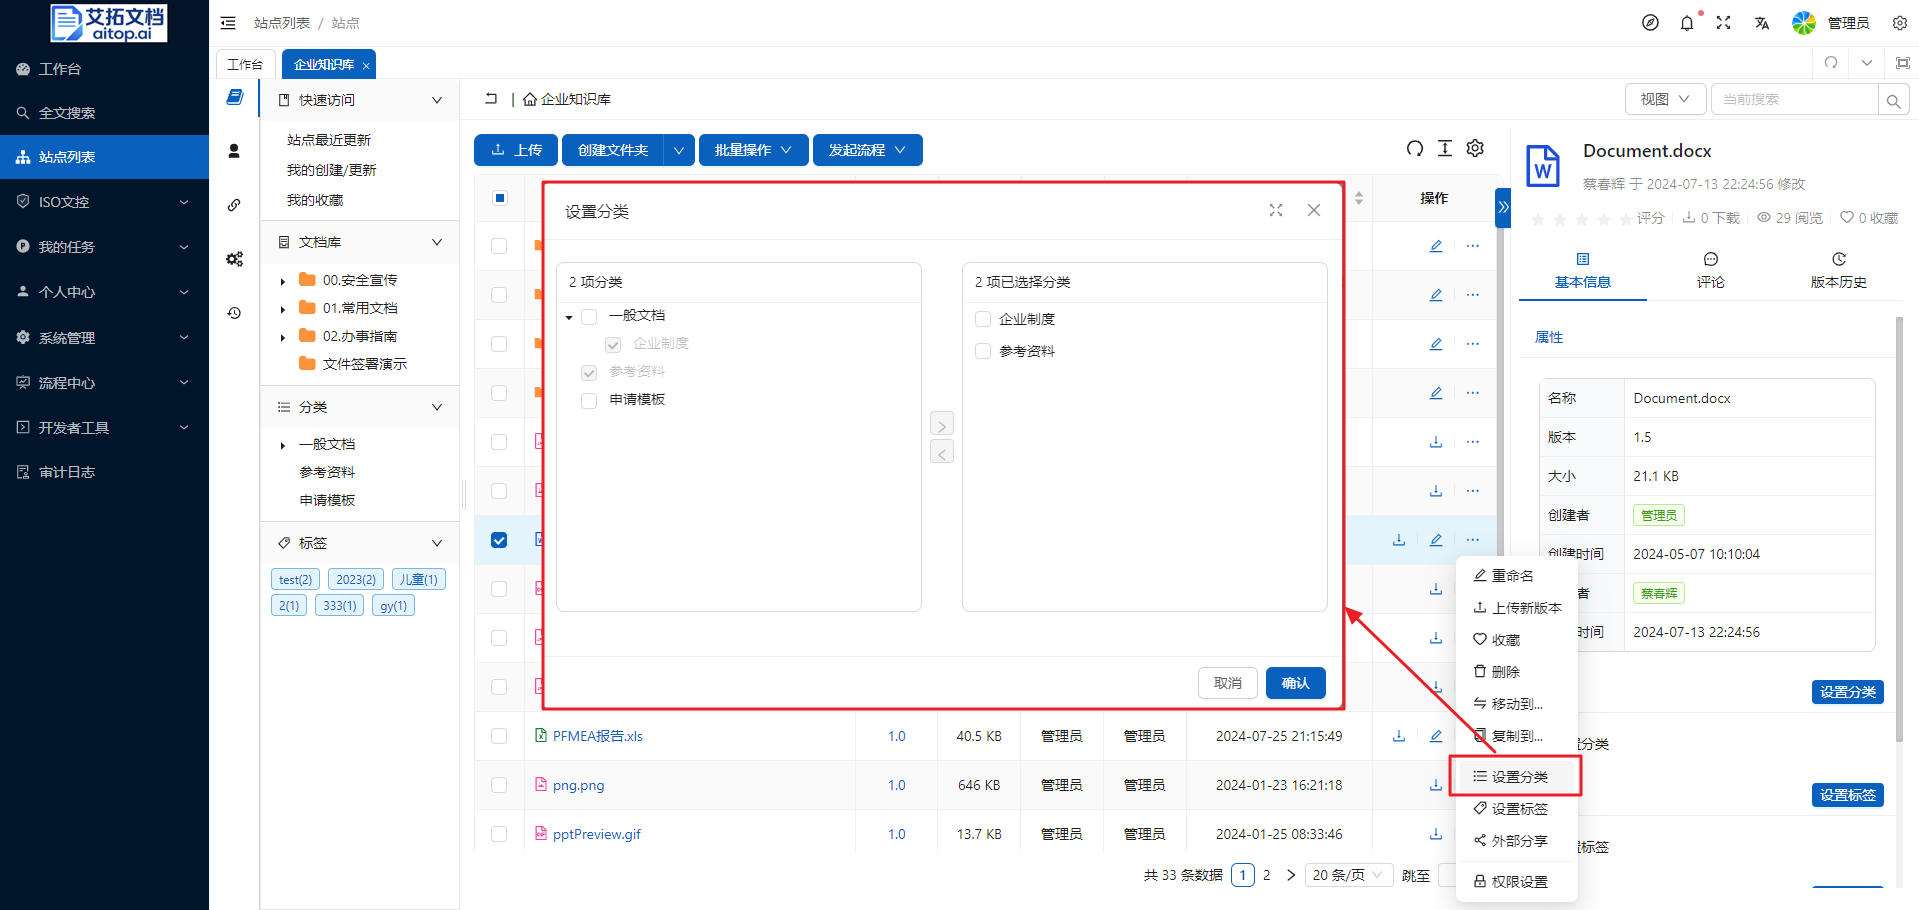
Set Category
- Enter the site
- Click the More button in the operation column of the file list, select Set Category
- In the Set Category pop-up box, select the appropriate category and click the Confirm button
Batch Set Category
- Select the documents/folders to set categories in the file list, then click Batch Operation > Set Category on the toolbar
- In the Set Category pop-up box, select the appropriate category and click the Confirm button

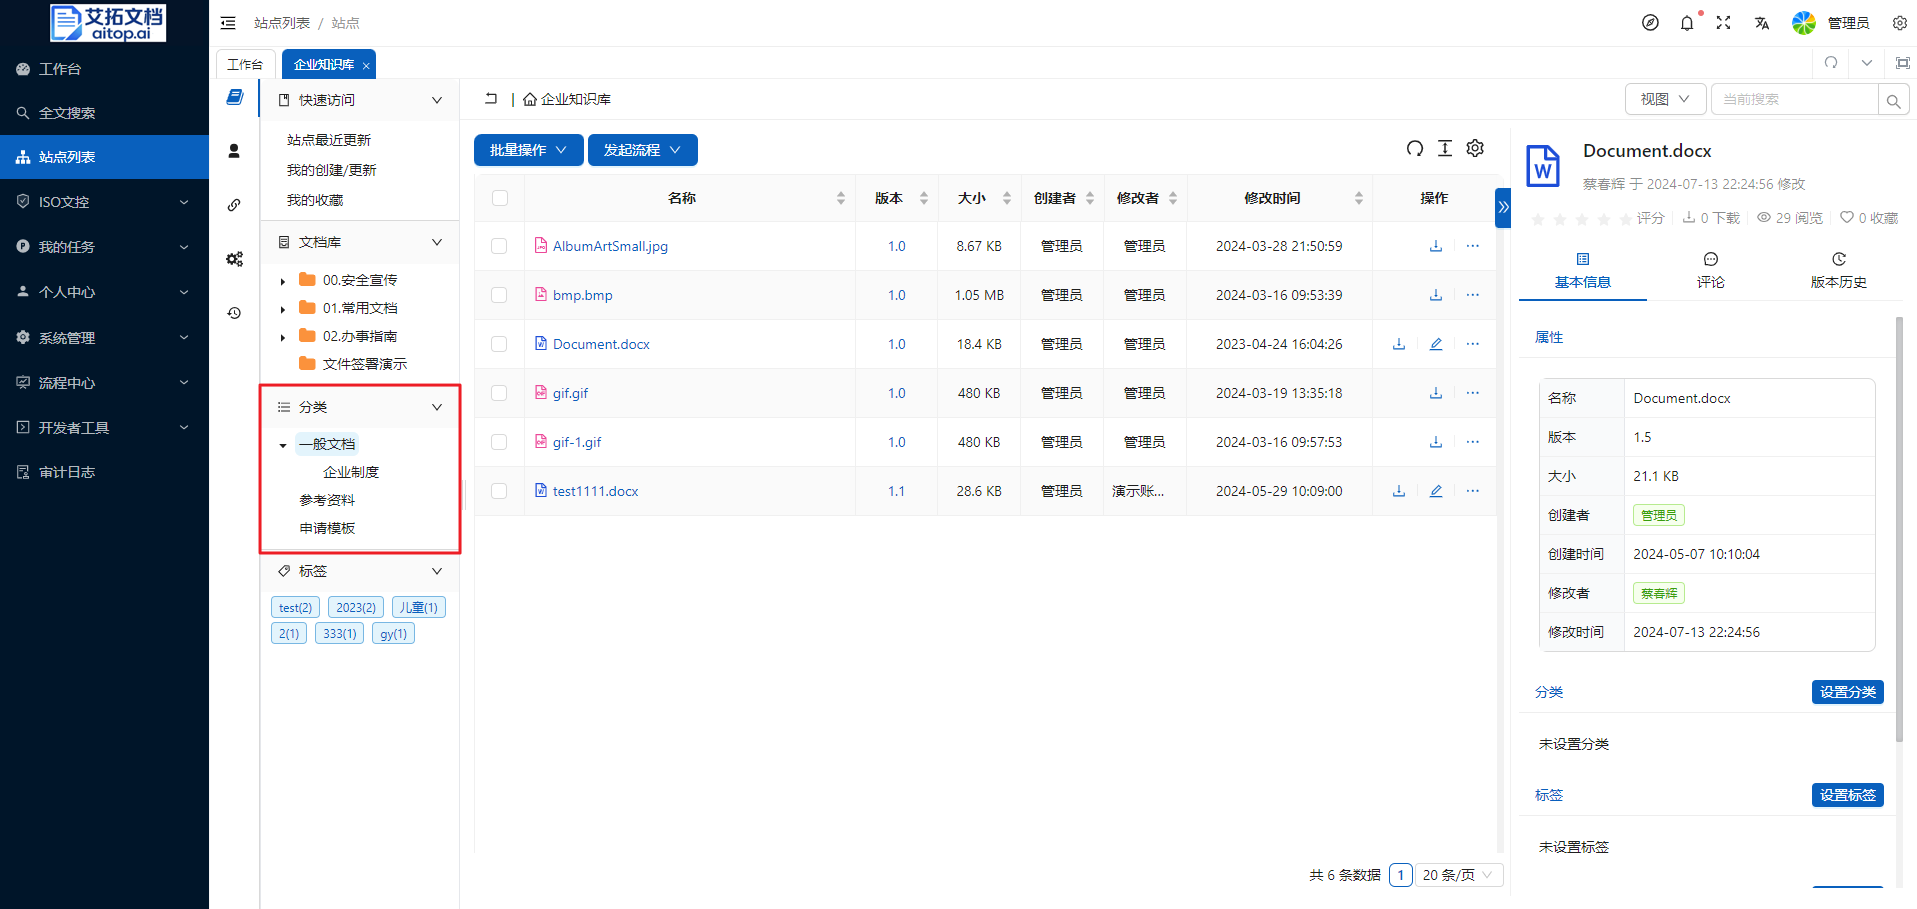
Find Documents by Category
In the Category area of the Navigation Panel on the left of the document library, you can expand categories. Click the category to automatically filter out the documents corresponding to the category.
Favorites
Some documents/folders are frequently accessed, but the directory is too deep. You can add these documents/folders to your favorites.
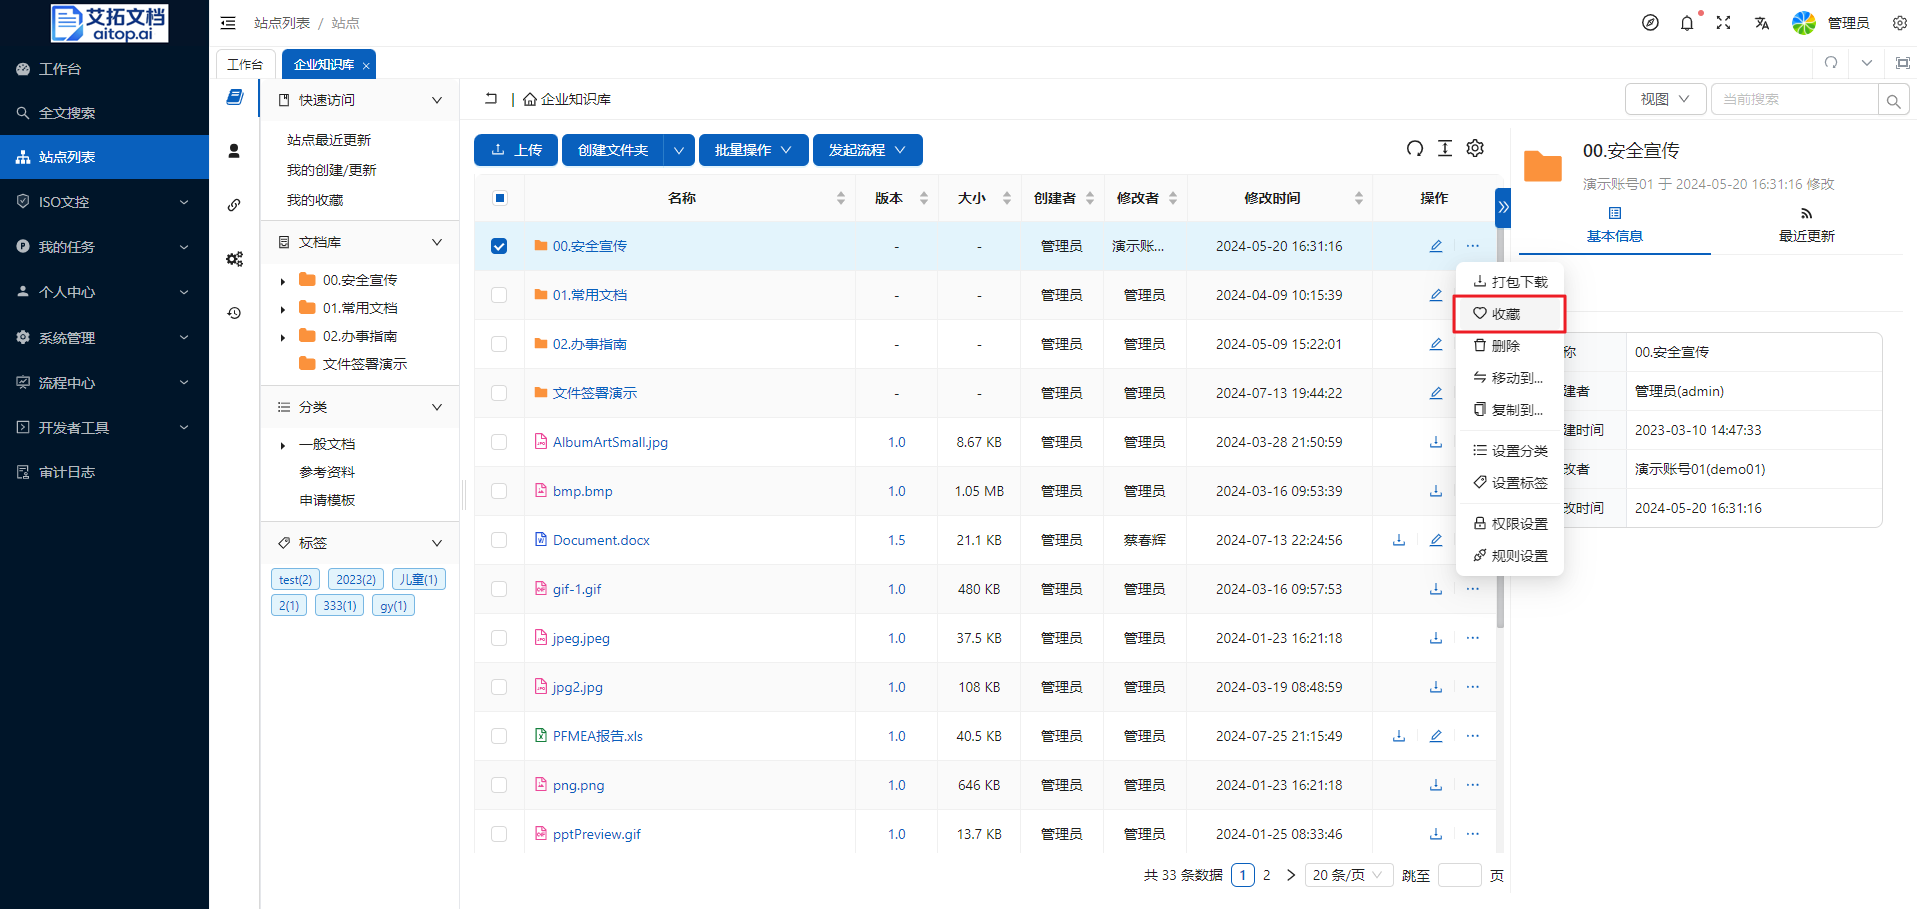
Add to Favorites
- Enter the site
- Click the More button in the operation column of the file list, select Favorite
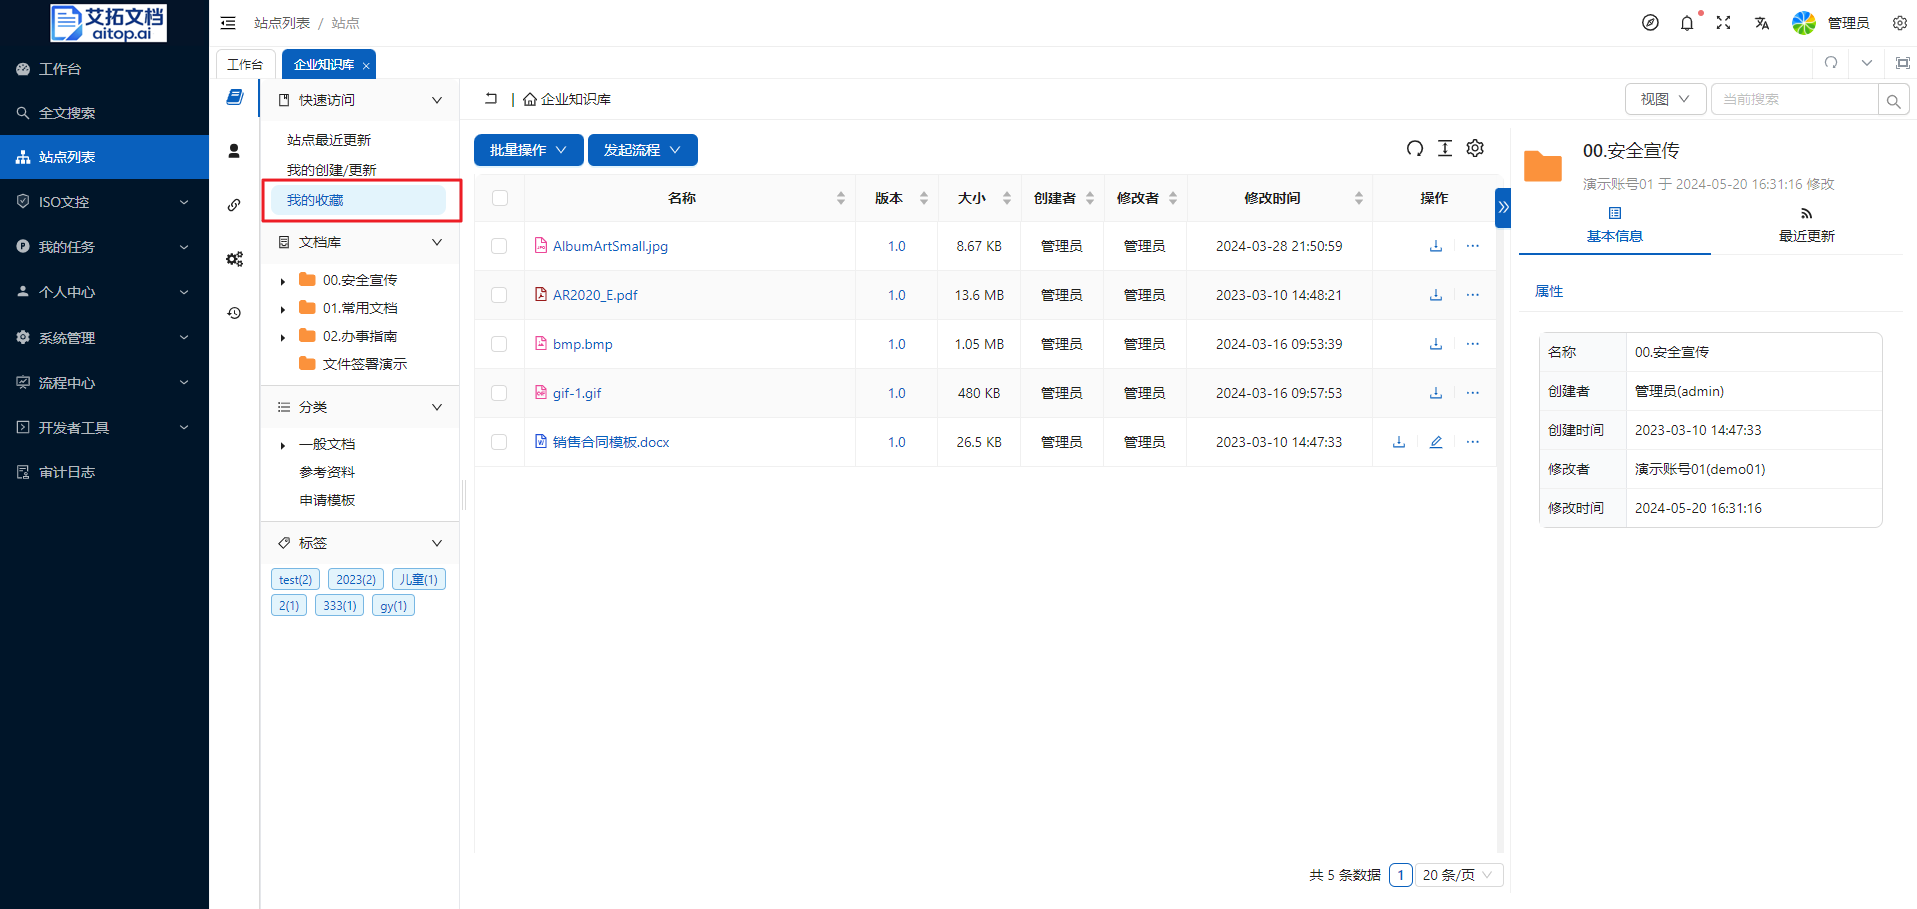
Site Favorites
In the Quick Access area of the Navigation Panel on the left of the document library, click My Favorites to quickly filter and display the documents/folders that have been favorited in this site
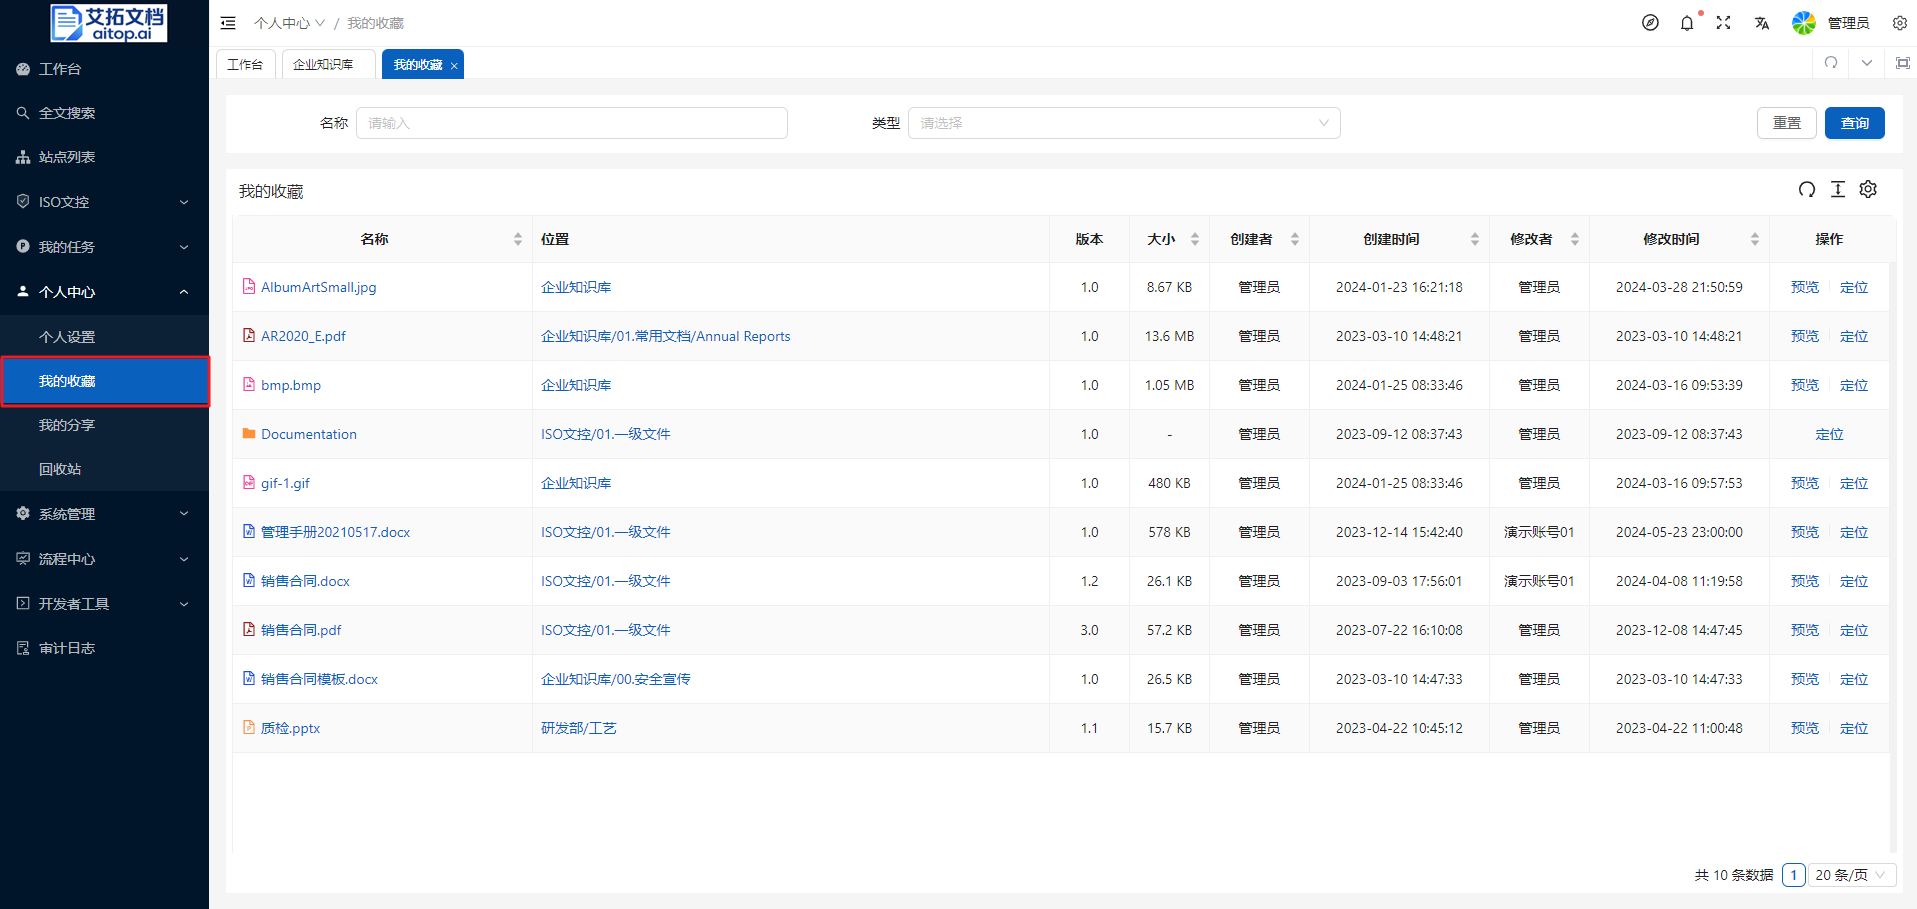
Global Favorites
Documents/folders favorited in each site will also be synchronized to the personal global favorites. If you forget which site the favorited documents/folders are in, you can visit the global favorites.
Click Left Navigation Bar > Personal Center > My Favorites
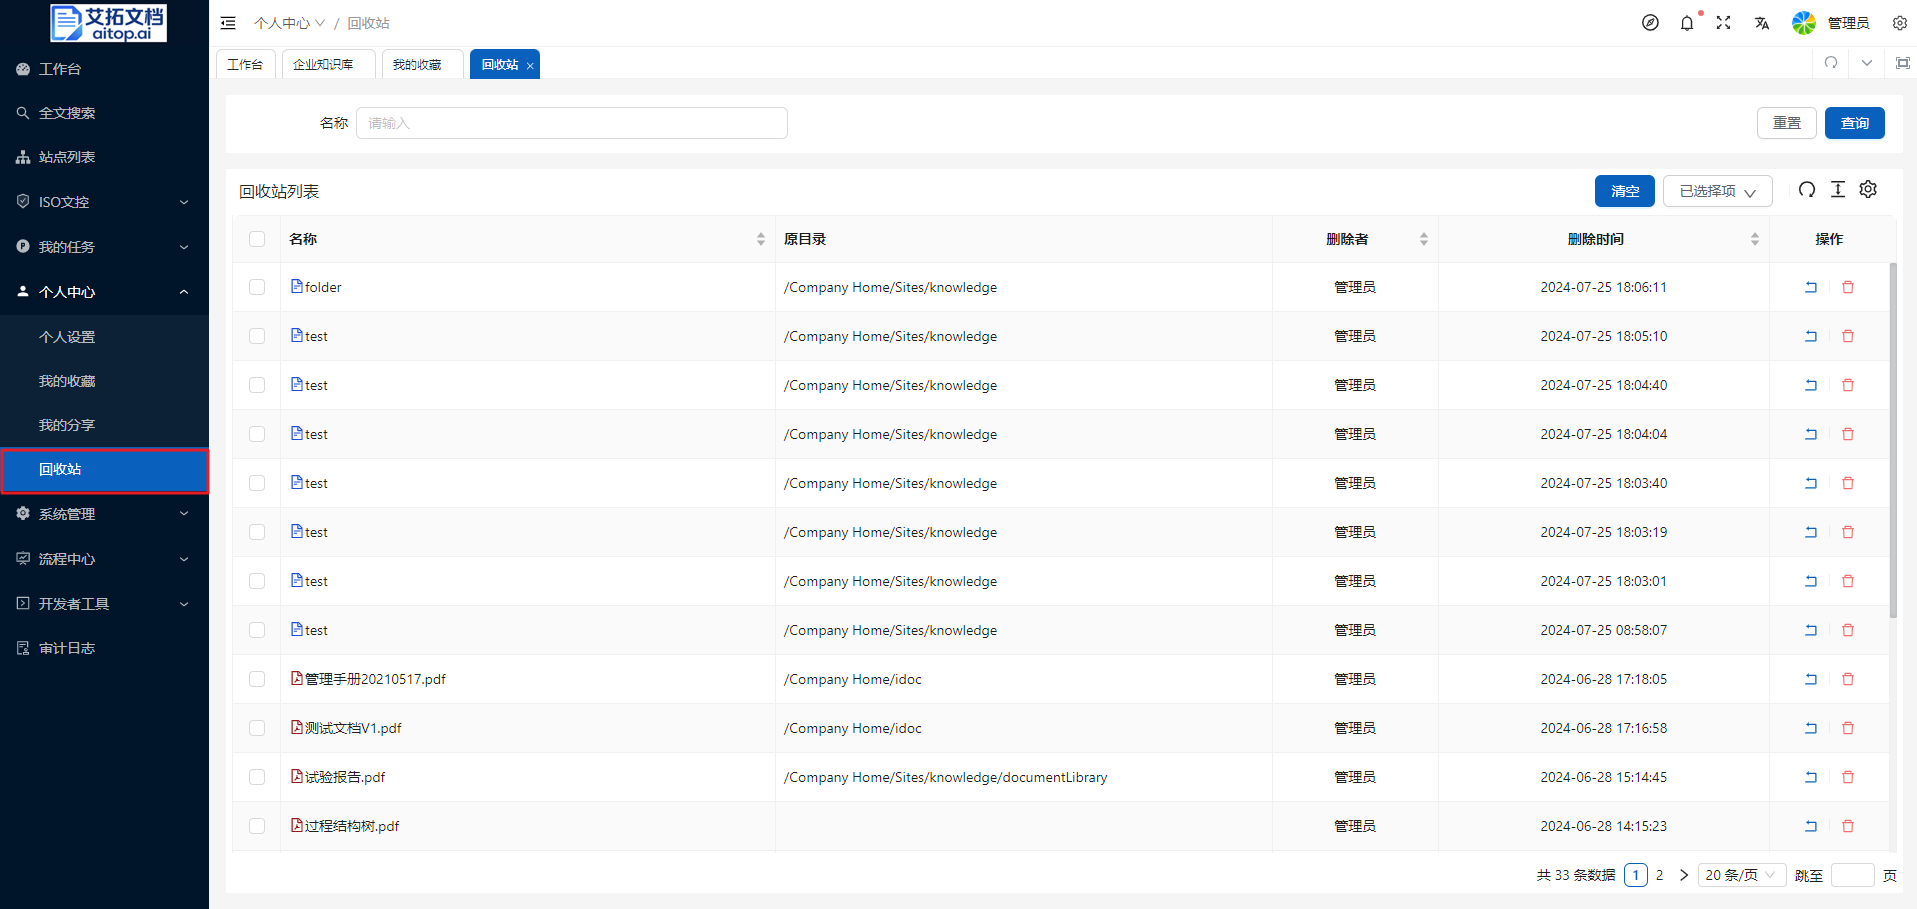
Recycle Bin
When deleting documents/folders, data will not be lost. It will be moved to the recycle bin. If necessary, documents can be restored to their original location before being deleted. This function prevents accidental deletion and loss of important files or folders.
- Click Left Navigation Bar > Personal Center > Recycle Bin
- Click the Empty button on the toolbar to empty the recycle bin. After emptying, documents/folders cannot be retrieved
- Click the Operation column in the recycle bin list to perform restore or delete operations on single data
- Select data in the recycle bin list, and the Selected Items on the toolbar can perform batch restore or delete operations
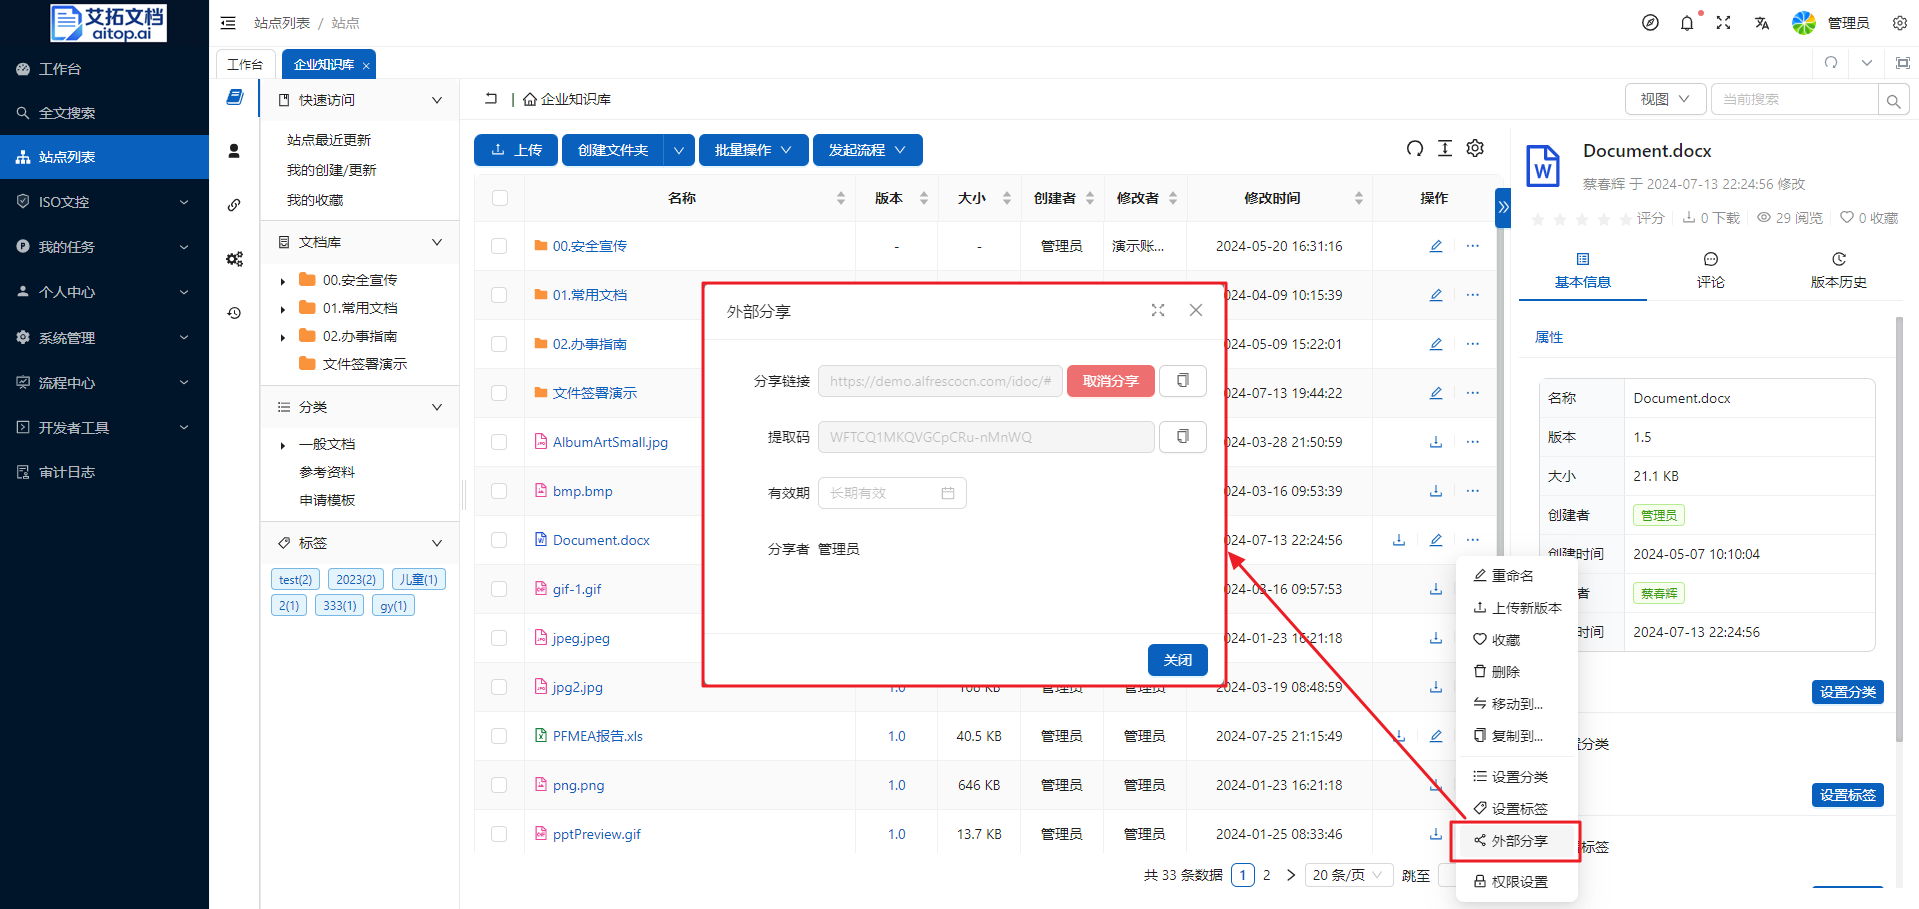
External Sharing
If users need to share documents with external users for viewing, they can use the method of generating external links. Even if the other party does not have an account, they can view the documents based on the link and extraction code provided during sharing.
Share Document
- Click the More button in the operation column of the file list, select External Share
- Click Generate Link in the External Share pop-up box, copy the generated link and extraction code, and send them to external users
- You can set the validity period of sharing as needed. If not set, it is valid for a long time
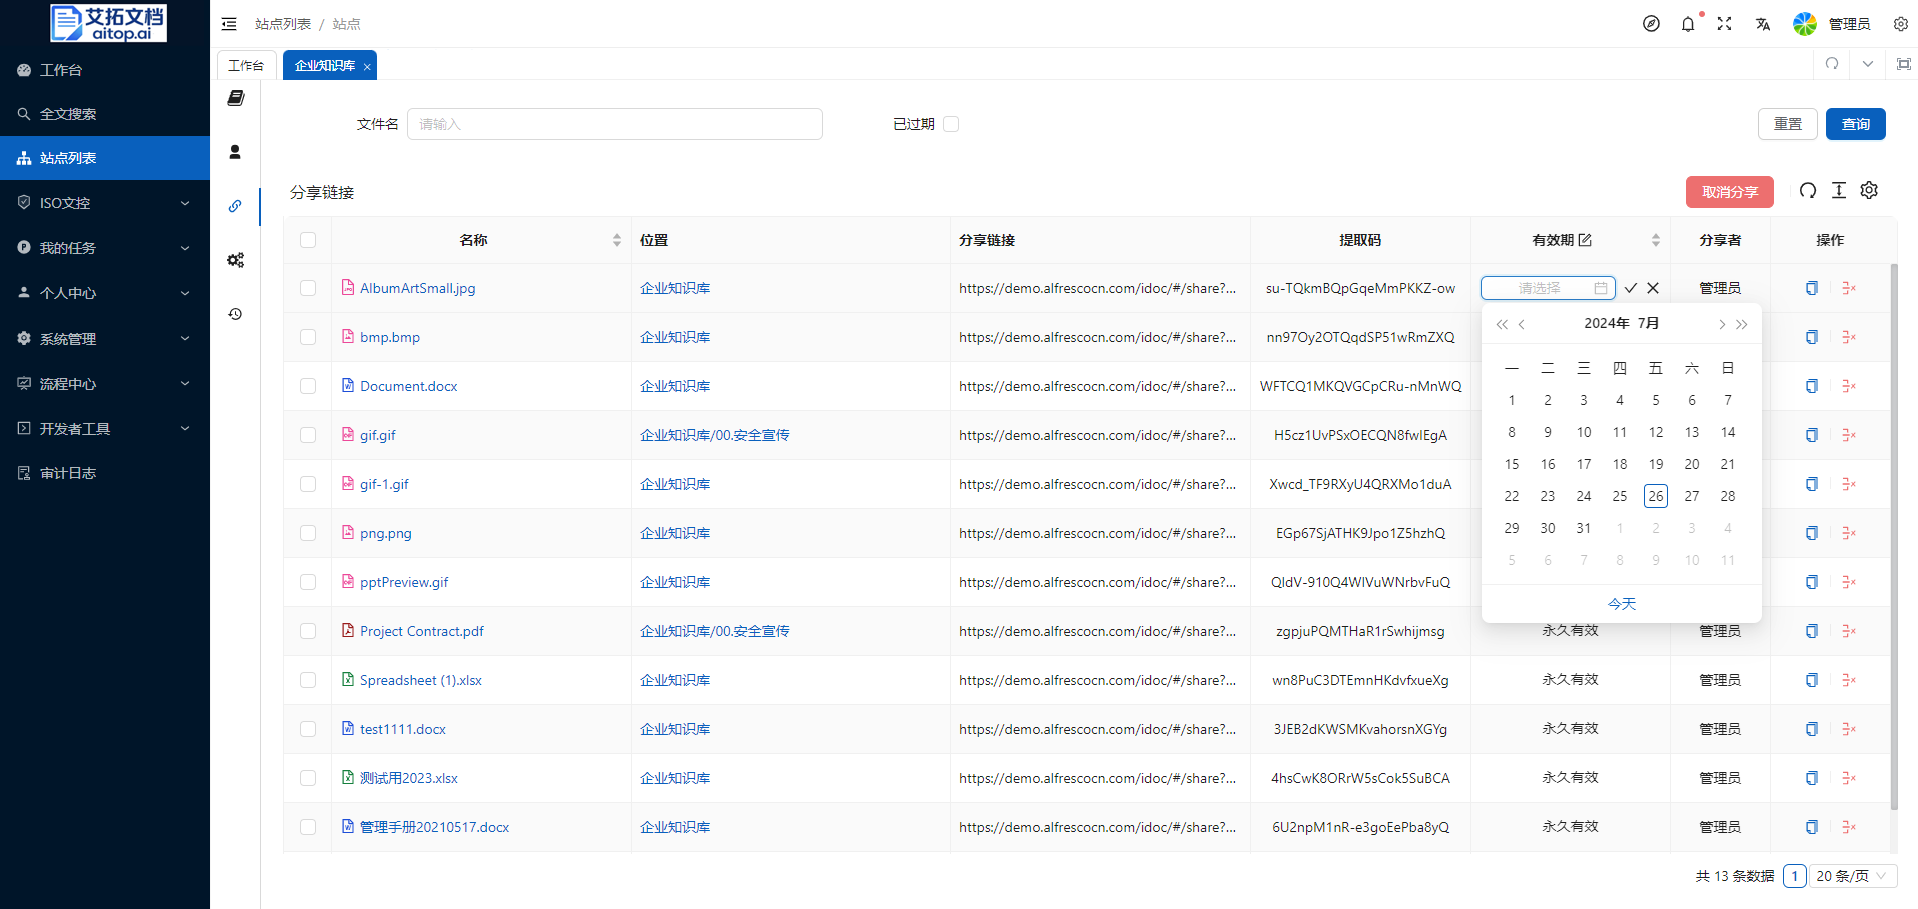
Share Management
You can centrally manage shared links, cancel sharing, or reset the validity period of sharing.
- Click the leftmost navigation bar of the site > Share Links
- Click the Operation column of the share link list to copy the link and extraction code, cancel sharing
- Click the Name column of the share link list to directly open the share link page
- Click the Position column of the share link list to locate the file position
- Click the Share Link column of the share link list to directly copy the share link
- Click the Extraction Code column of the share link list to directly copy the extraction code
- Click the Validity Period column of the share link list to modify the validity period